

Trigger campaigns in Mailmodo via Pabbly
Last updated December 24, 2023
We can integrate Pabbly with Mailmodo to implement the following use cases-
- Add contacts to a list in Mailmodo ( guide )
- Trigger a transactional campaign
Integrating Pabbly with Mailmodo
How to create a transactional campaign in Mailmodo?
Step 1: Go to templates from the vertical menu on the left side. Click on create new template.

Step 2: Either select a blank template or a pre made template.
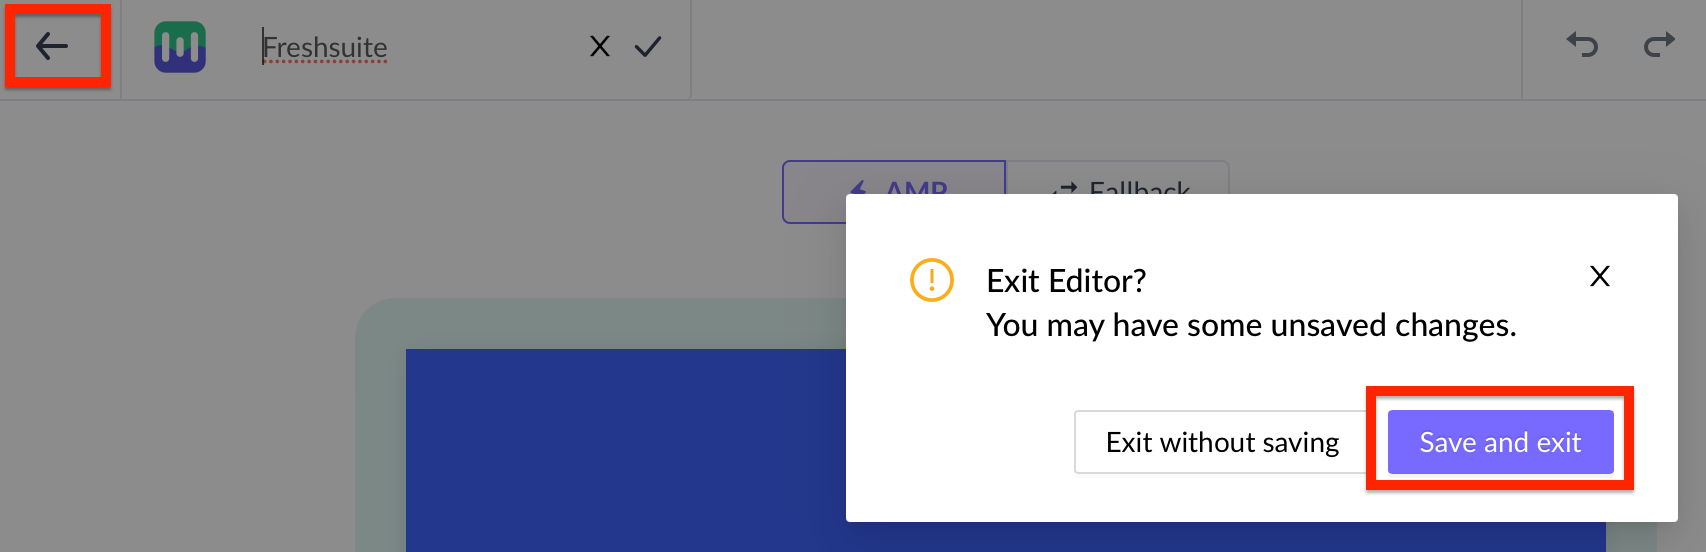
Step 3: Use the editor to edit the template. Save and rename the template upon completion. After saving, click on the back arrow.

Step 4: Click on save and exit.
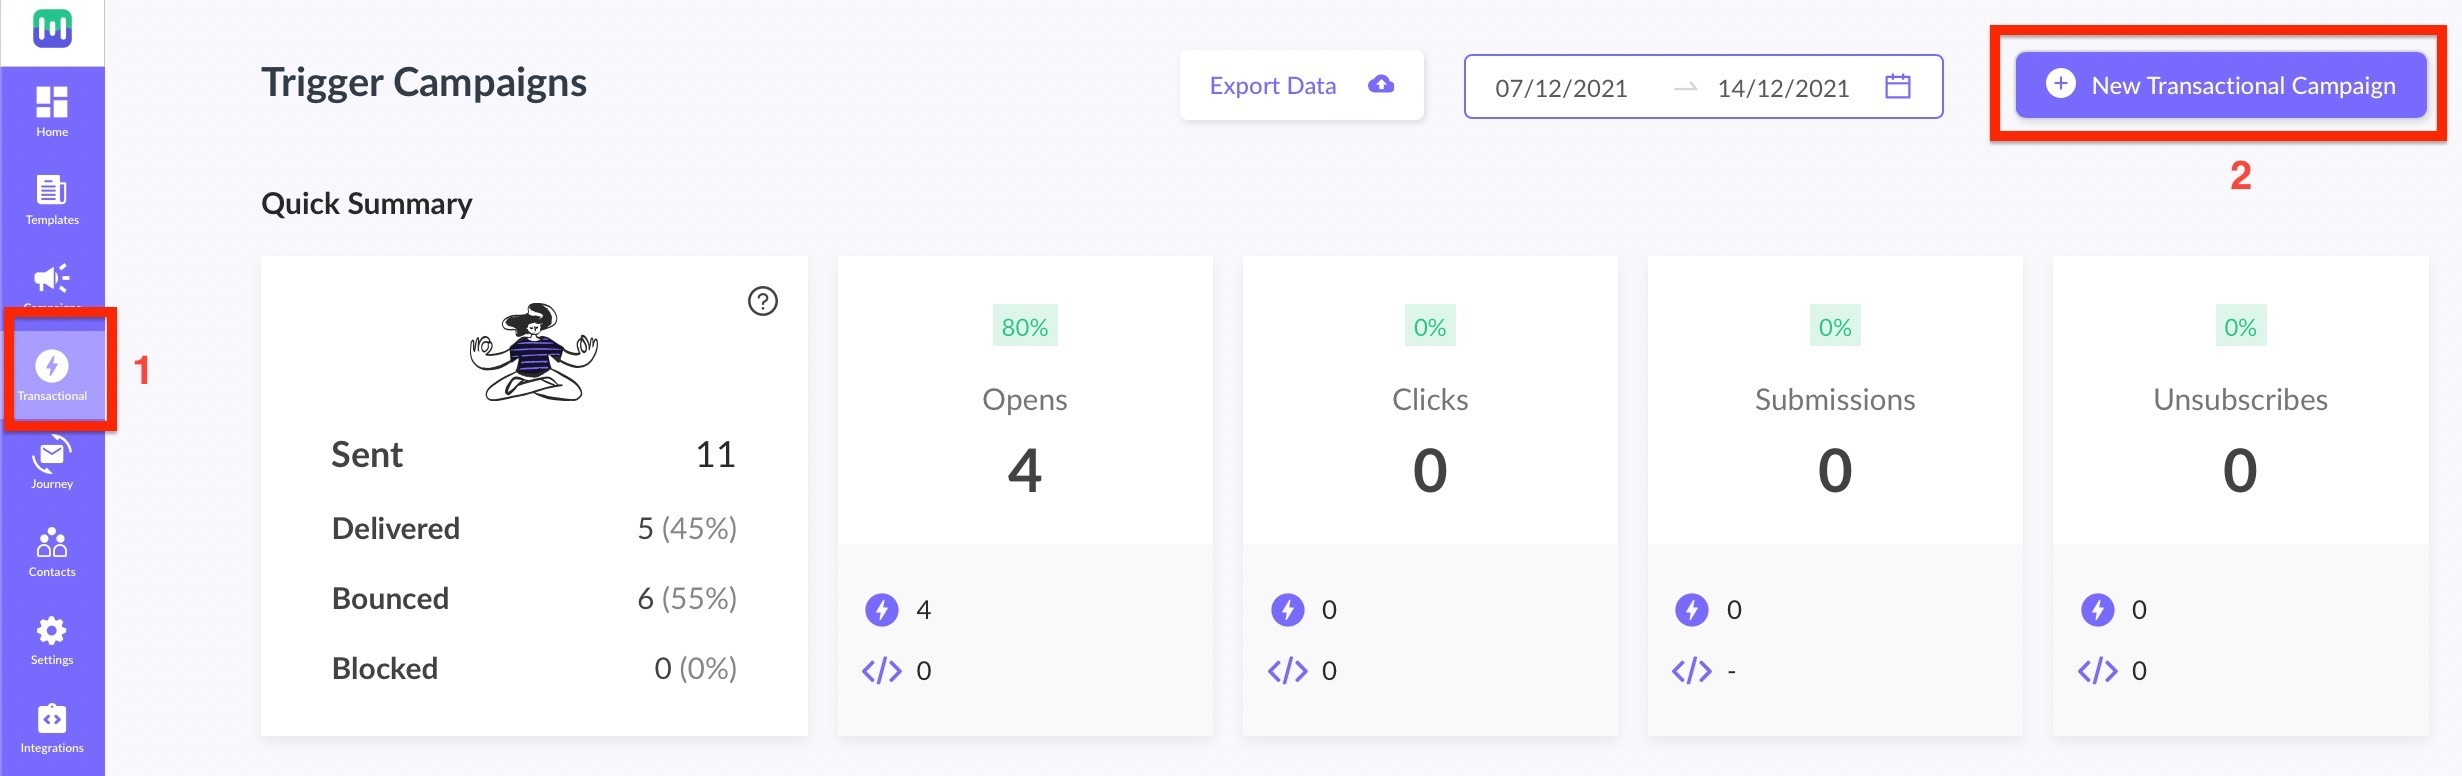
Step 5: You will be redirected to the home page. Click on Trigger under Campaigns from the vertical menu on the left. Next, click on Create trigger campaign.
Step 6: Select the template you saved before. Click on next.

Step 7: Add Subject Line, Pre-header text, From name and Reply to email. Click on next.

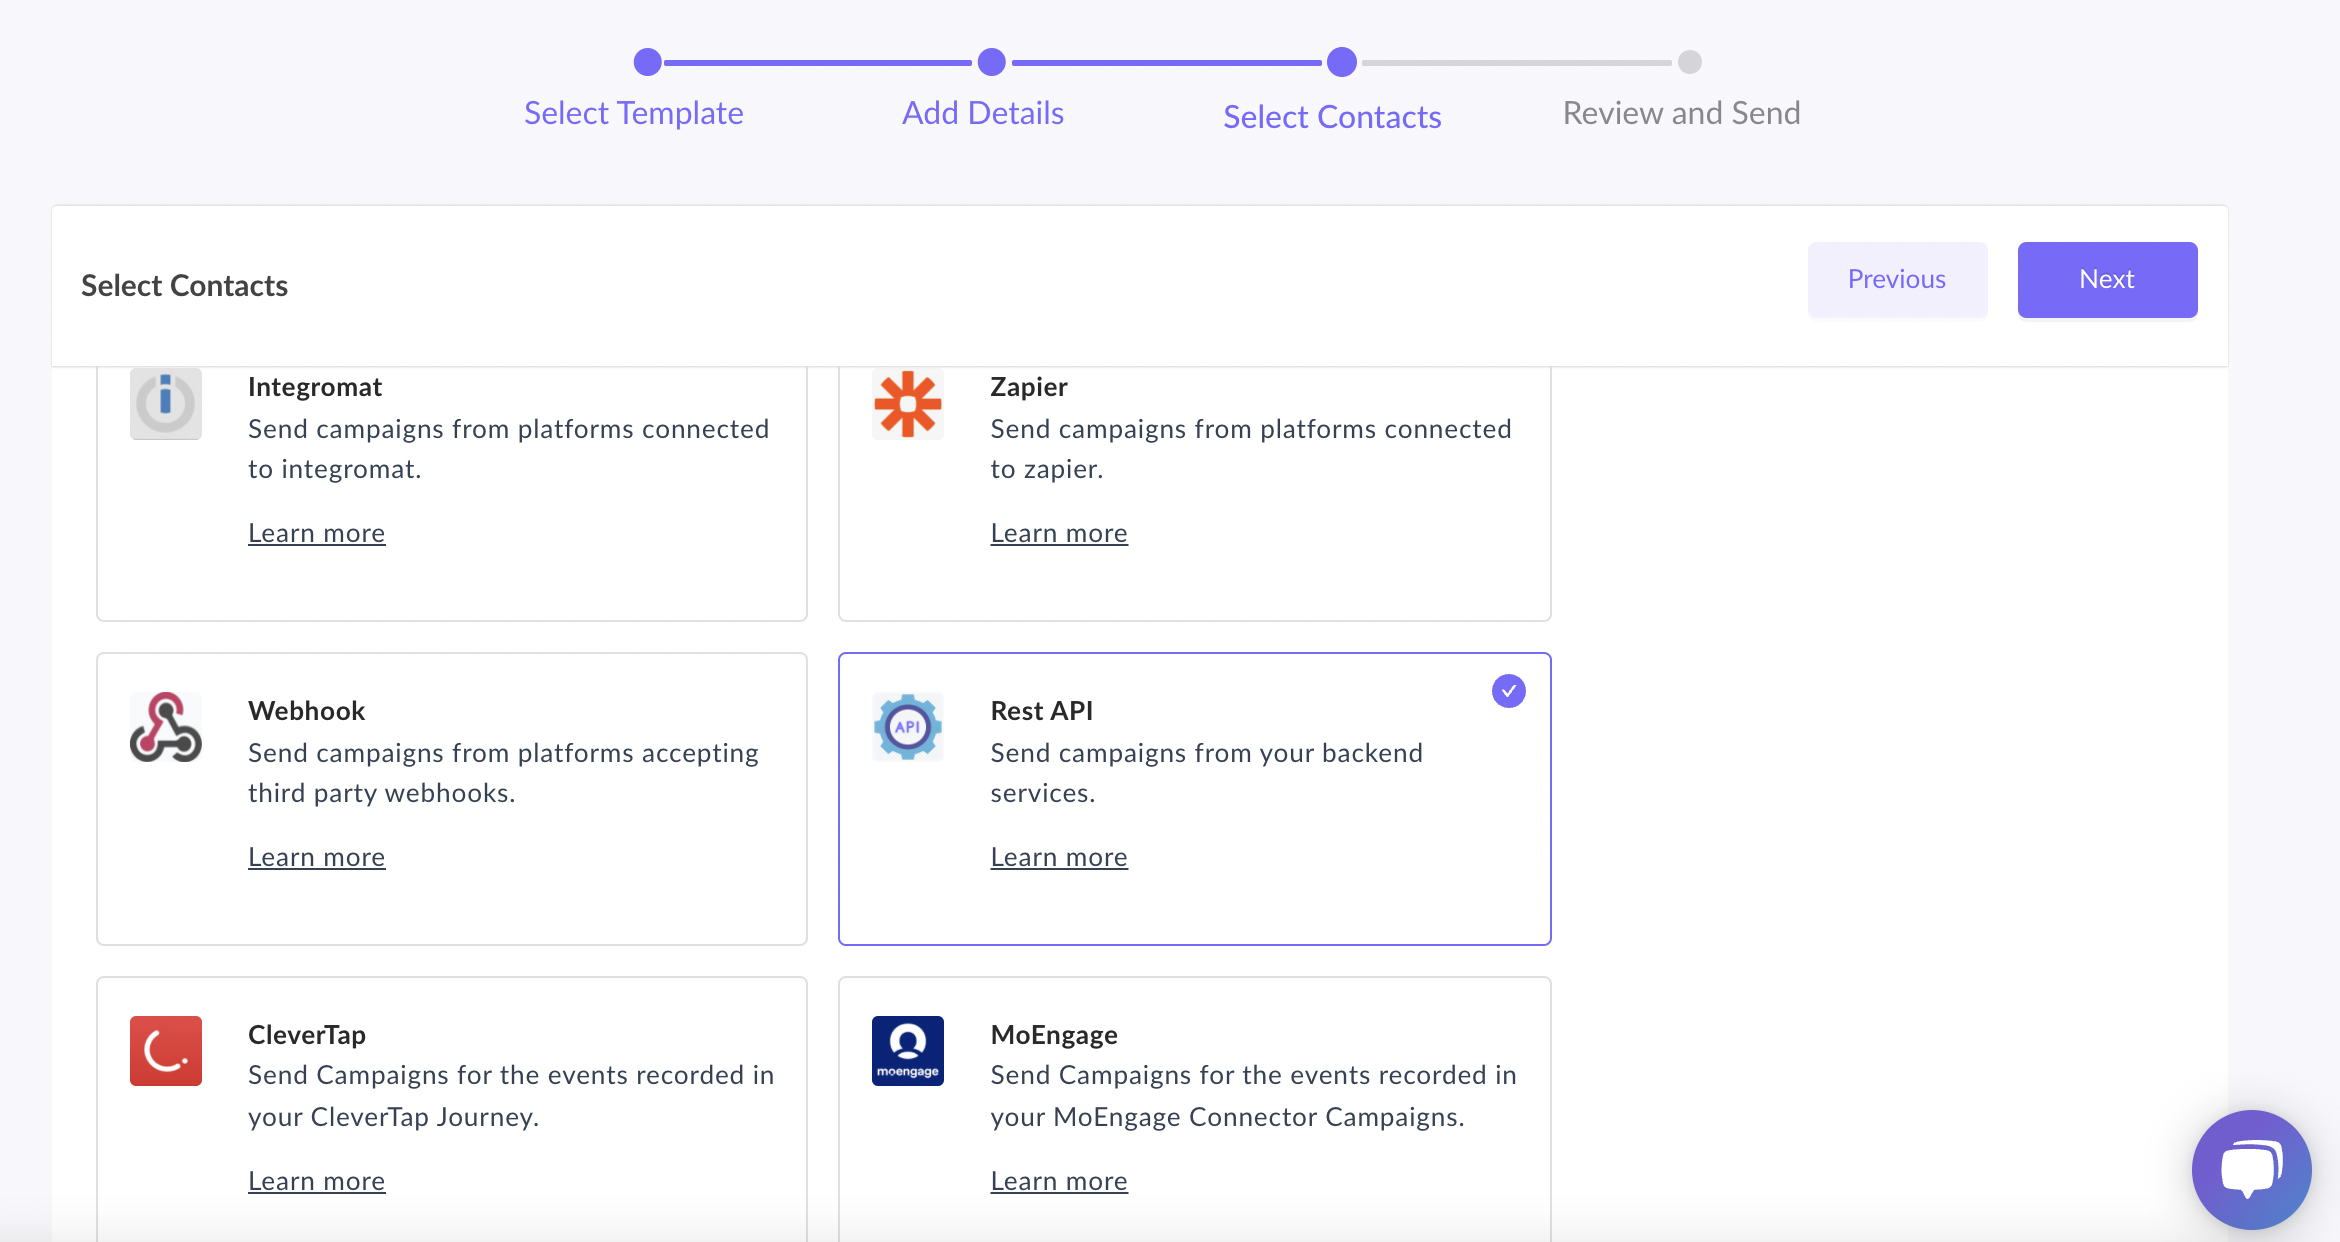
Step 8: You will be redirected to trigger on events. Select Rest API from the list of platforms. Click on next.
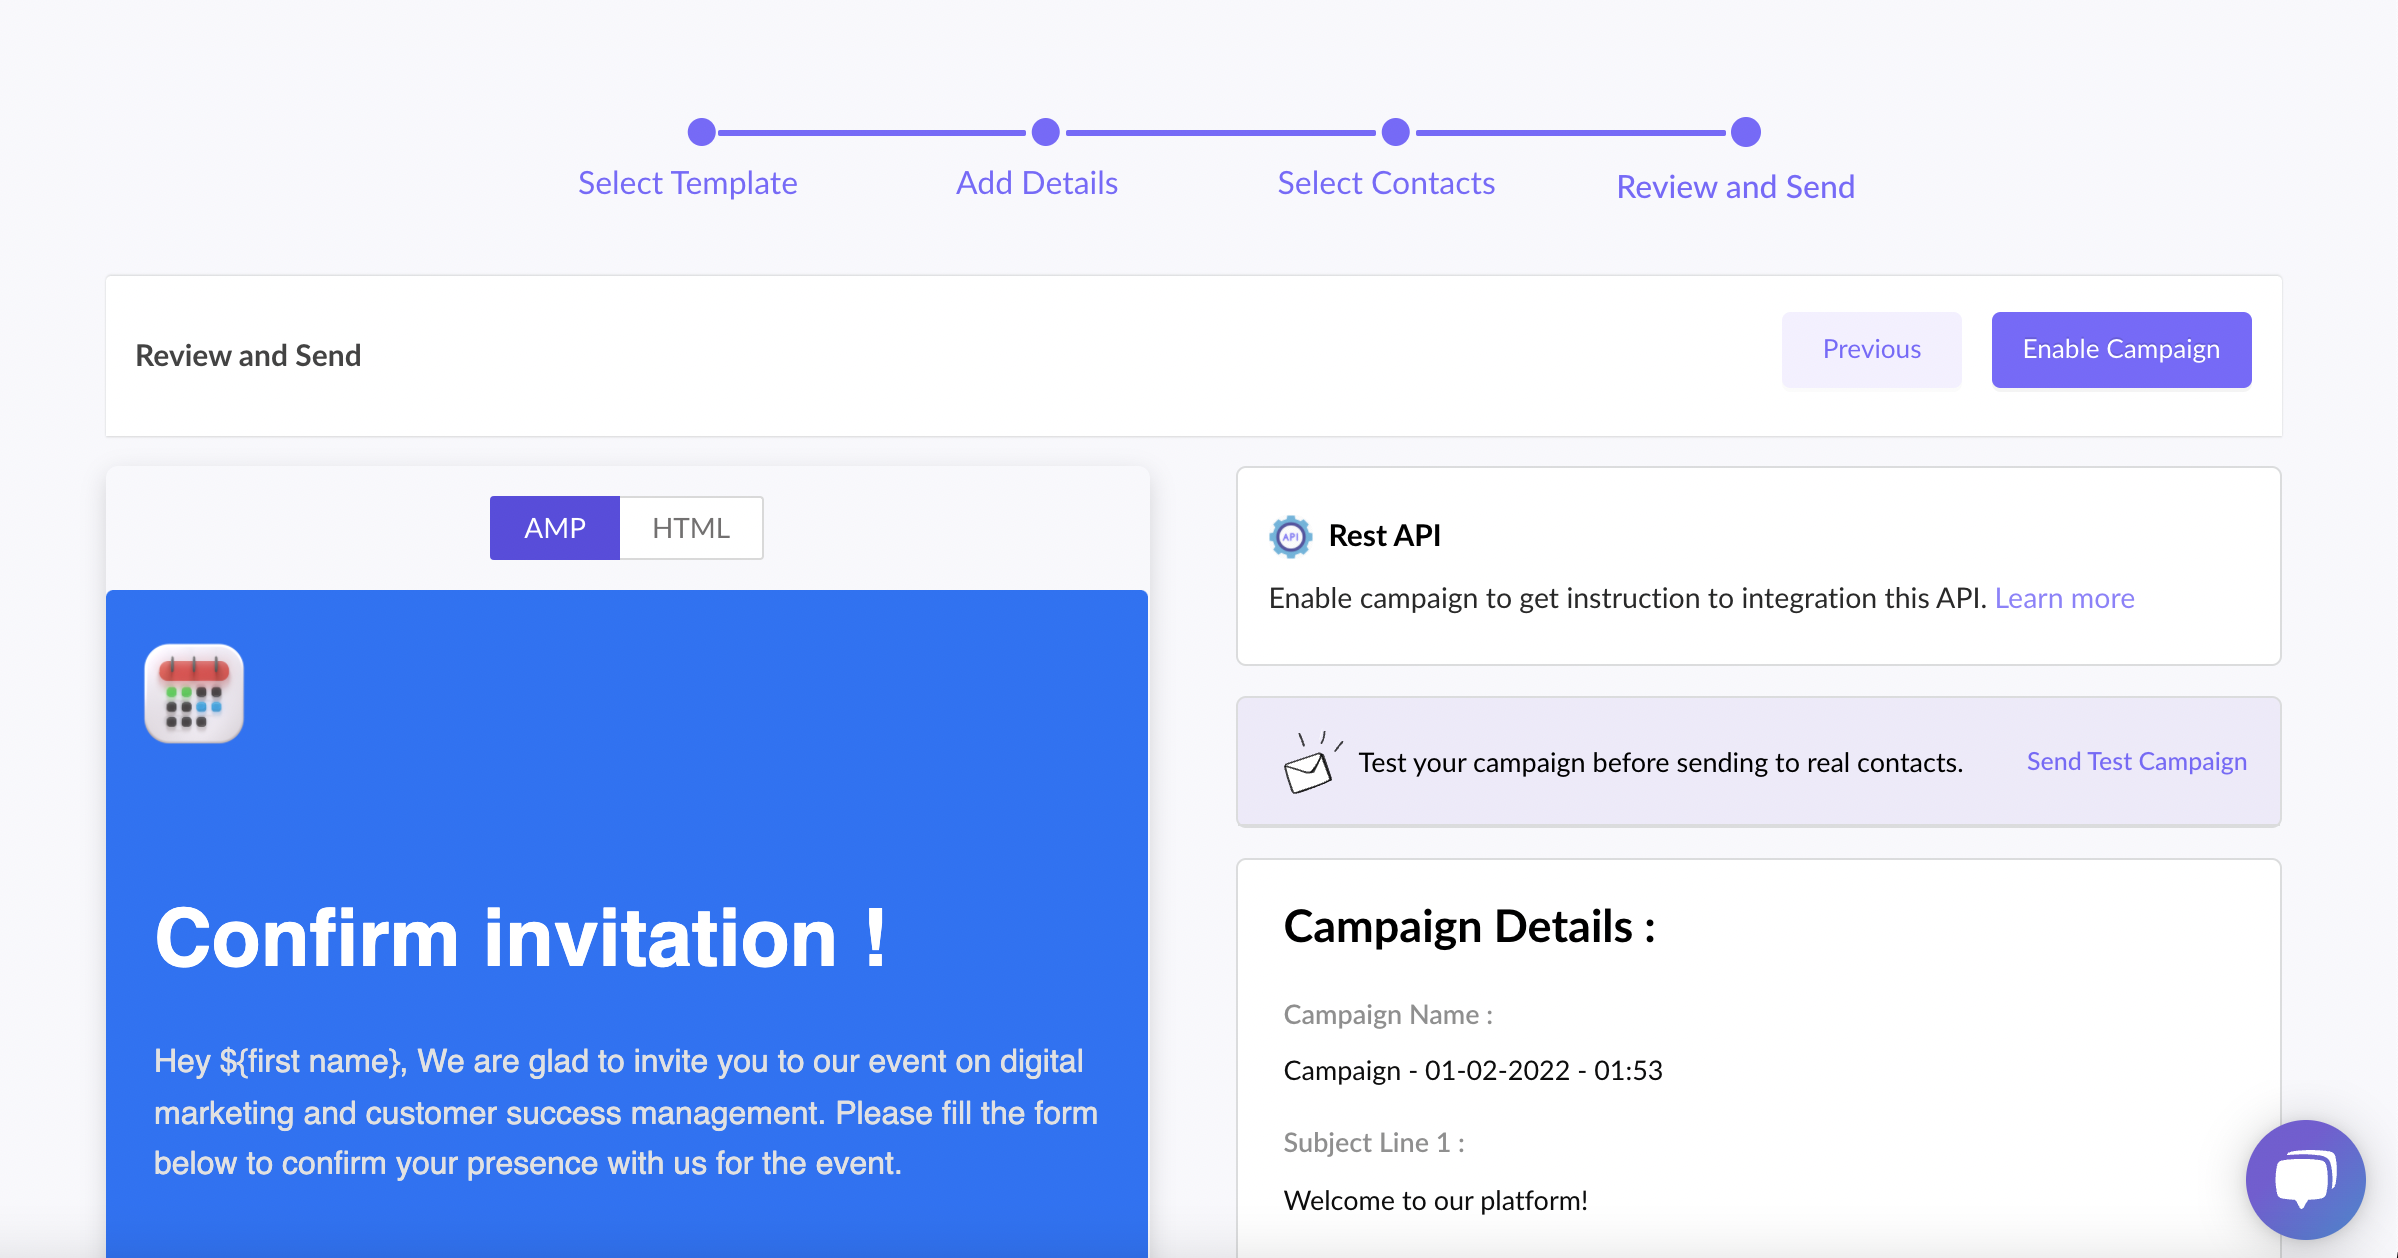
Step 9: Review and test your campaign. To test, click on send test campaign->enter email ID->send test email.
Once tested and reviewed, click on enable campaign.
Step 10: You will be redirected to trigger campaign page.
We would need the API key and campaign ID in Pabbly setup.
The last part of the API endpoint is your campaign ID.
eg. If your Trigger Endpoint is https://api.mailmodo.com/api/v1/triggerCampaign/ ed3196e9-cab8-5ae3-816f-3a2e356ac2e7 then campaign id will be ed3196e9-cab8-5ae3-816f-3a2e356ac2e7 .
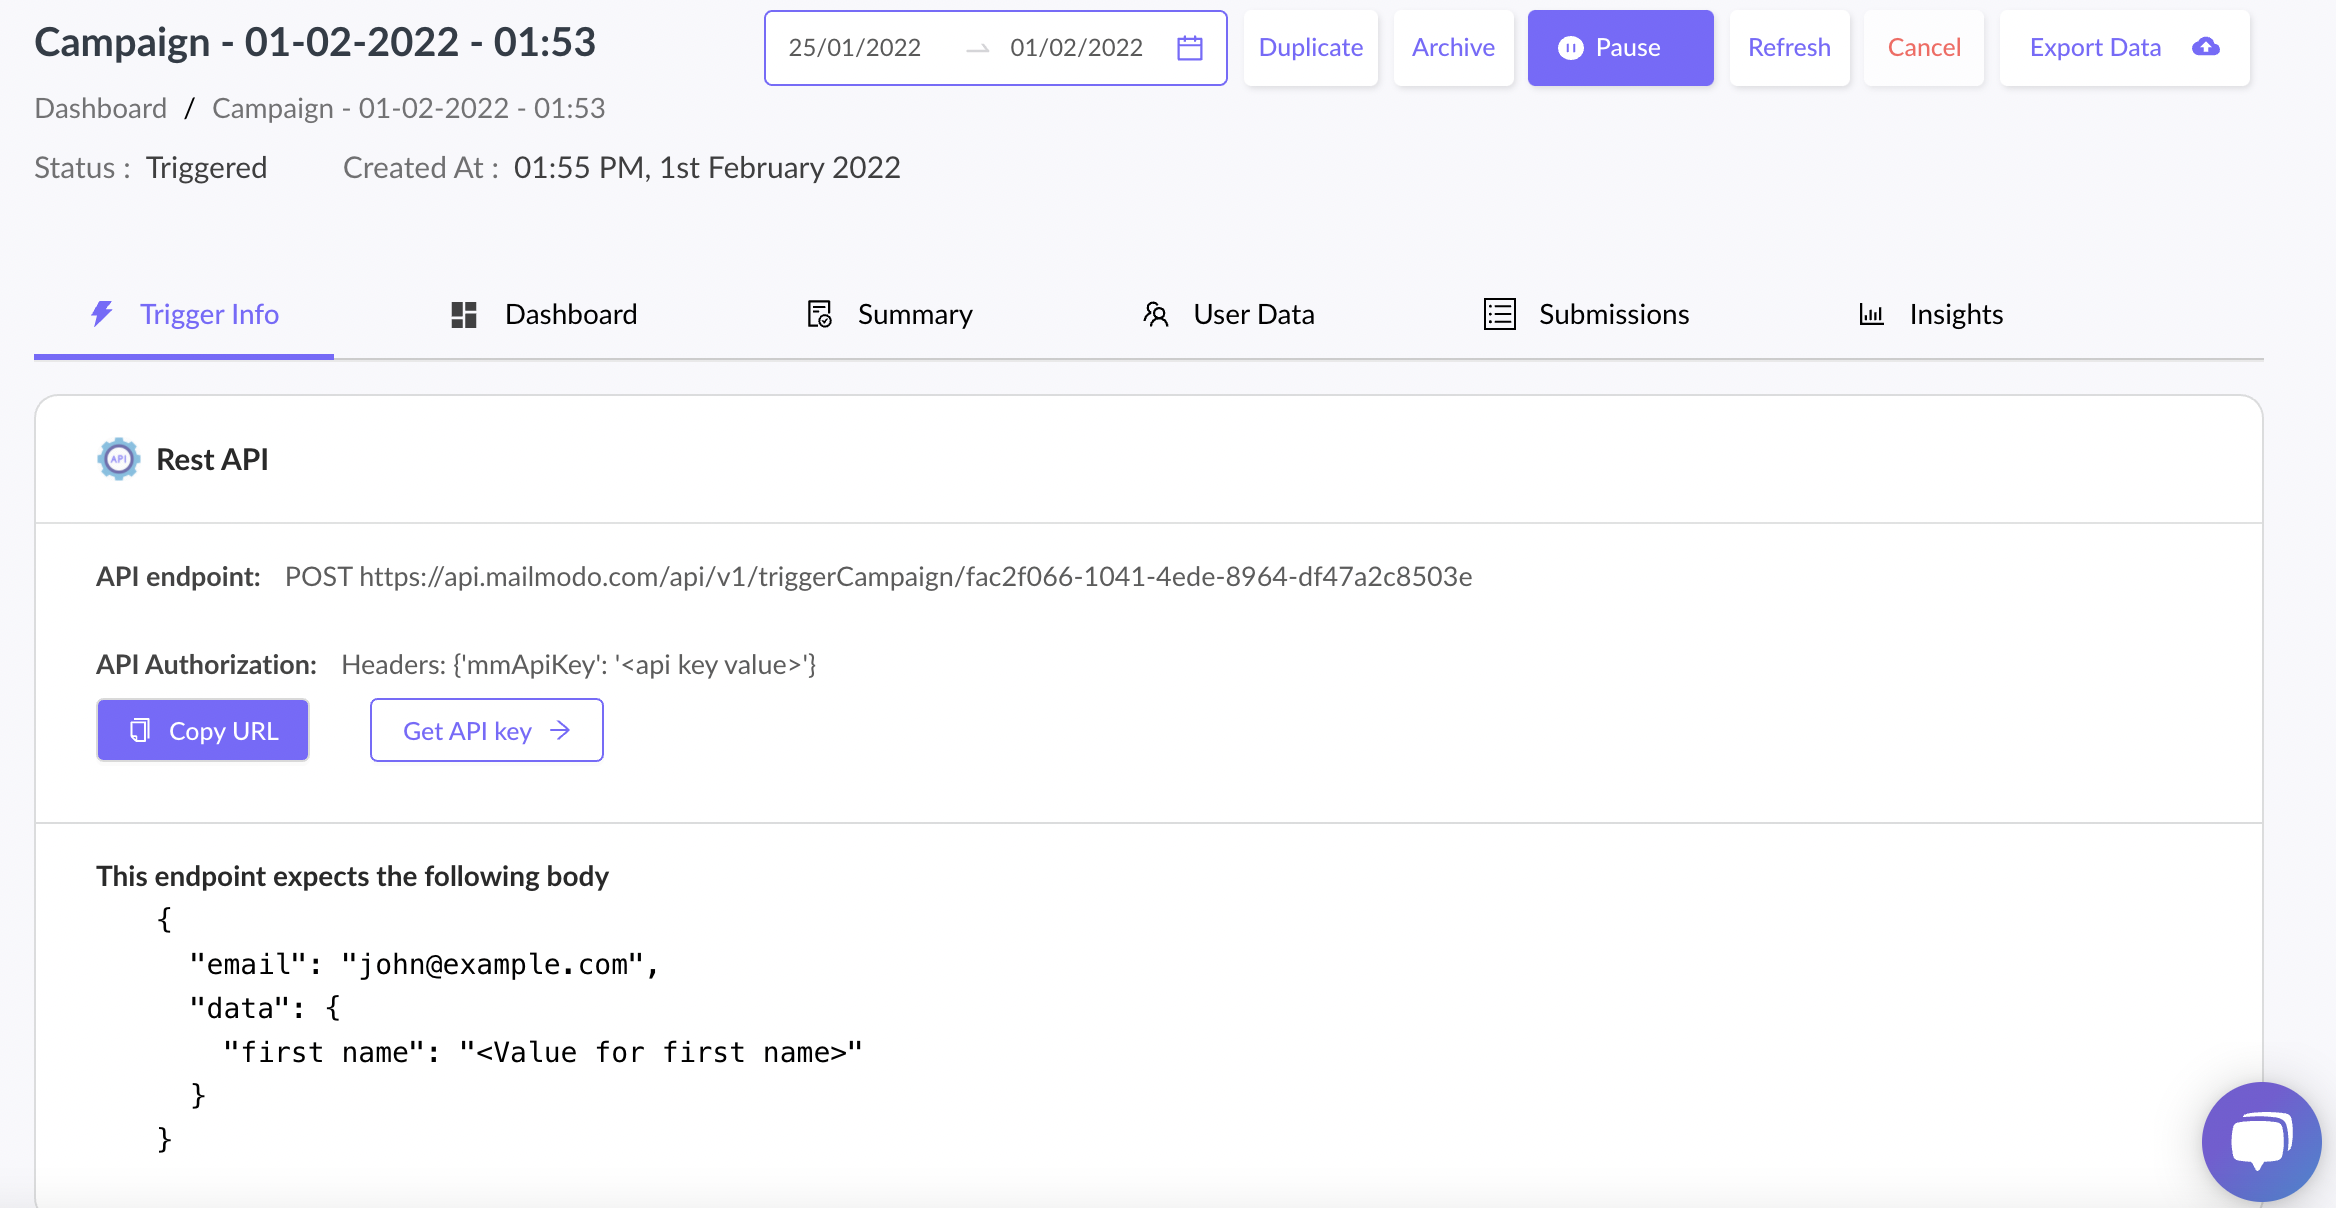
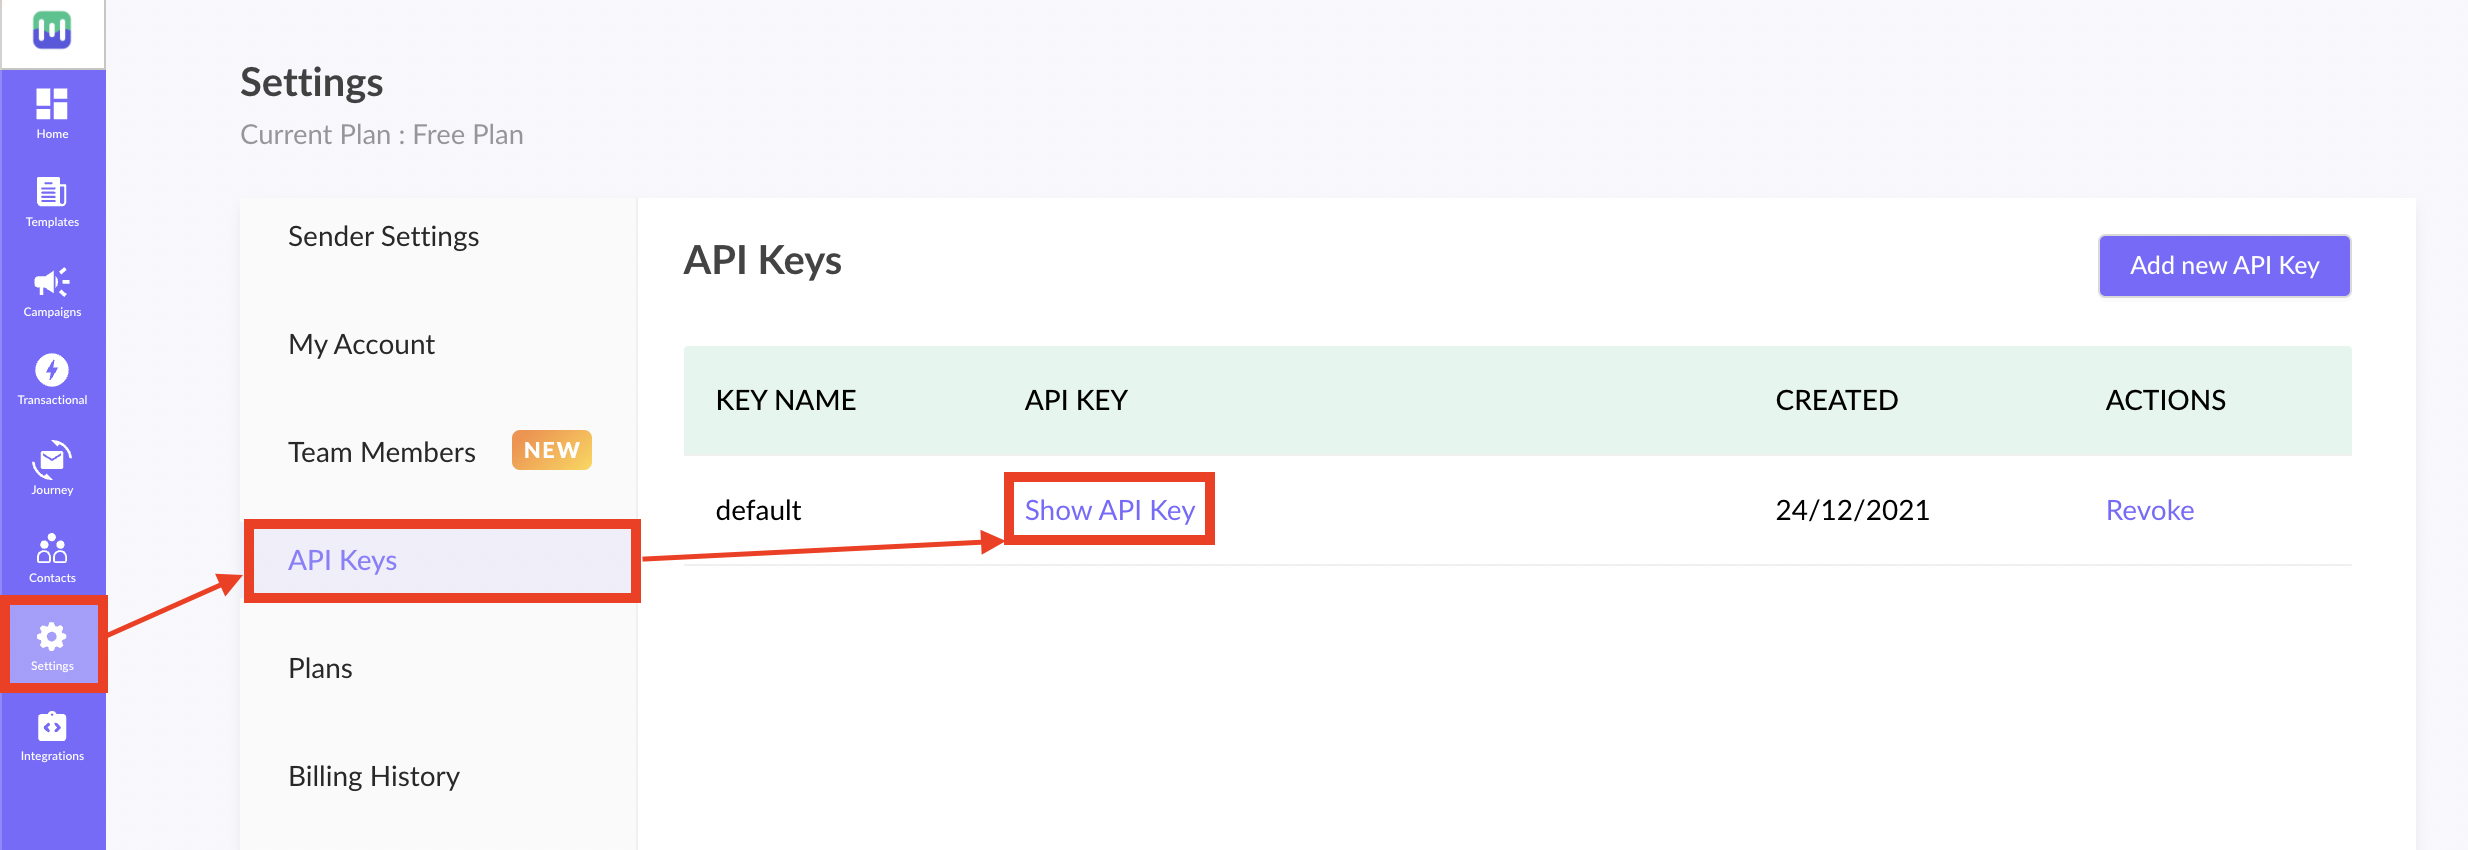
Mailmodo API key
You can find the API key in the trigger info section of your transactional campaign. Alternatively, you can also go to Settings from the vertical menu on the left. Navigate to API keys. Click on Show API Key. Select and copy the API key.
Pabbly Setup
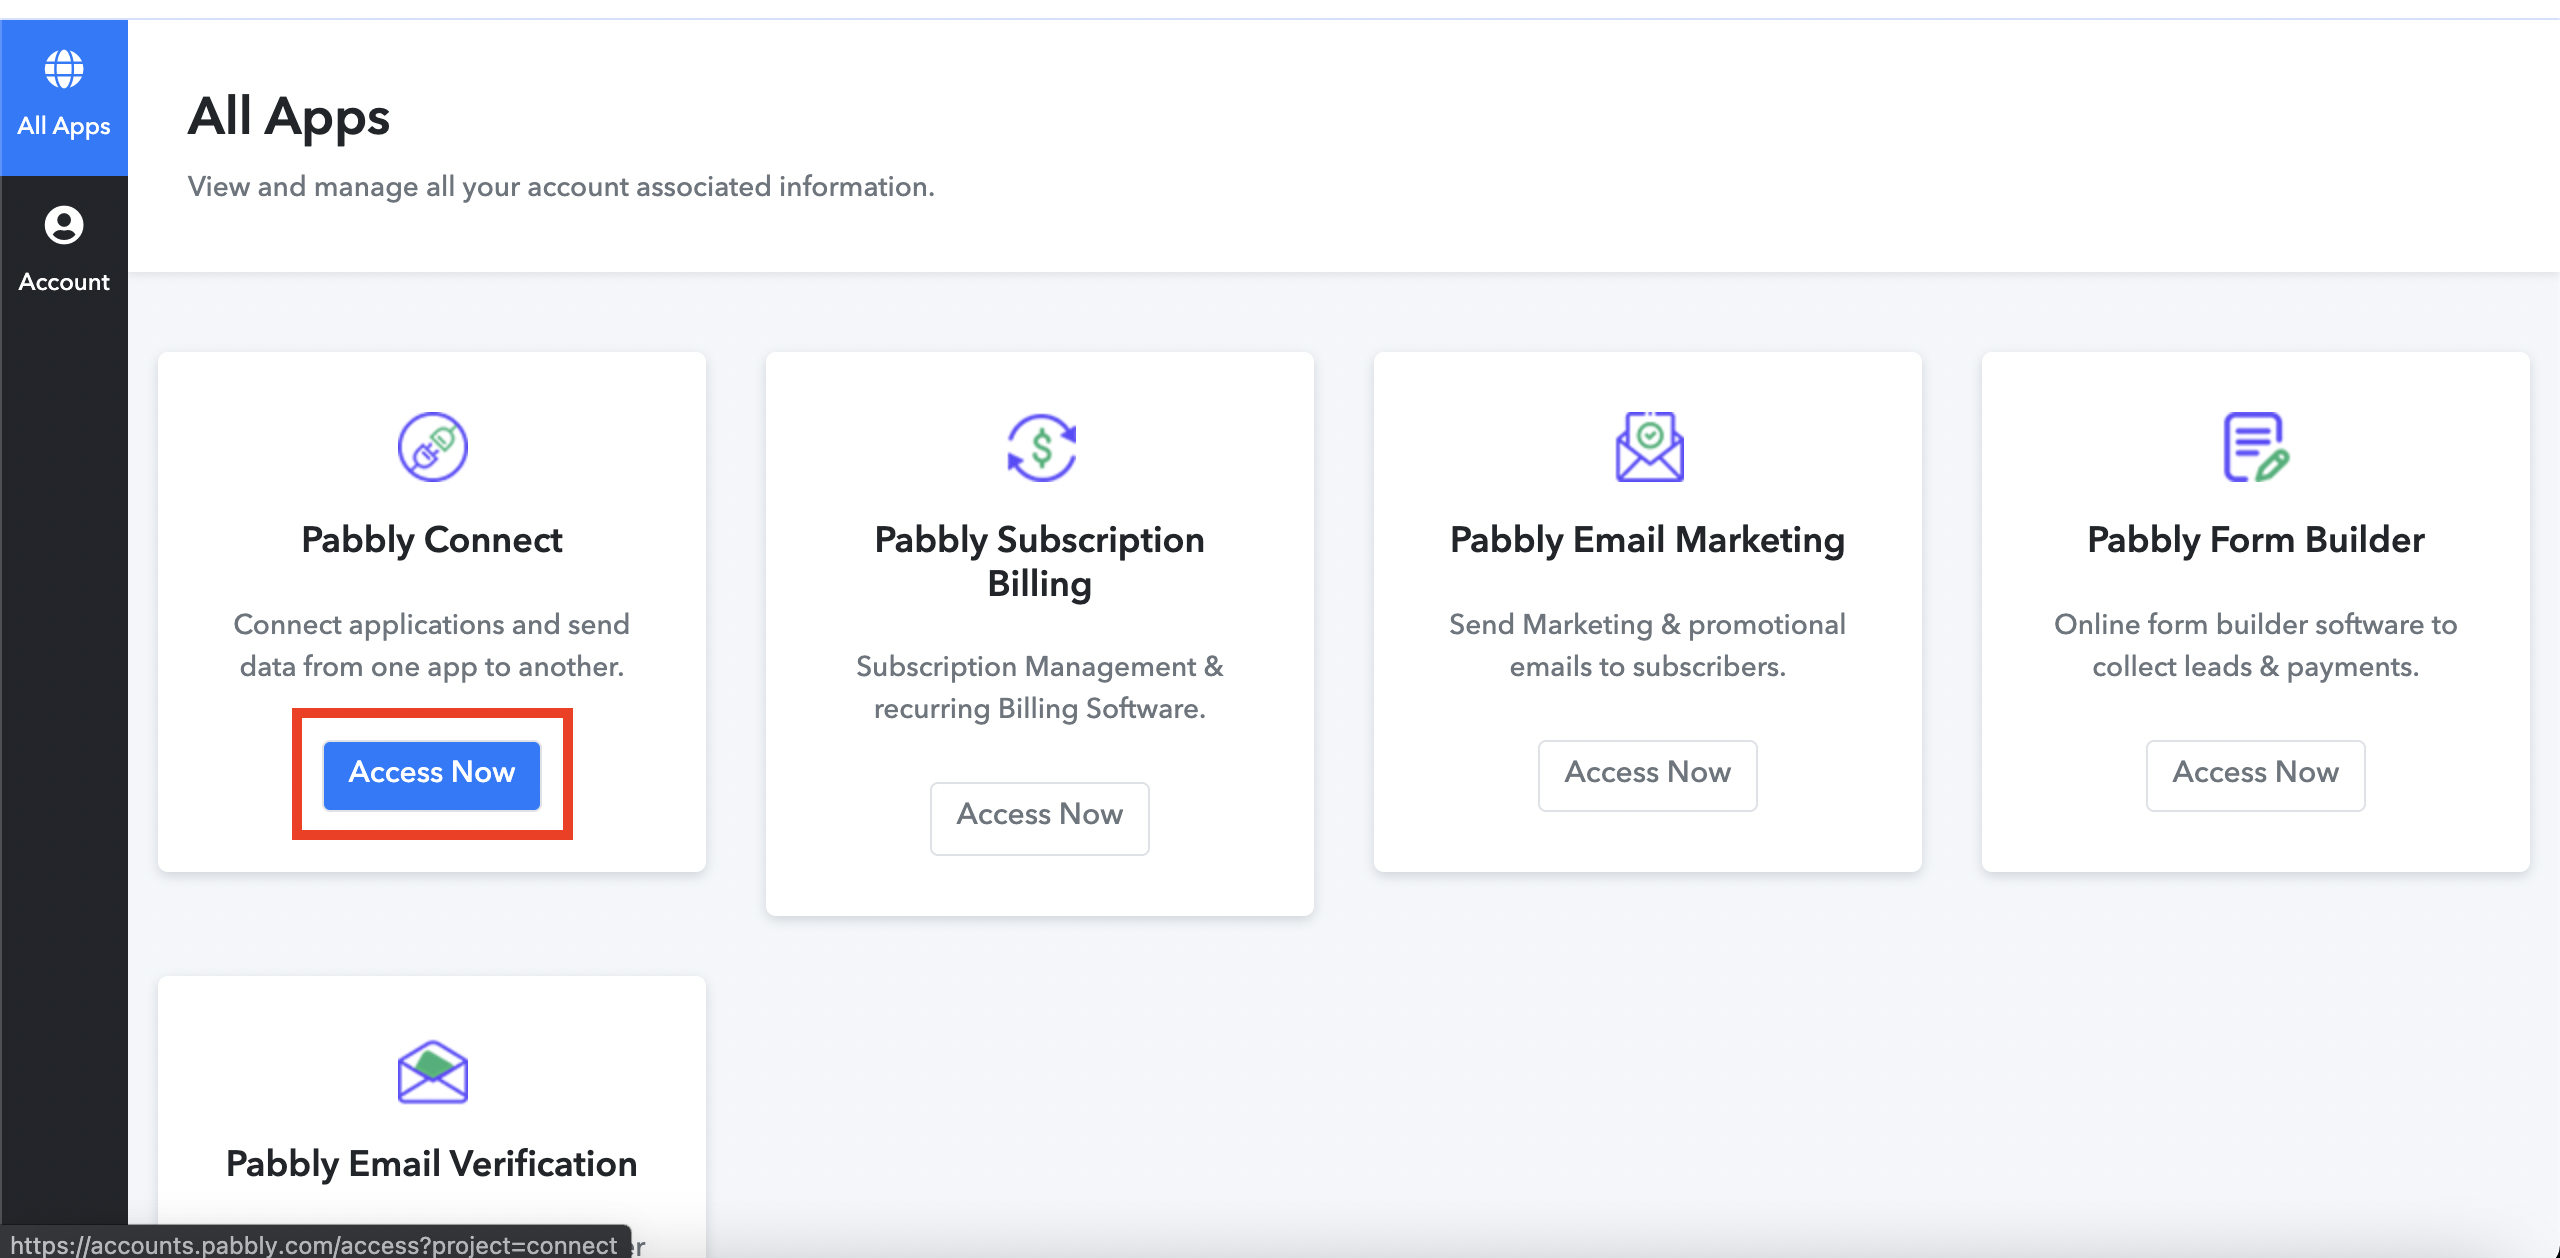
Step 1: Go to Pabbly homepage, click on Pabbly Connect (Access Now)
Step 2: You will be redirected to Pabbly Connect. Click on Create Workflow.
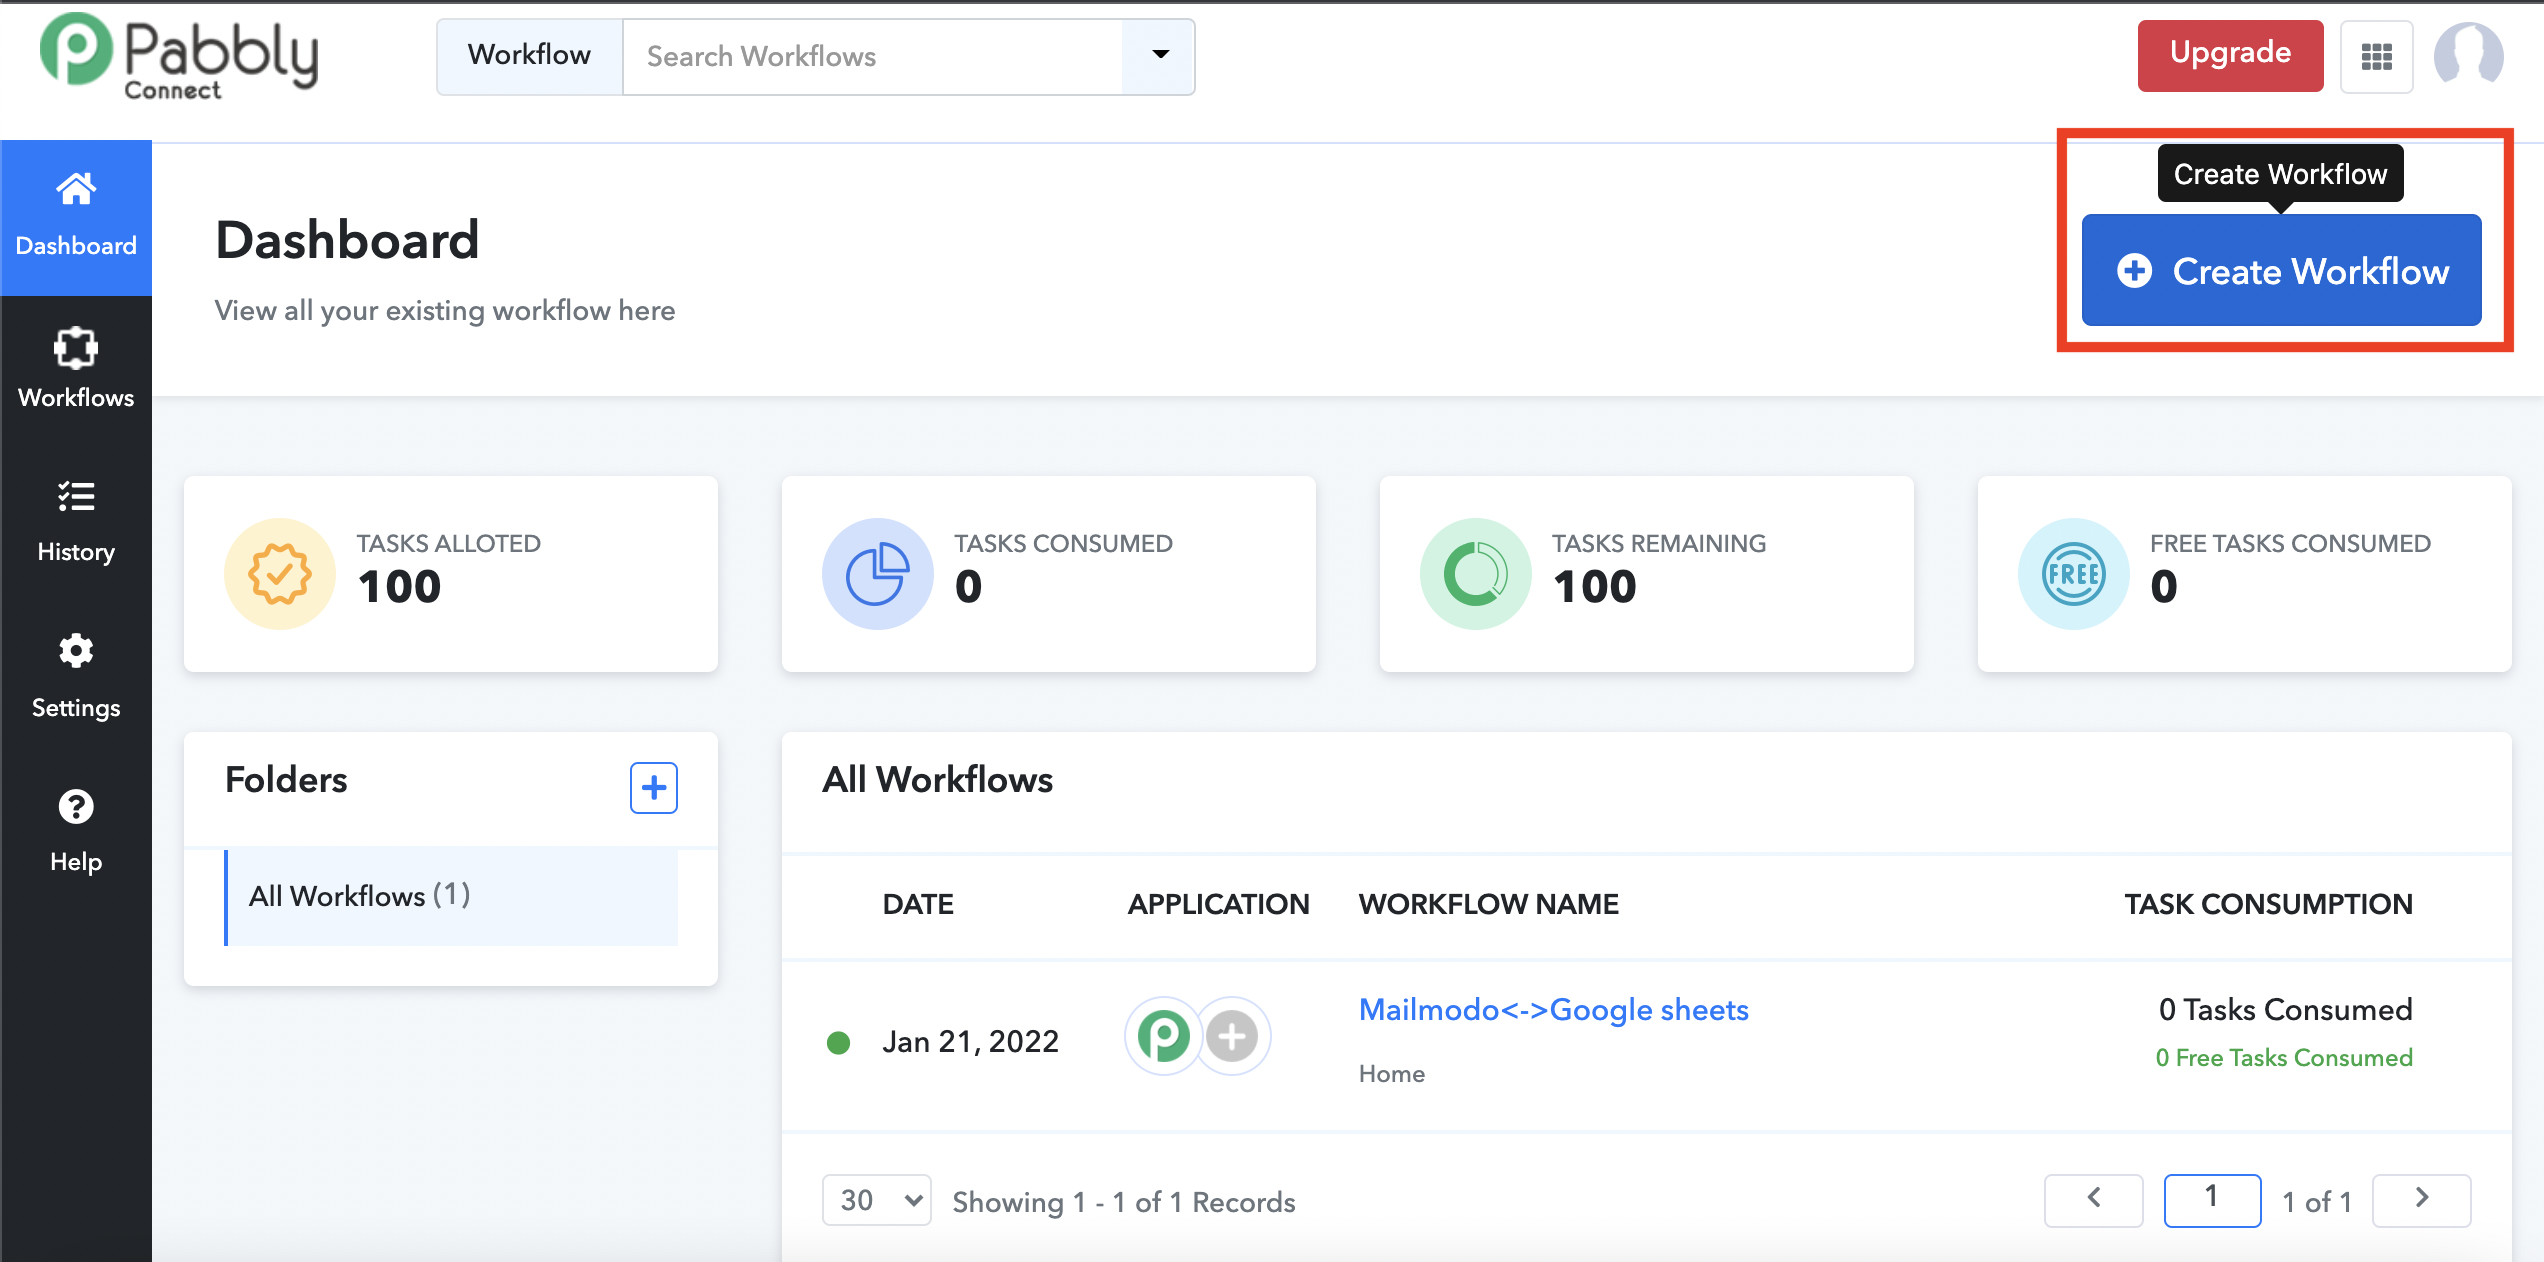
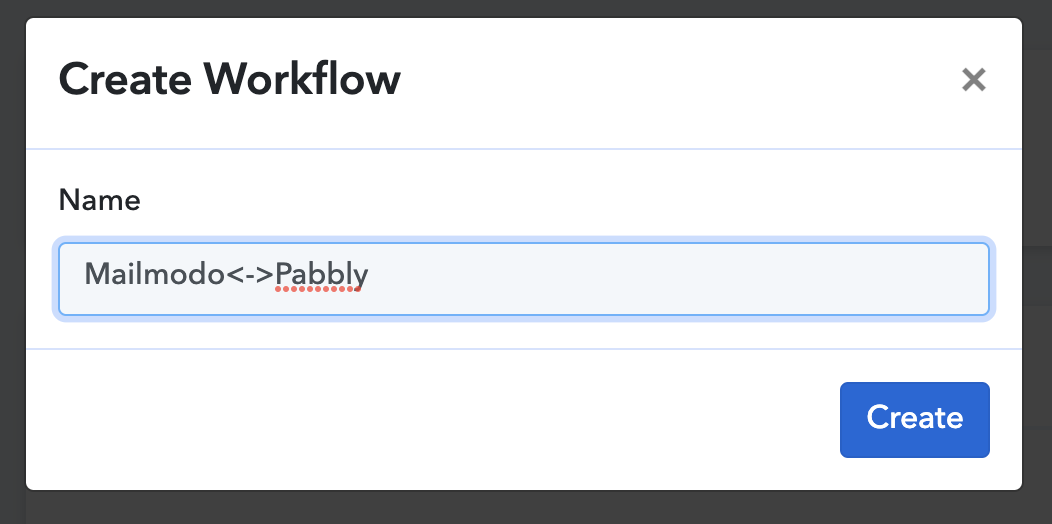
Step 3: Give your workflow a suitable name. Click on Create.
Step 4: Choose the first application. Events recorded in this application will trigger your workflow.
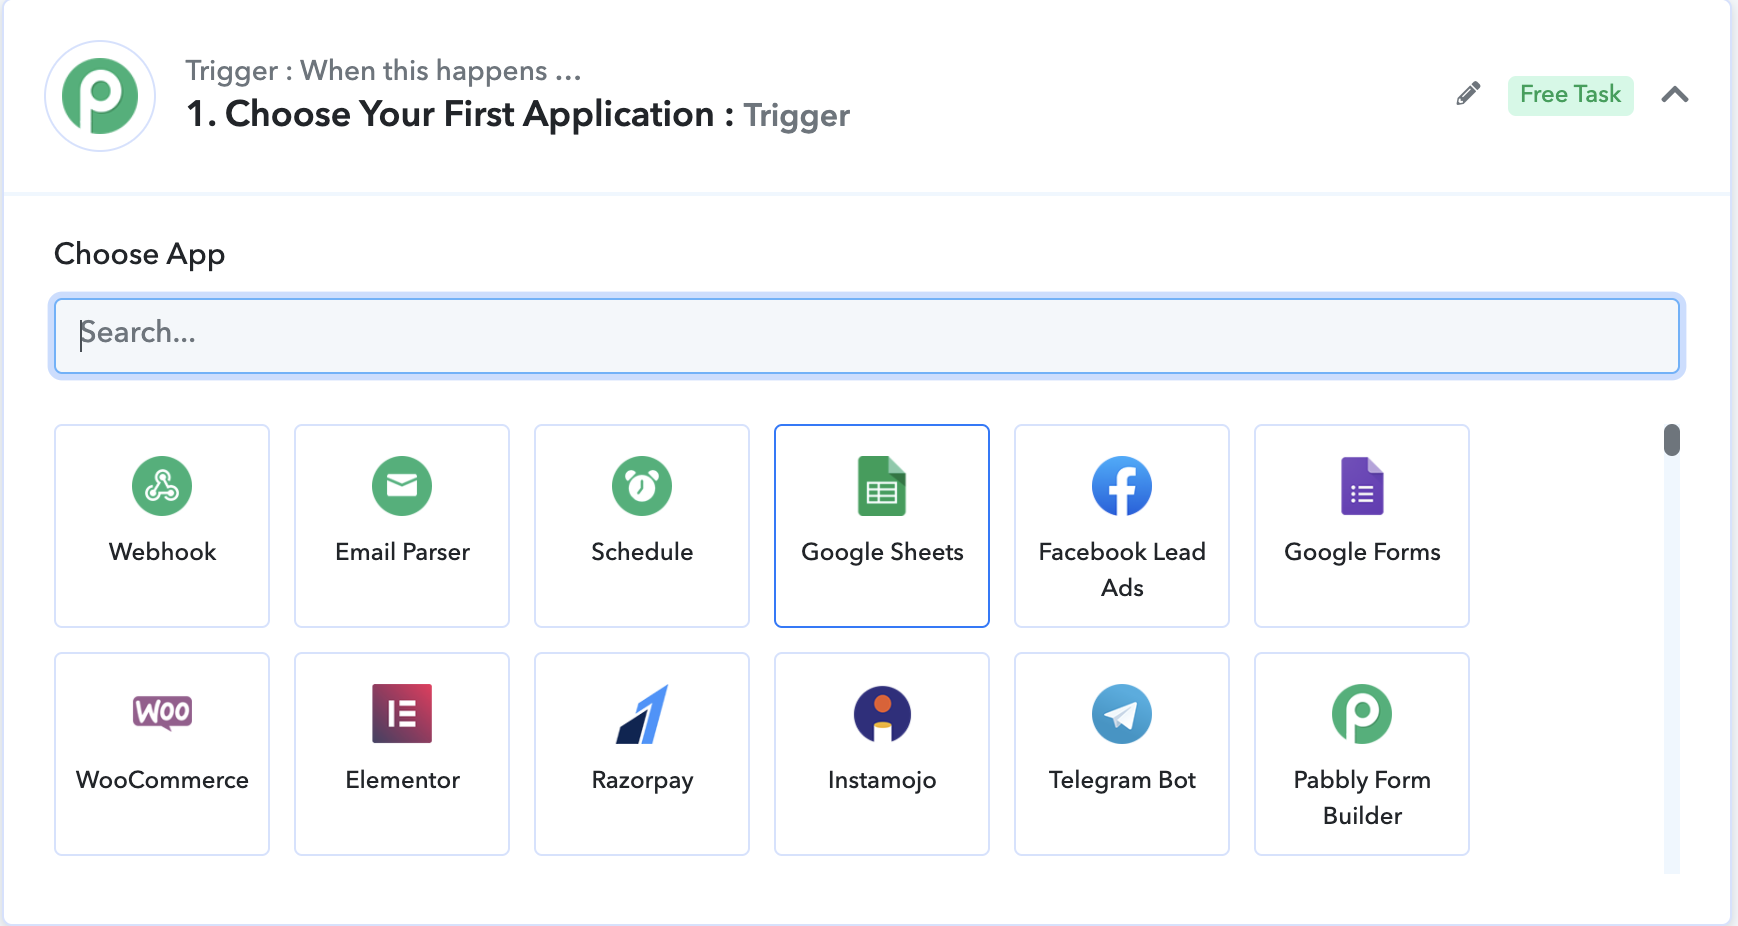
Step 5: Select a trigger event for the chosen app.

Step 6: You might need to follow some on screen instructions for the chosen app. The instructions will vary depending on the app you choose.
Configuring the Trigger App
For the purpose of this tutorial, we will select Google Sheets as the trigger app.
Step 1: Copy the Webhook URL from Pabbly.

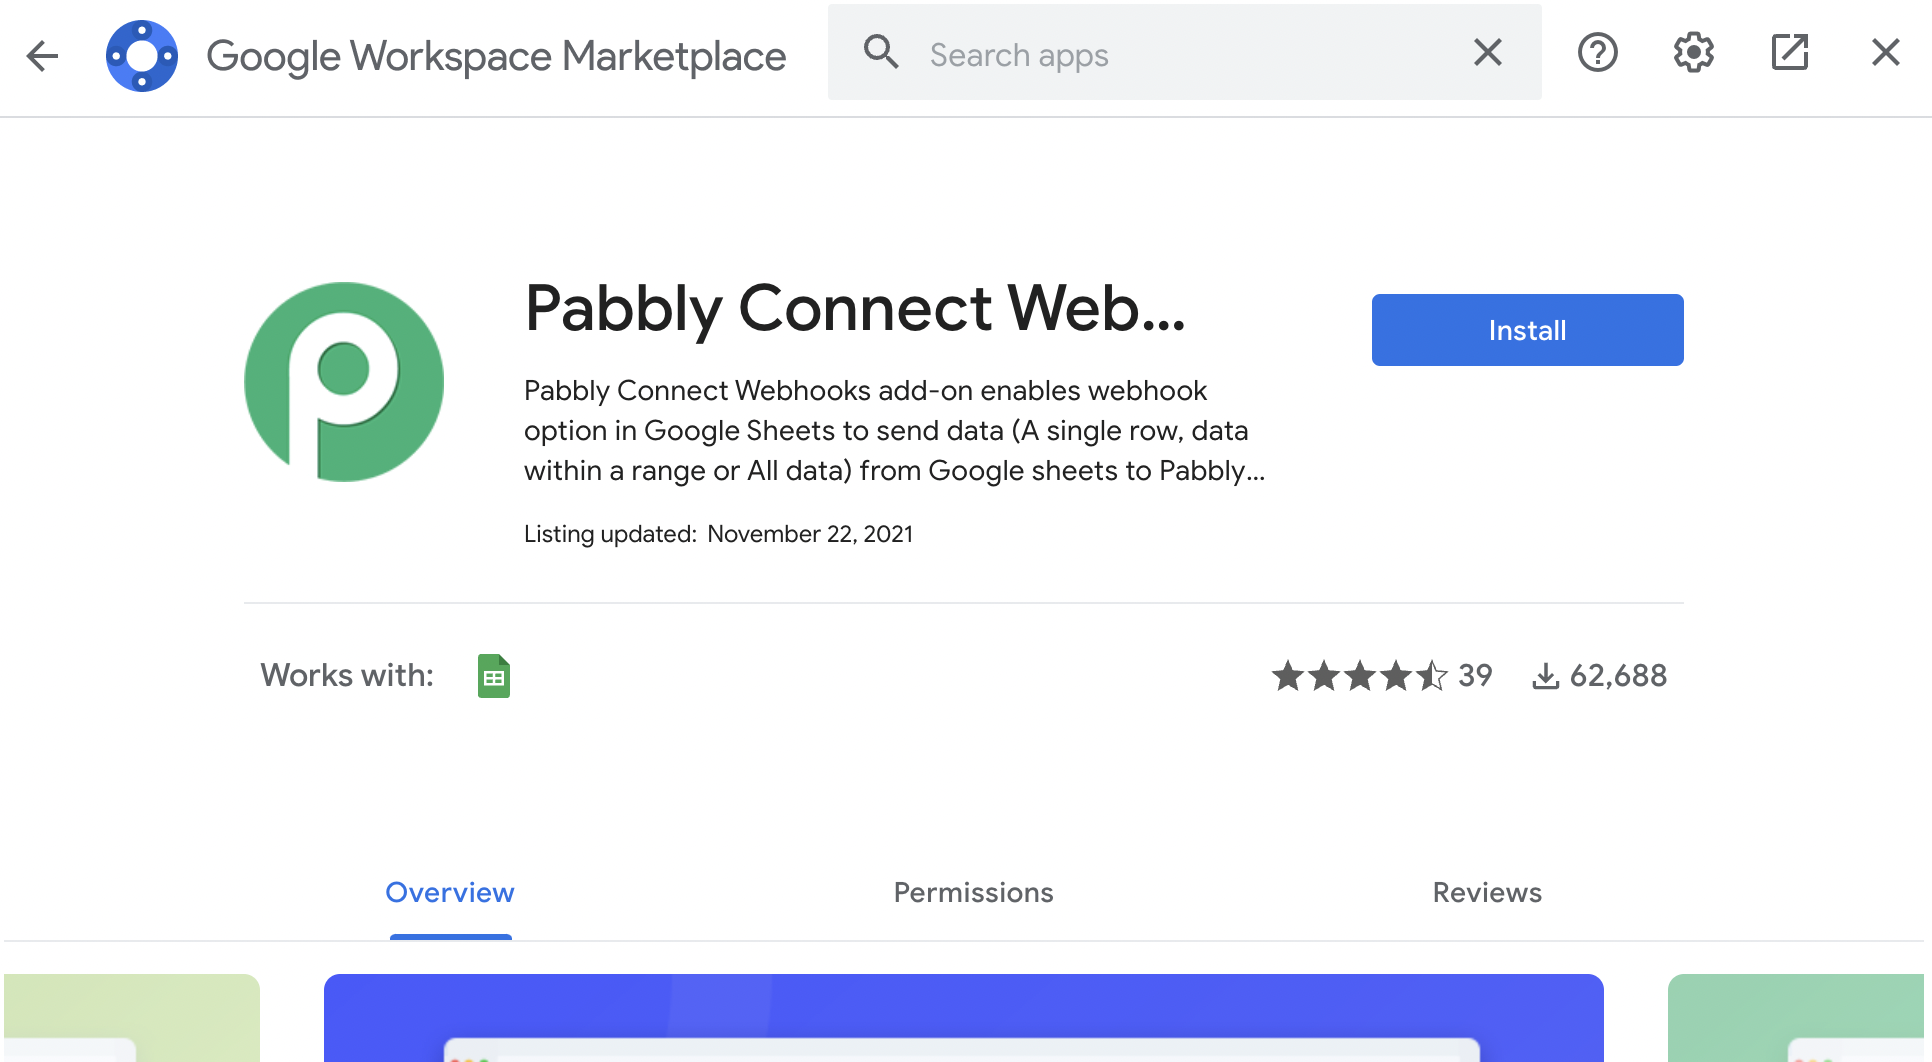
Step 2: Create a new spreadsheet->Navigate to Extensions->Add-ons->Get Add-ons
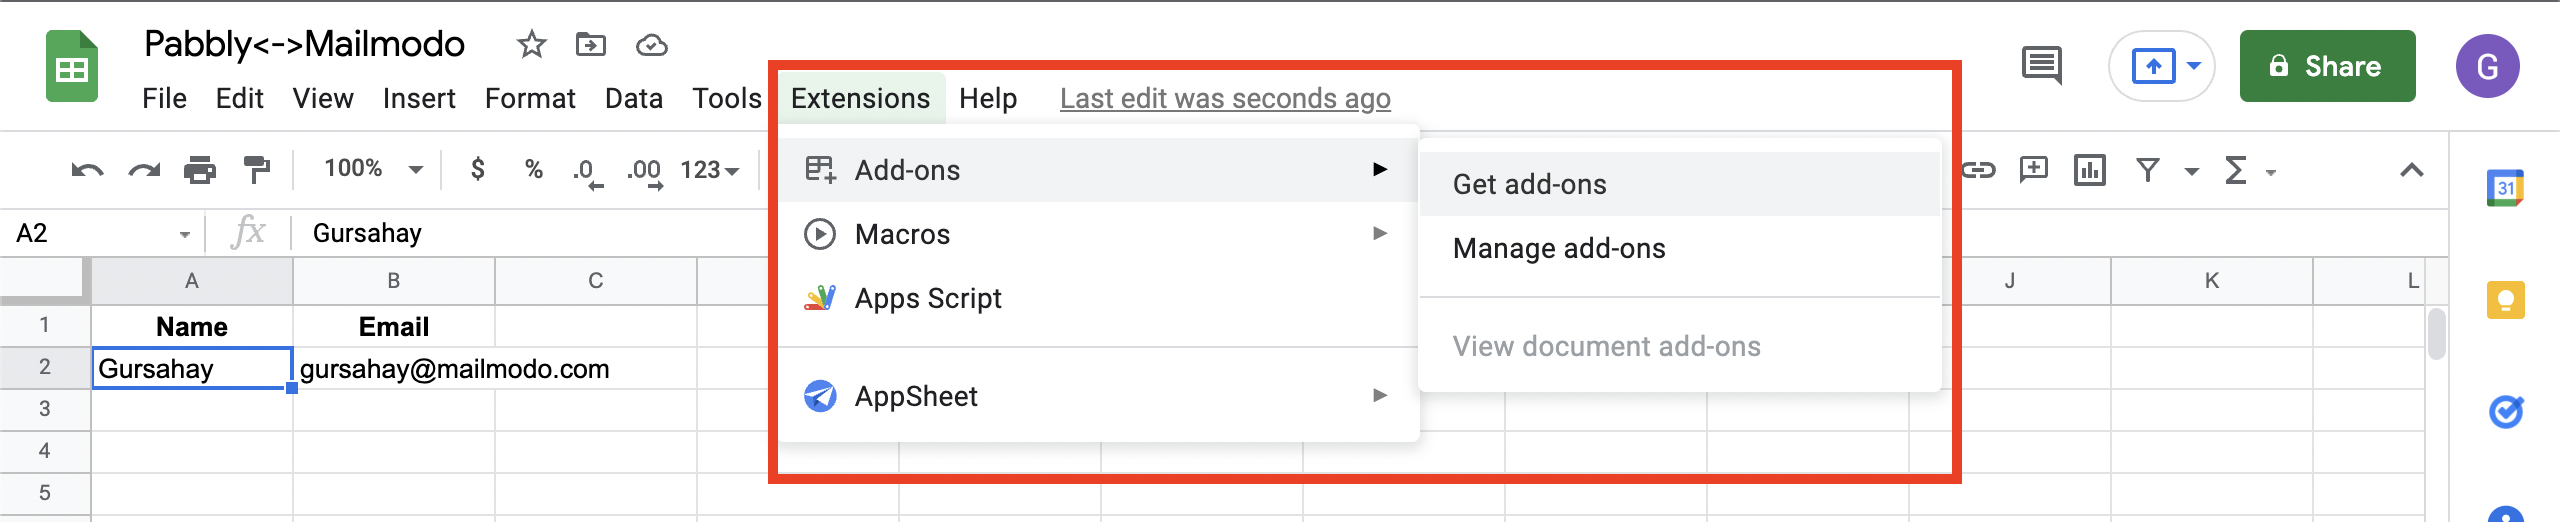
Step 3: A dialogue box will open, search for Pabbly Connect Webhooks.
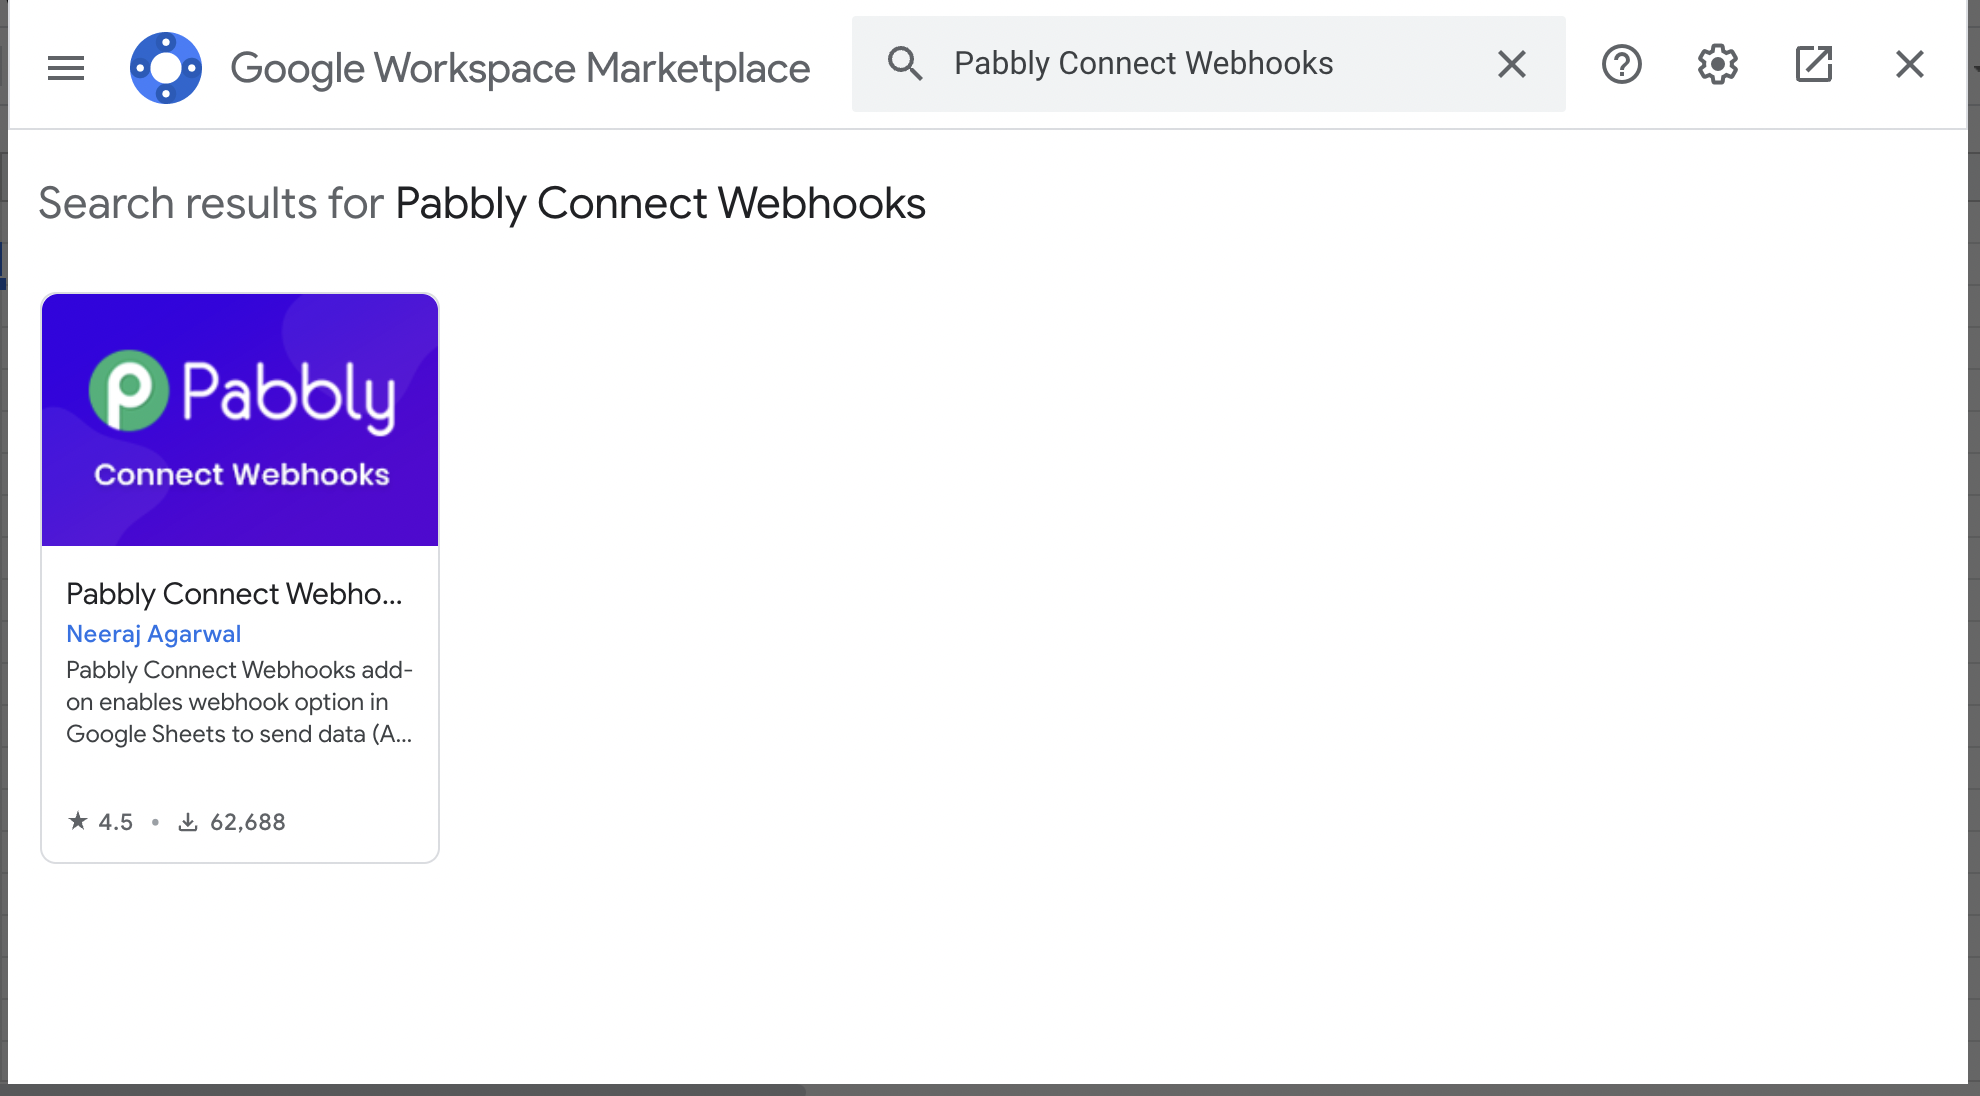
Install the extension.
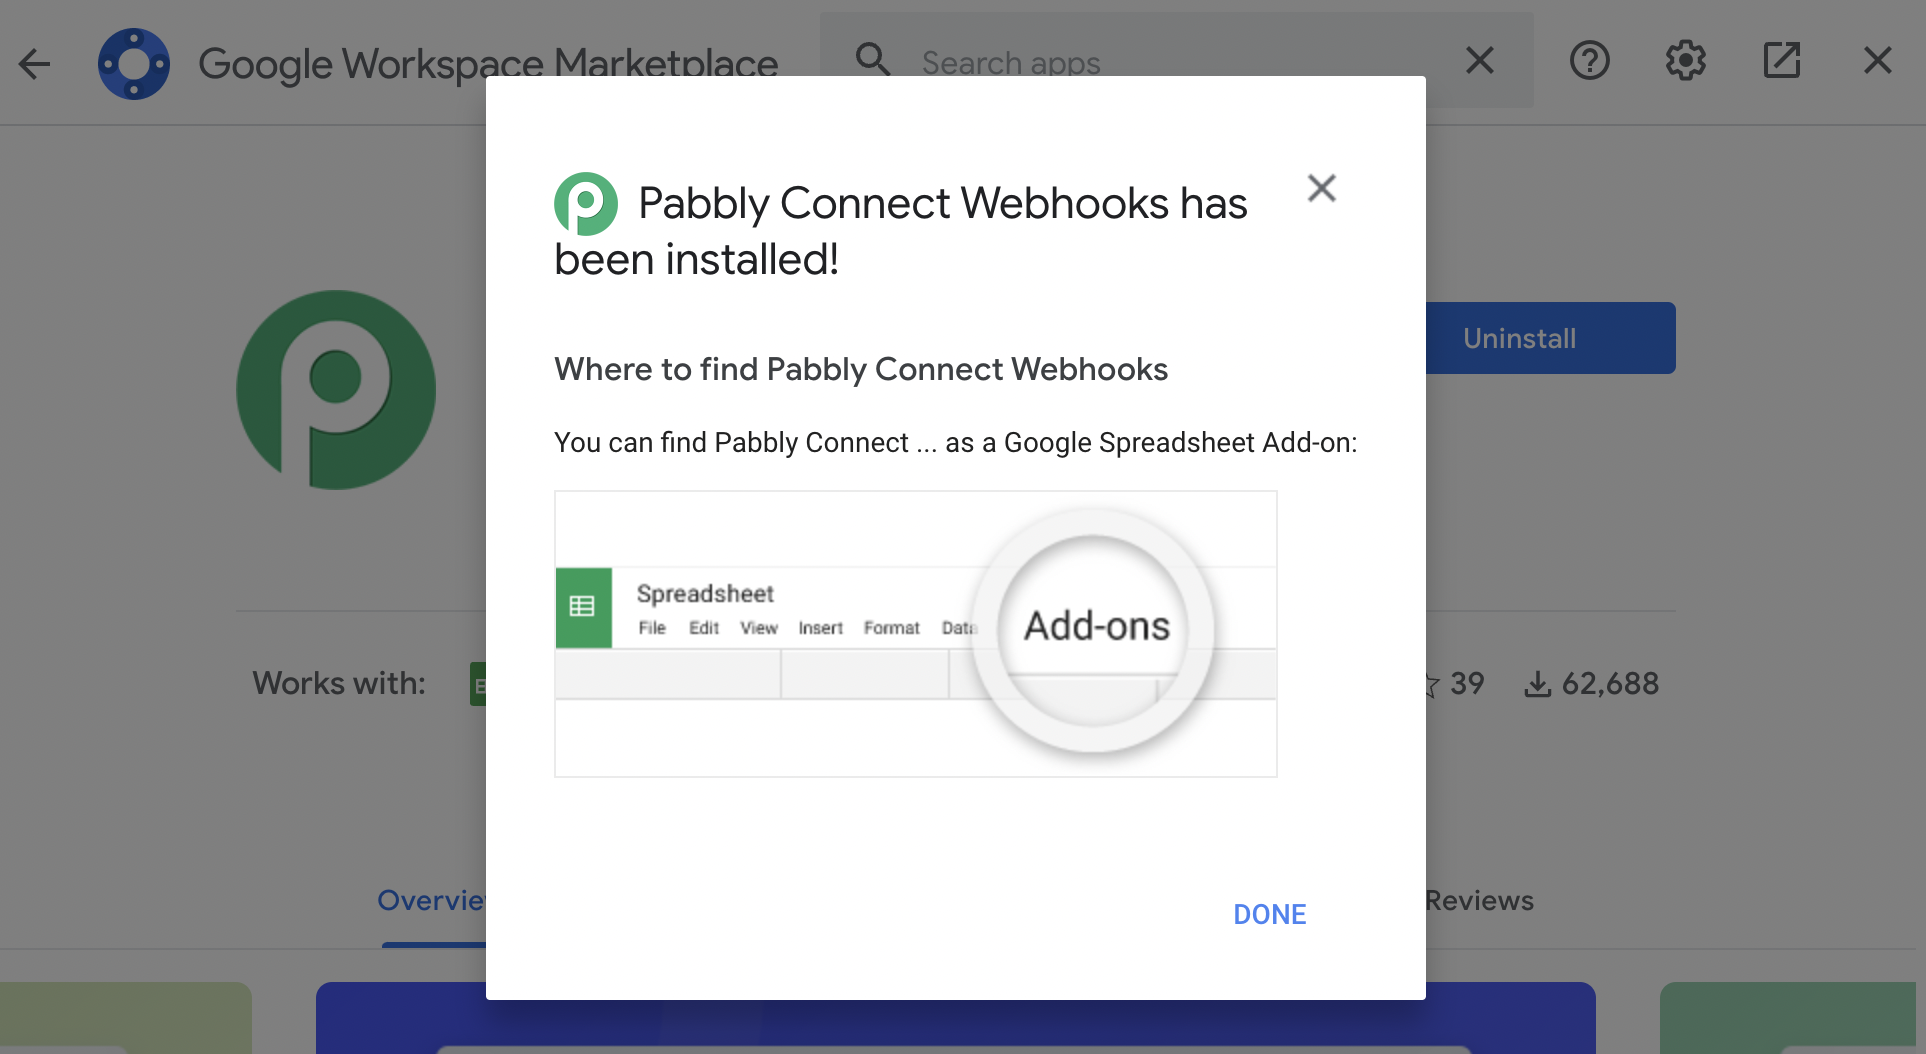
Step 4: Choose the account for which you want to download the extension, give necessary permissions. Upon successful installation, you will see the following screen. Click on Done. Refresh the page.
Step 5: Again navigate to Extensions->Pabbly Connect Webhooks->Initial Setup

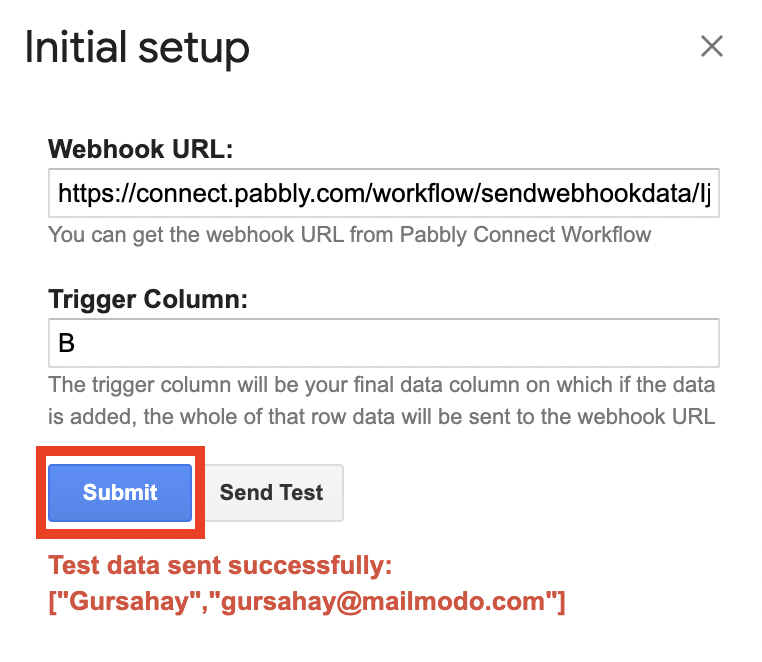
Step 6: A dialogue box will open, paste the webhook URL copied from Pabbly.
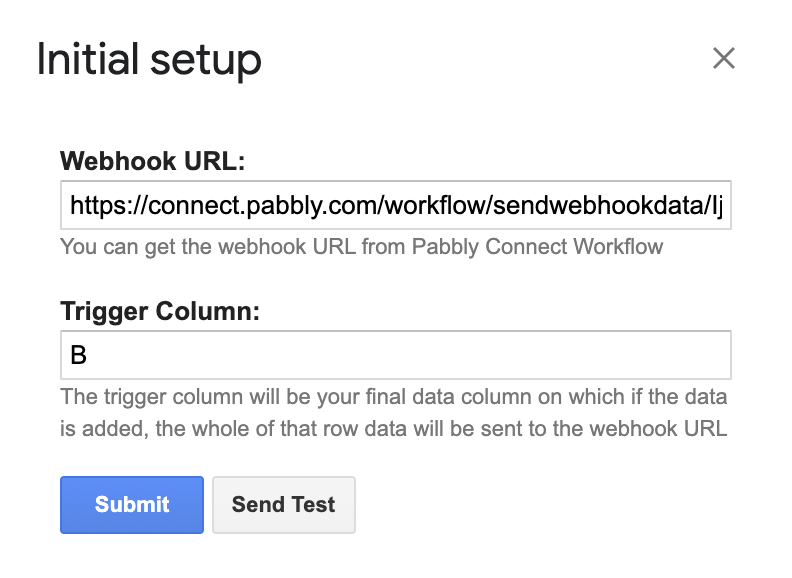
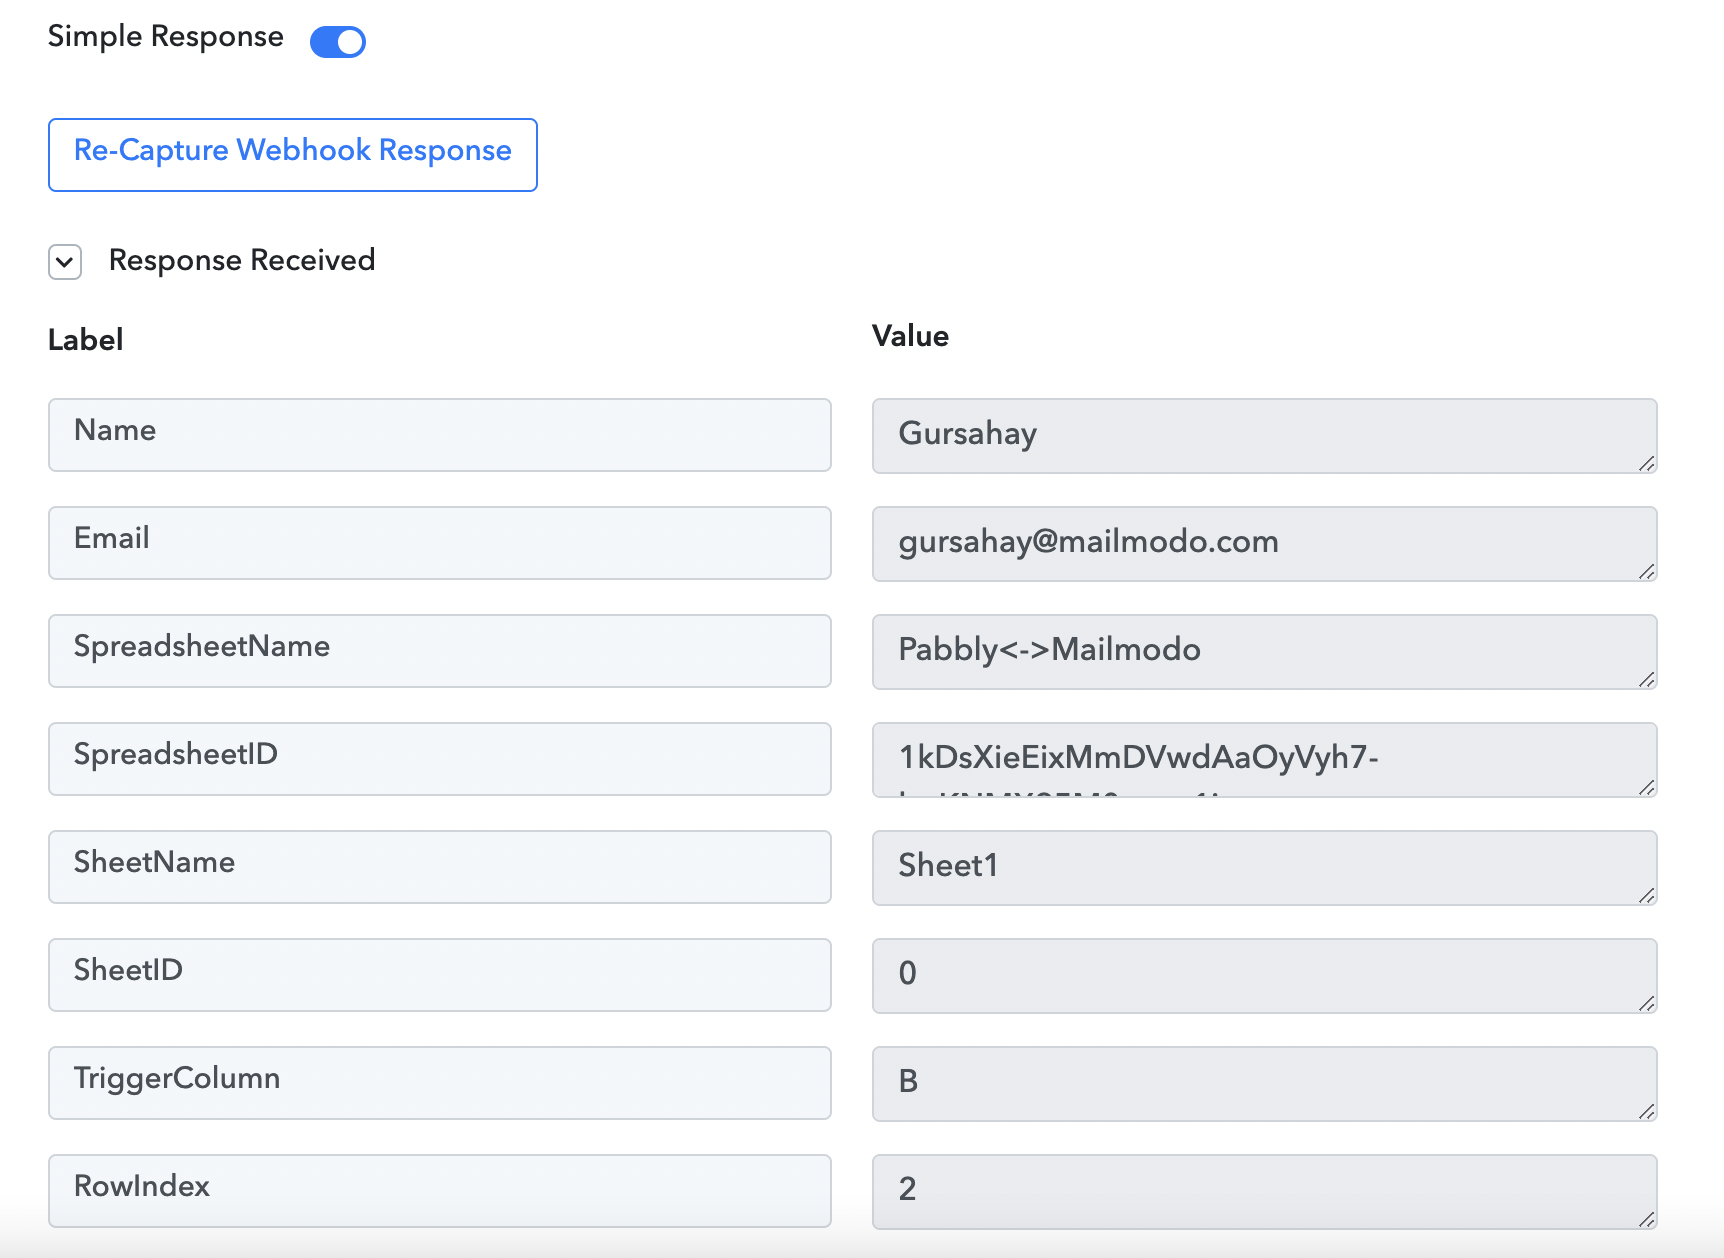
Enter Trigger column. Trigger column will be your final data column on which if the data is added, the whole of that row data will be sent to the webhook URL.
For the spreadsheet above (see image), the last data column in B. So, trigger column for this spreadsheet is B.
Note- Be careful while entering the trigger column. Wrong value will not trigger the webhook or incomplete data will be sent.
Step 7: Click on Send Test. Your screen should look like this.
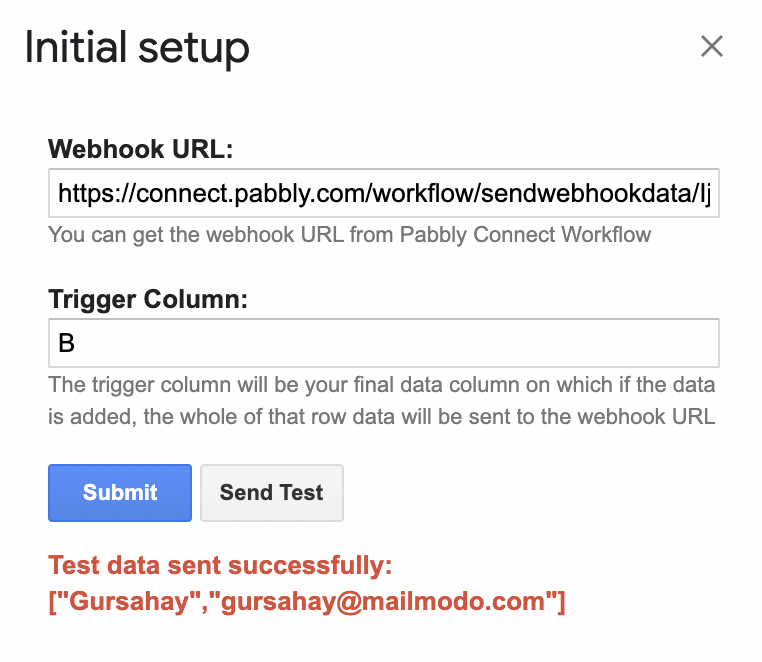
Go back to Pabbly, you should be able to see the Webhook response.
Step 8: Click Submit on the Initial Setup dialogue box (in google sheets). Your initial setup is now saved.
Step 9: Navigate to Extensions->Pabbly Connect Webhooks->Enable Send on Event
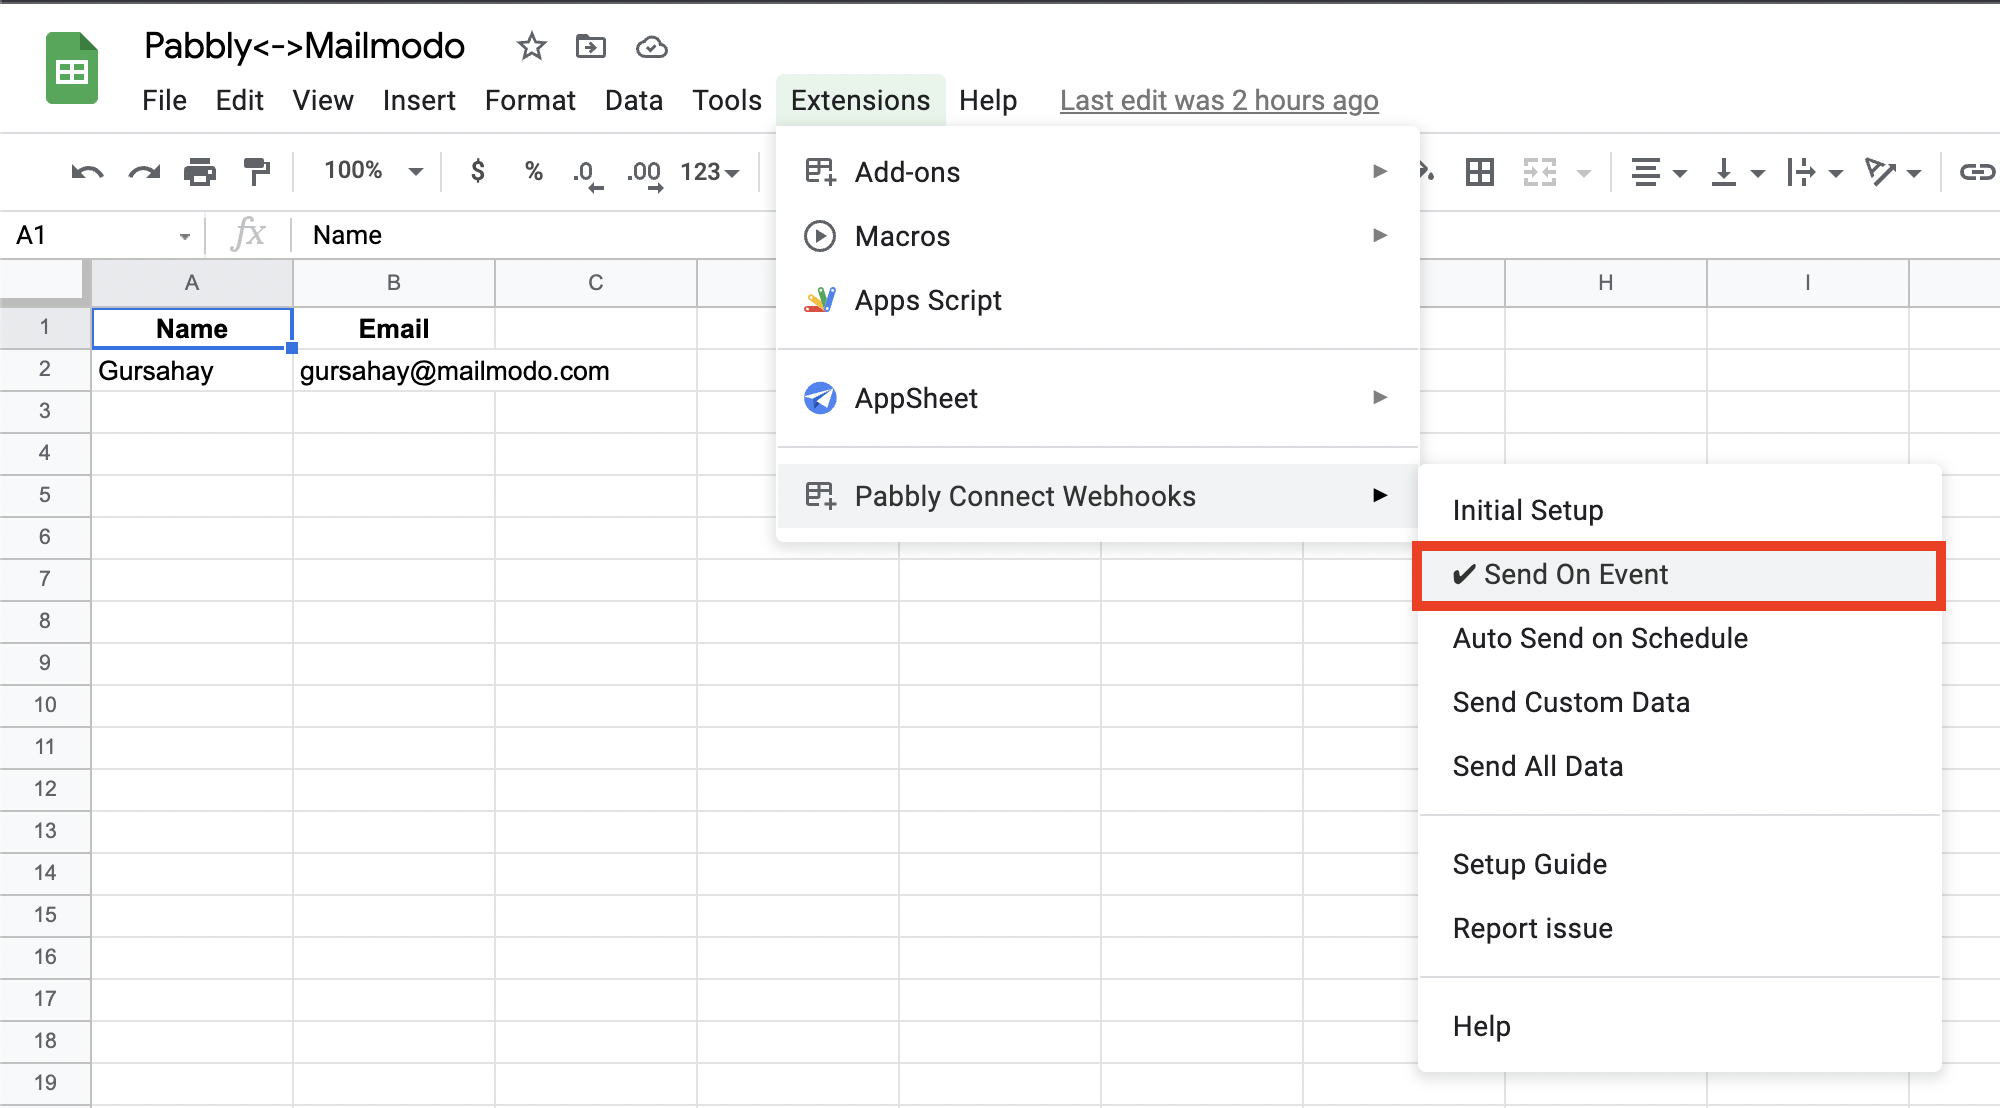
If you are manually making the change in the Spreadsheet, the updated data will be sent immediately to Pabbly Connect. Ensure enabling the Send on Event option in the add-on.
If the change is made through an external platform besides Google Forms in the Spreadsheet, the trigger will be sent once every hour. Ensure you enable the Send on Schedule option in the add-on.

You have successfully set up the webhook in your Google Sheets as a trigger!
Configuring the Action App (Mailmodo)
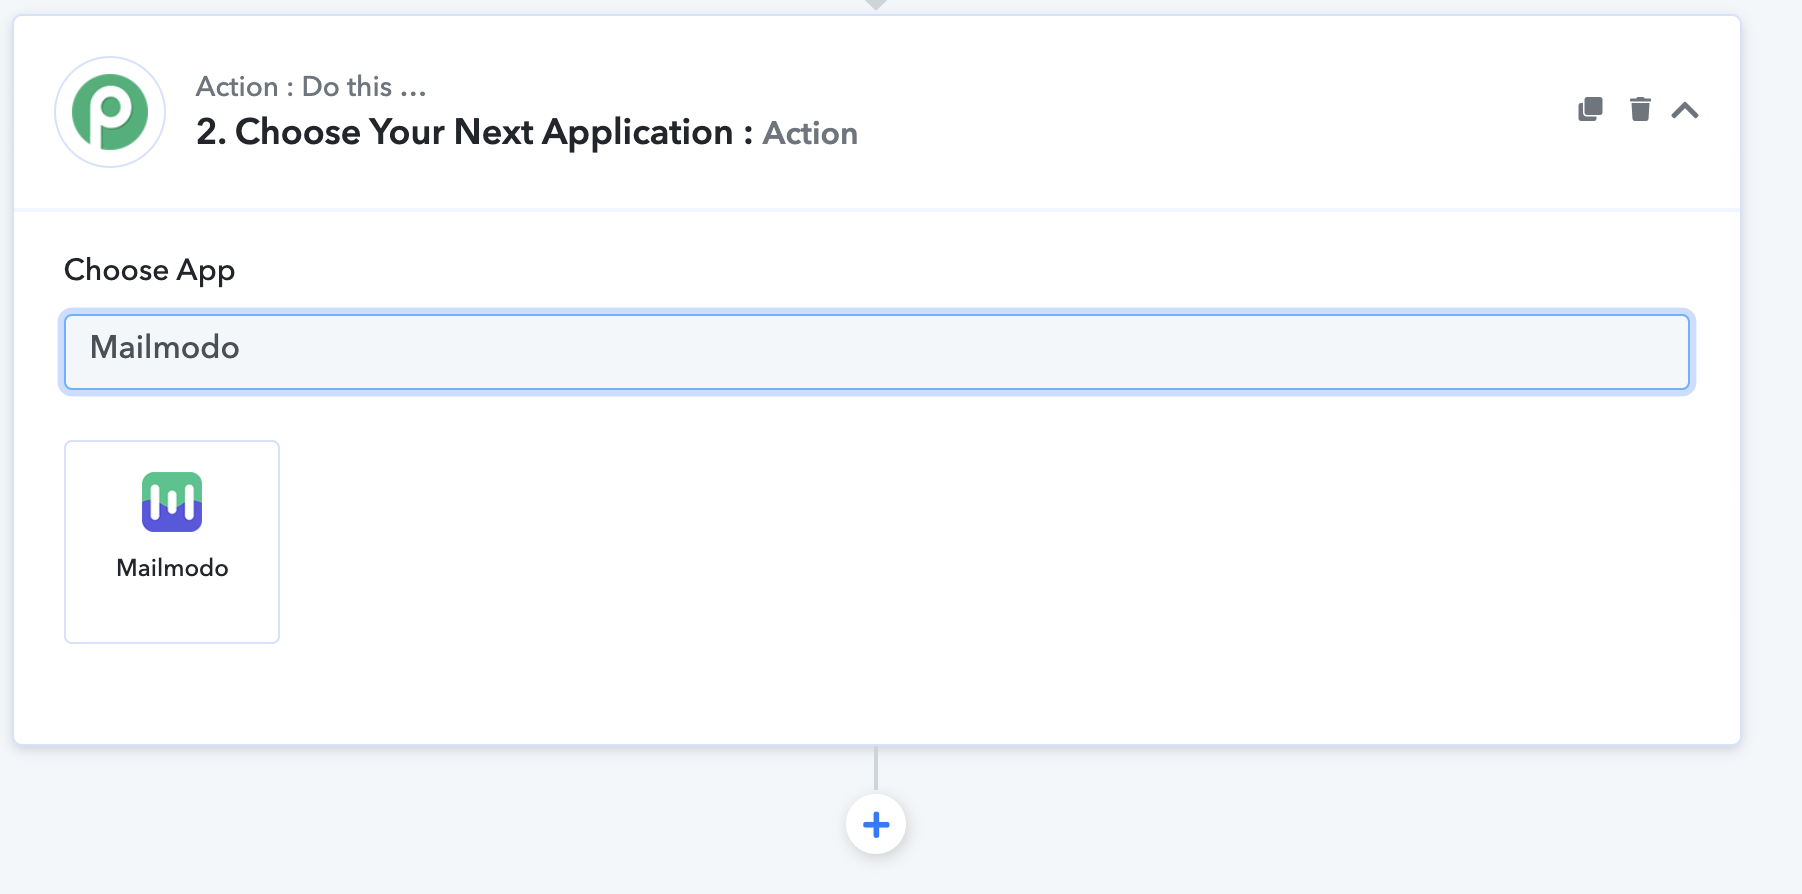
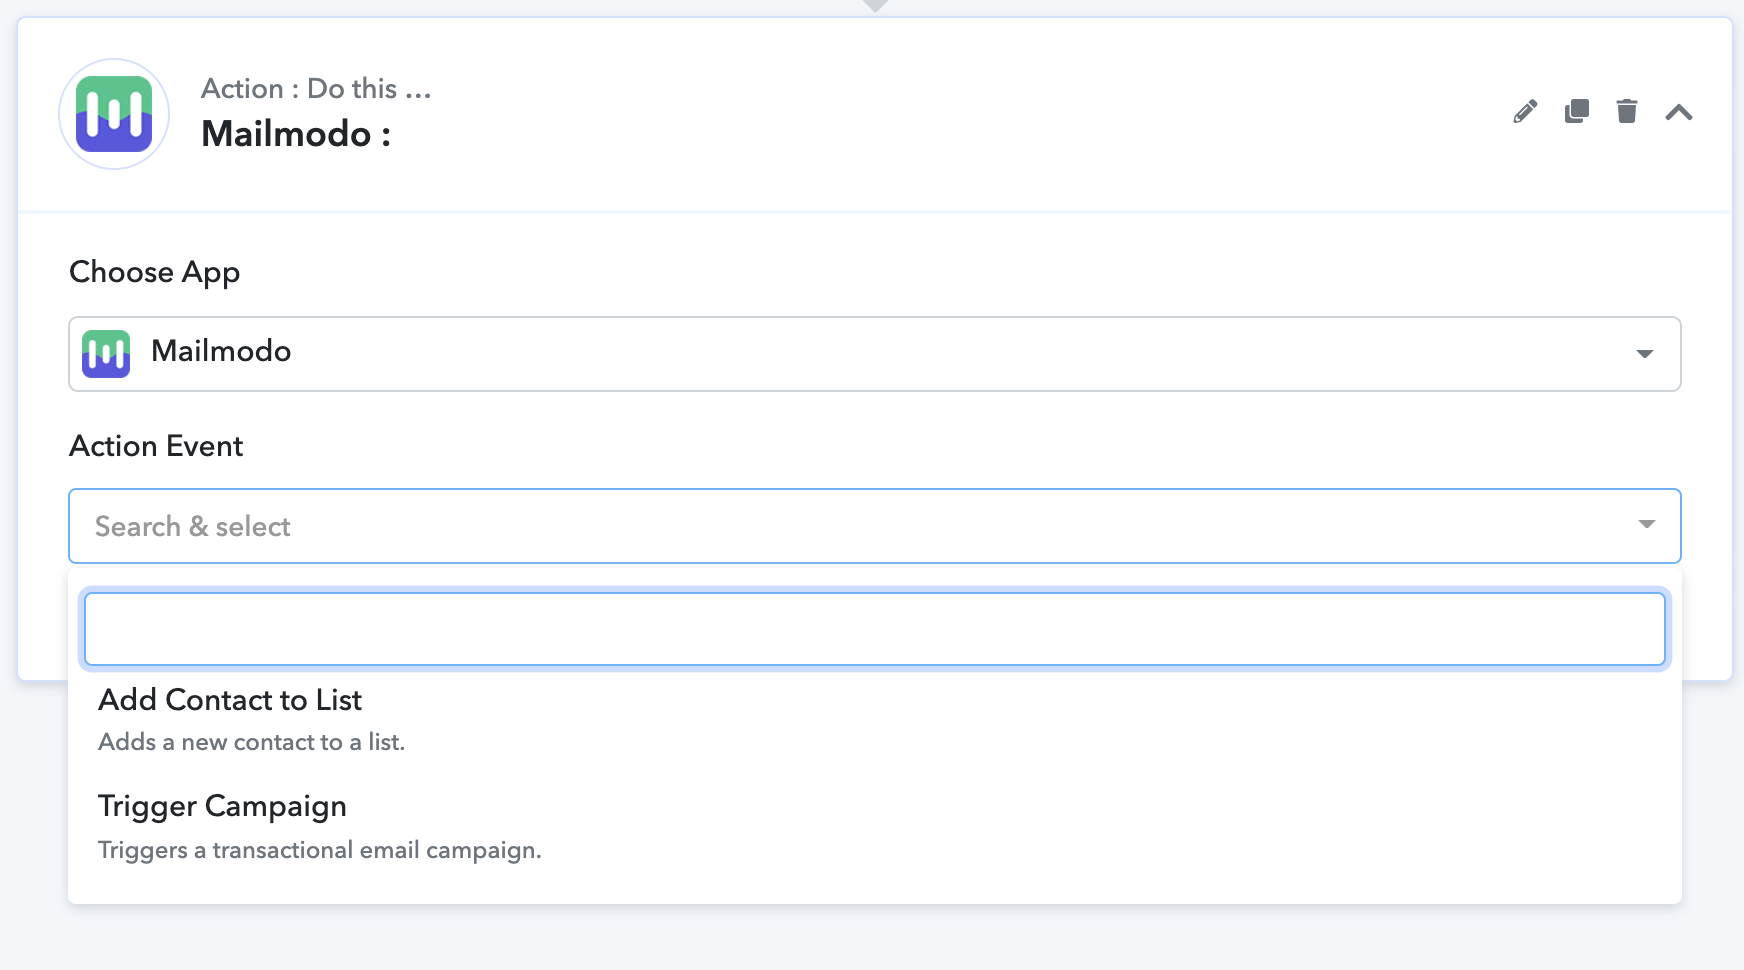
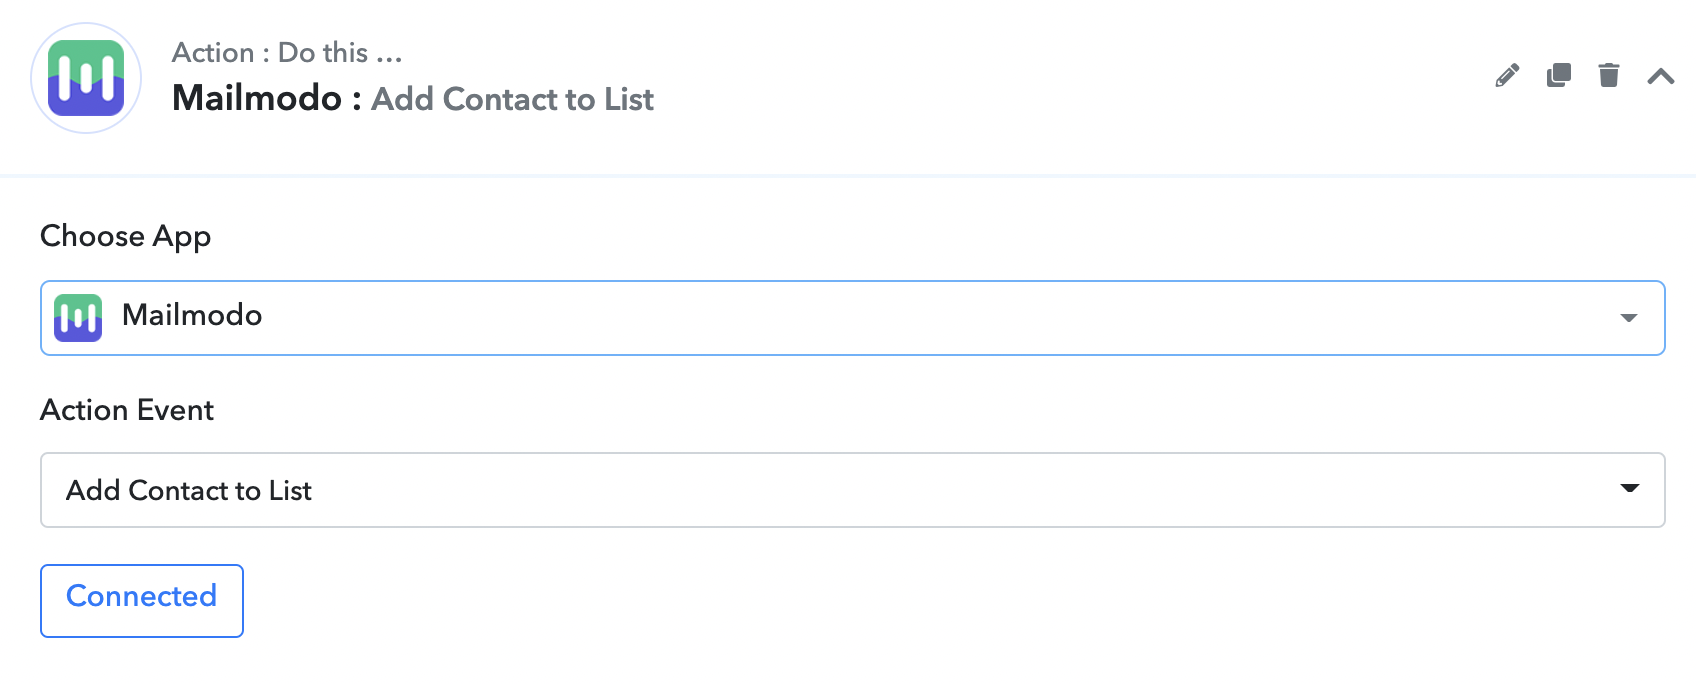
Step 1: Search and select Mailmodo as the Action app.
Step 2: Select the Action Event
Step 3: Click on Connect. A dialogue box will open. Select Add New Connection, paste the API key copied from Mailmodo.
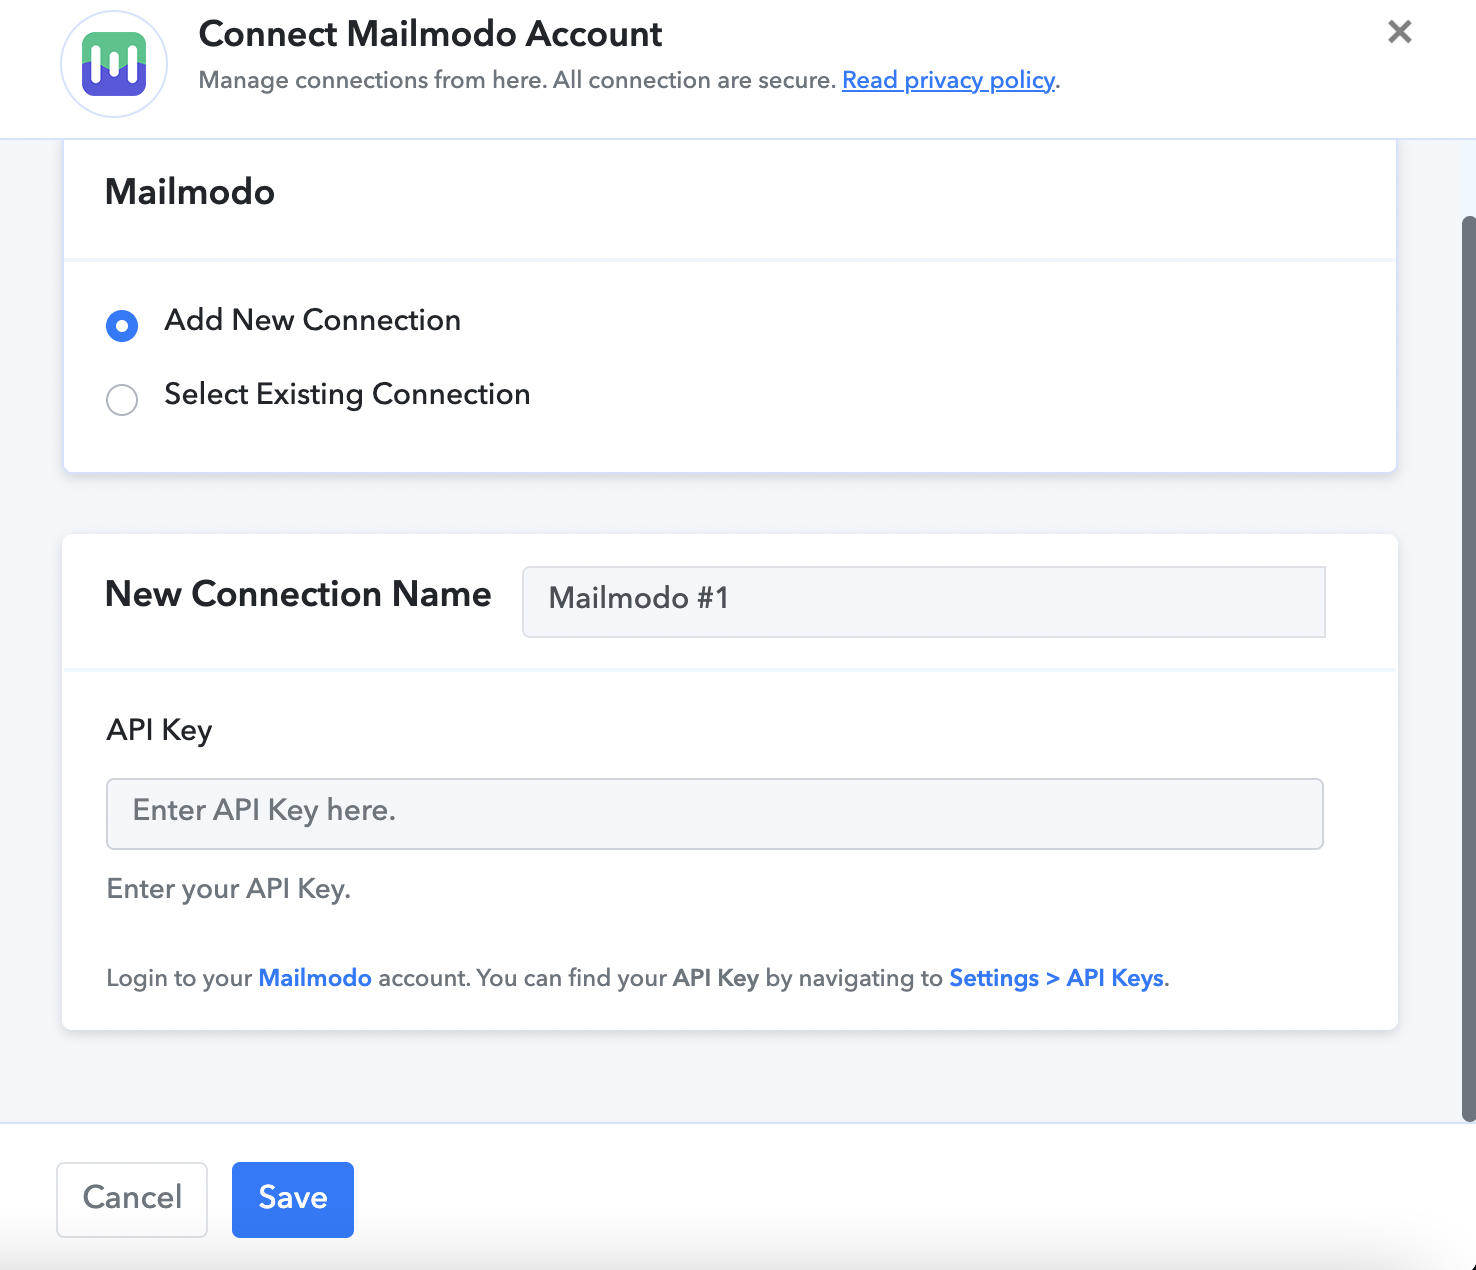
Click on Save. Your Mailmodo account is now connected.
Trigger Campaign
After connecting your account and selecting the Action event as Trigger Campaign, you need to enter the following details-
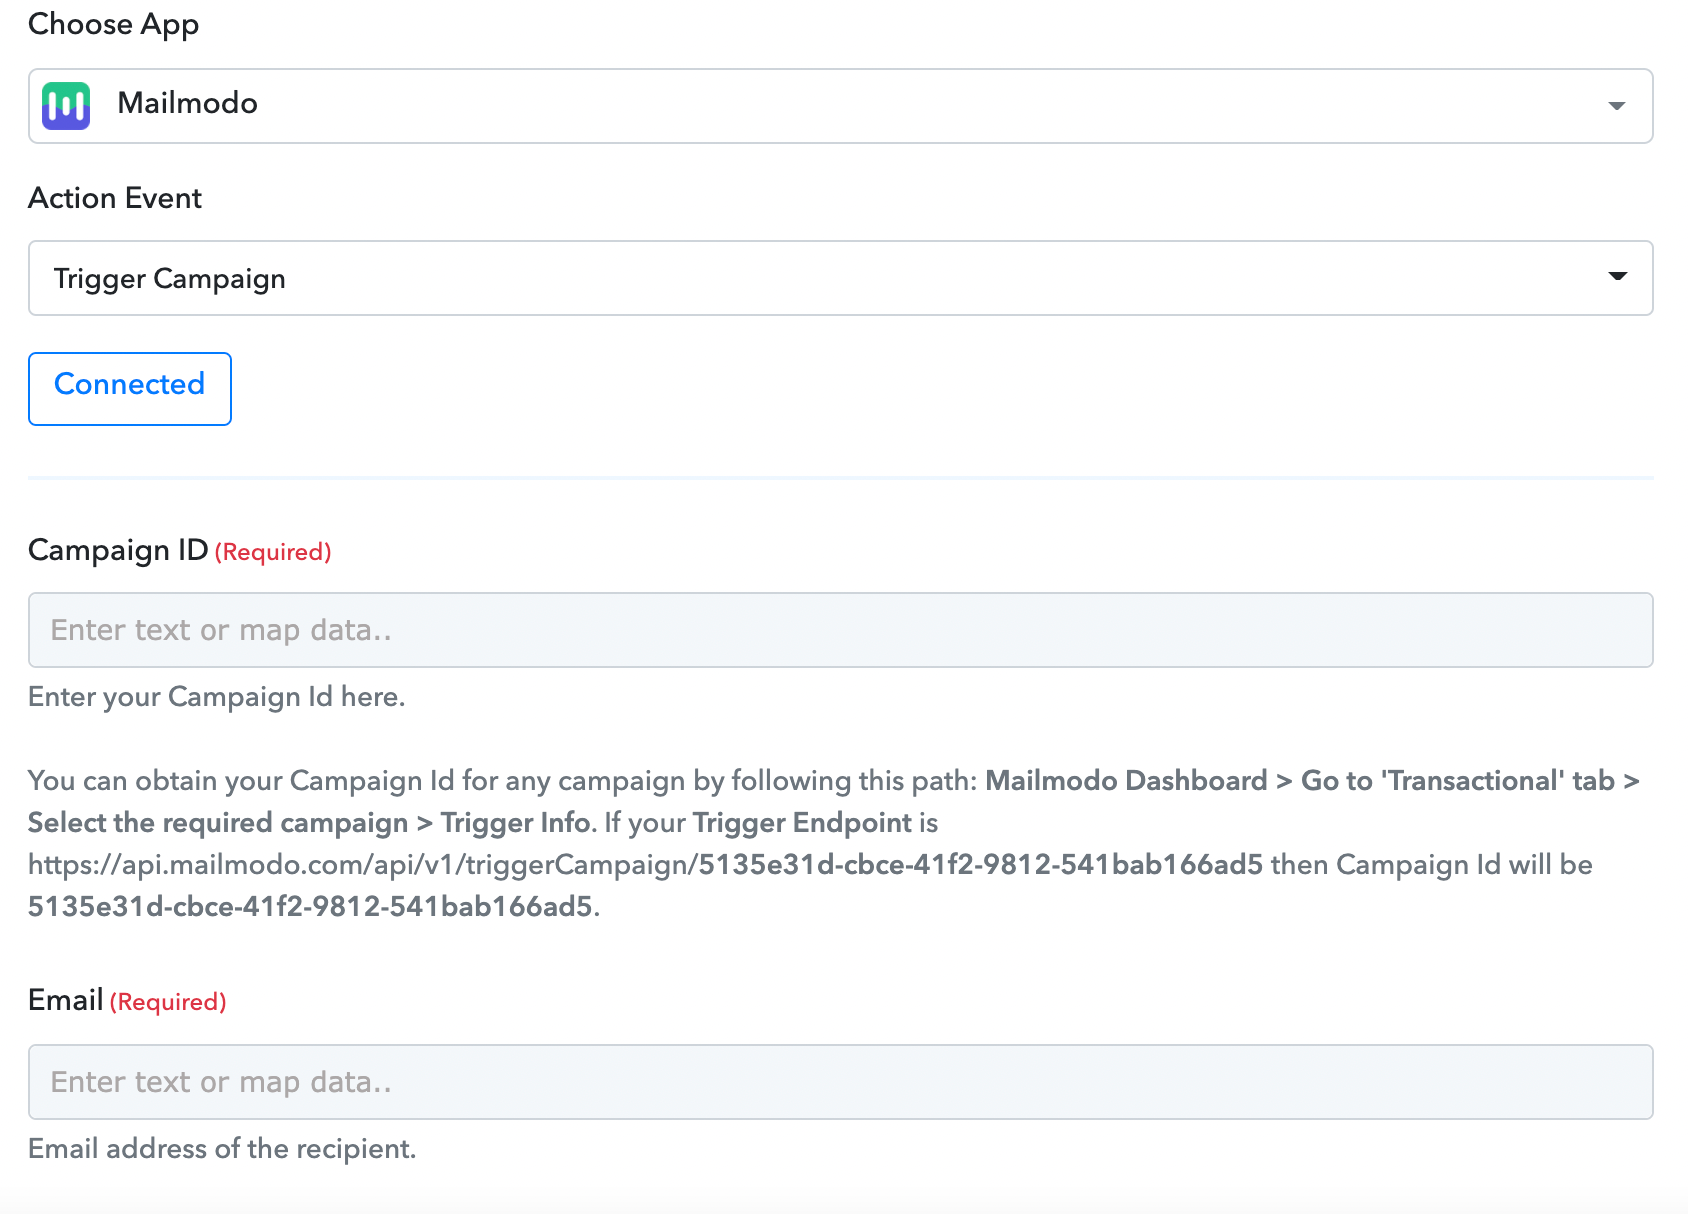
Campaign ID- To get the campaign ID, go to Mailmodo dashboard->Transactional->Select Trigger campaign->Trigger Info. The last part of your API endpoint is the campaign ID.
Email- Map it to the column in your spreadsheet containing Email ID's
Subject (Optional)- Enter subject line. If not provided, the original subject line of the campaign will be used.
Personalization Fields: Map the personalisation parameters to the respective columns in your spreadsheet eg. First Name, Customer ID etc.
Personalization should be done as shown below.
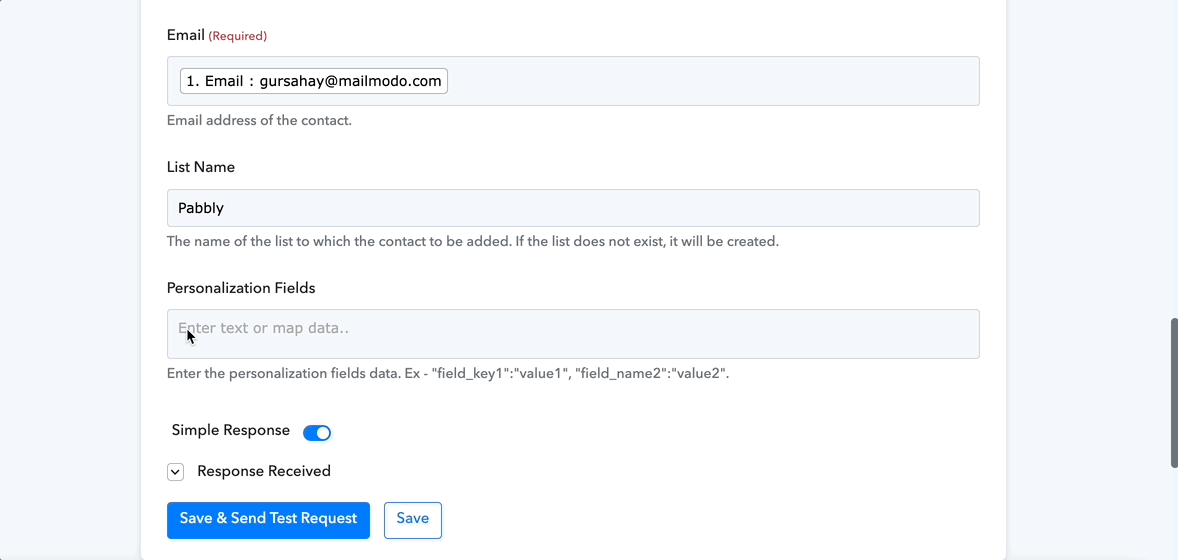
Personalization format:-
"parameter_name":"Selected_parameter_from_google_sheet"
Type the name of the personalisation key used in Mailmodo (eg. first_name) inside double quotes. Insert a colon (:). Select the parameter from Google sheet, insert it between the double quotes.
Save and Send Test request. Upon successful testing, save your workflow. Make sure your workflow is ON.
Every time a row is added or updated, the contact will be sent an email.