

How to setup Abandoned Cart Campaigns for GoKwik Cart Checkout
Last updated February 6, 2024
Key steps to setup GoKwik Checkout
- Create a template with the Gokwik widget in it.
- Get Mailmodo Trigger Campaign API endpoint.
- Get Mailmodo API Key for GoKwik.
- Finalise the ‘Wait time for the campaign’ to be shared with the GoKwik team.
- Share details with the GoKwik Team.
Step by step guide to setup abandoned cart campaigns for GoKwik Cart Checkout
1. Create template and add the GoKwik widget
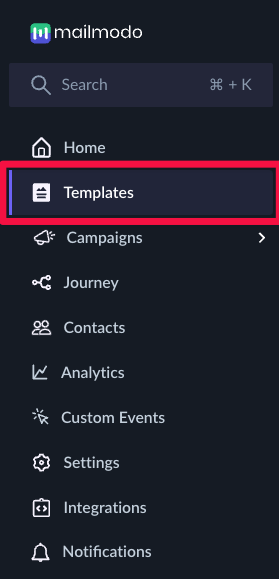
Step 1: Go to the ‘Template’ section.
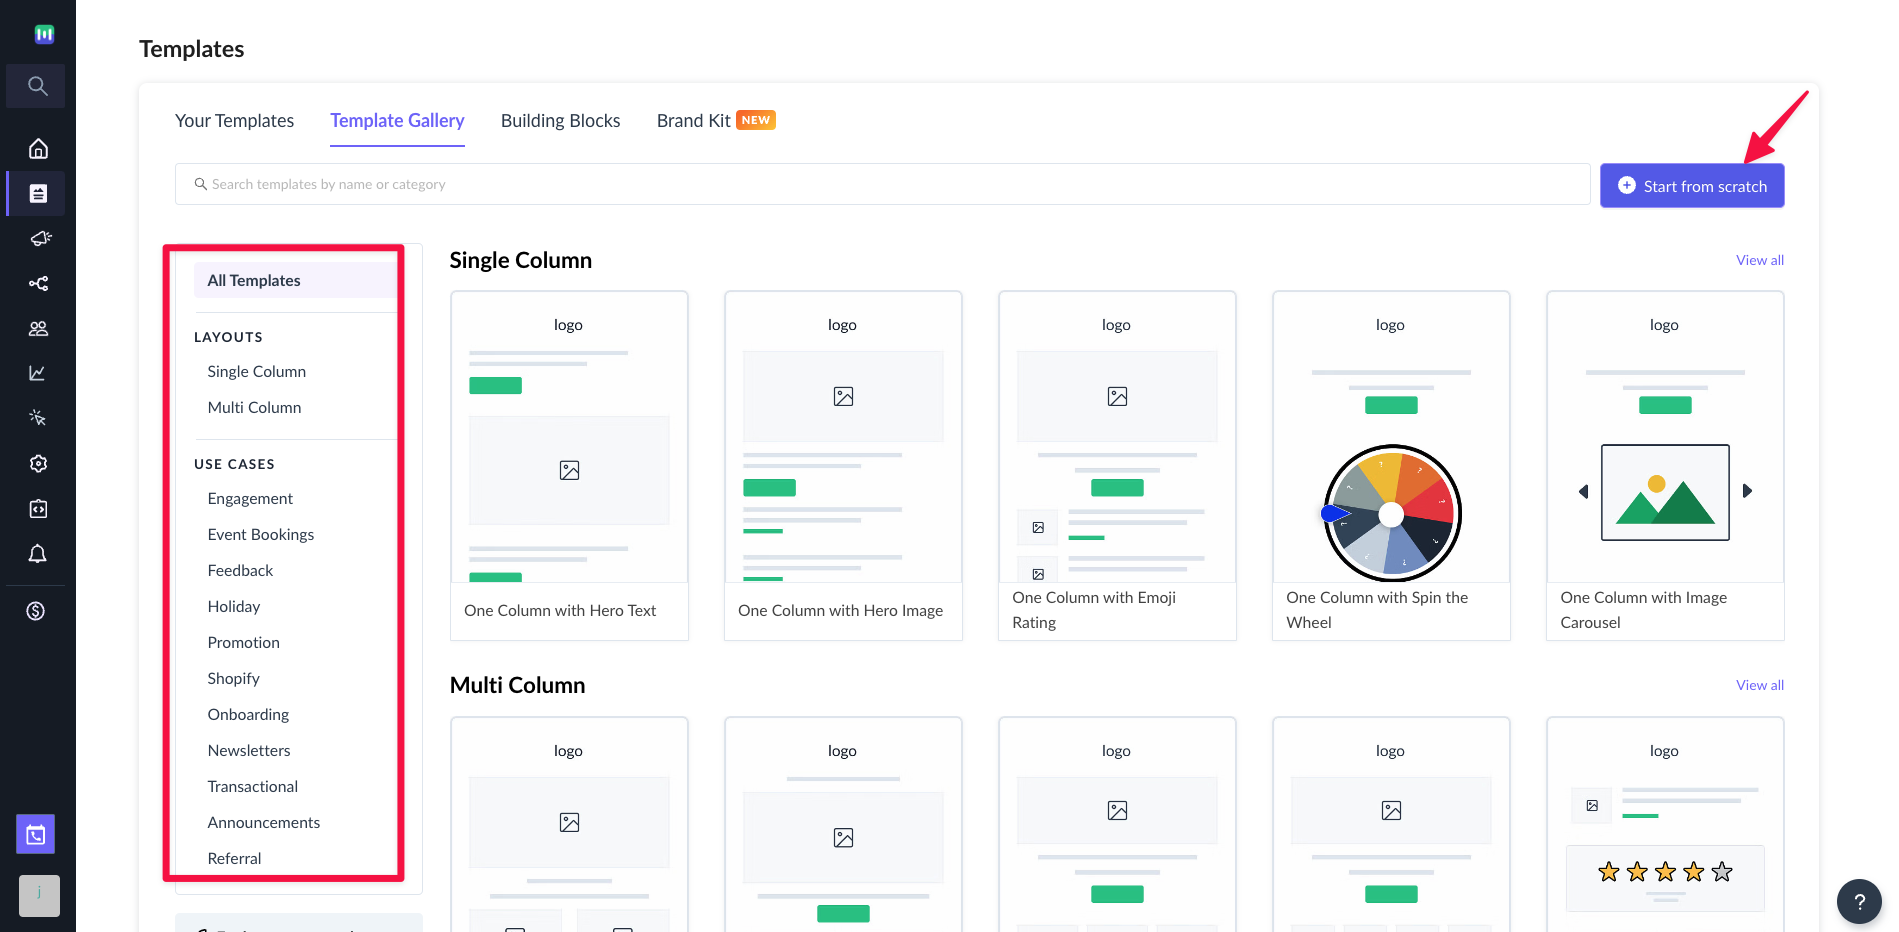
Step 2: Click on ‘Create new template’ button.

Step 3: Choose a blank template or any pre-made template.
Step 4: In the editor, edit the content as per your design.
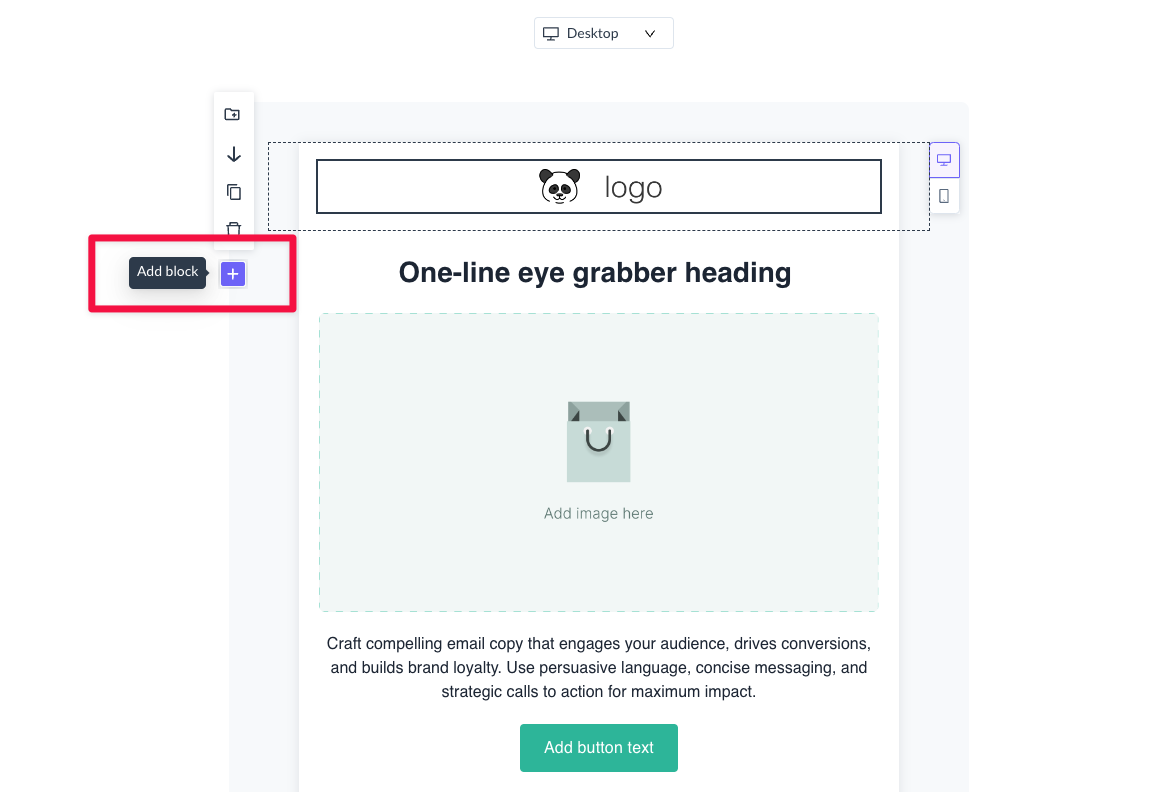
Step 5: To add the GoKwik widget, Click on the plus (+) button to add a new widget.
Step 6: Click on more (...) button to open the widget section.
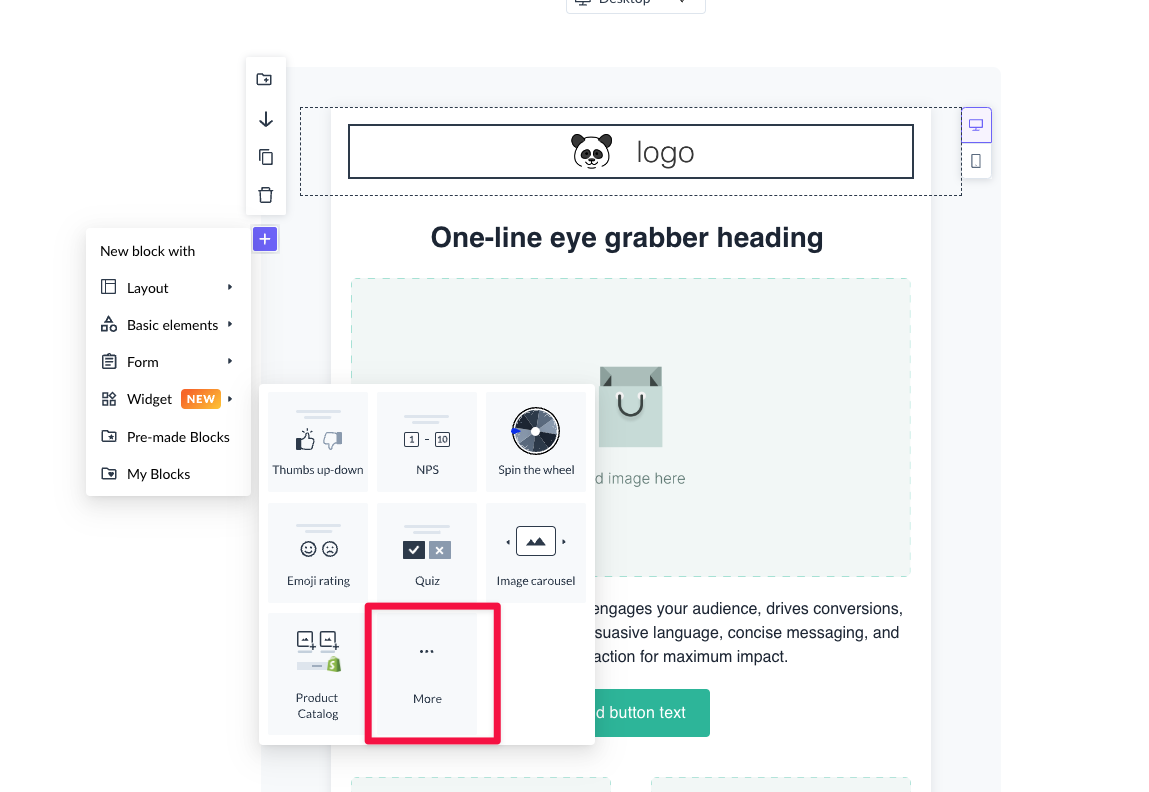
Step 7: Click on the GoKwik box to add in the editor.
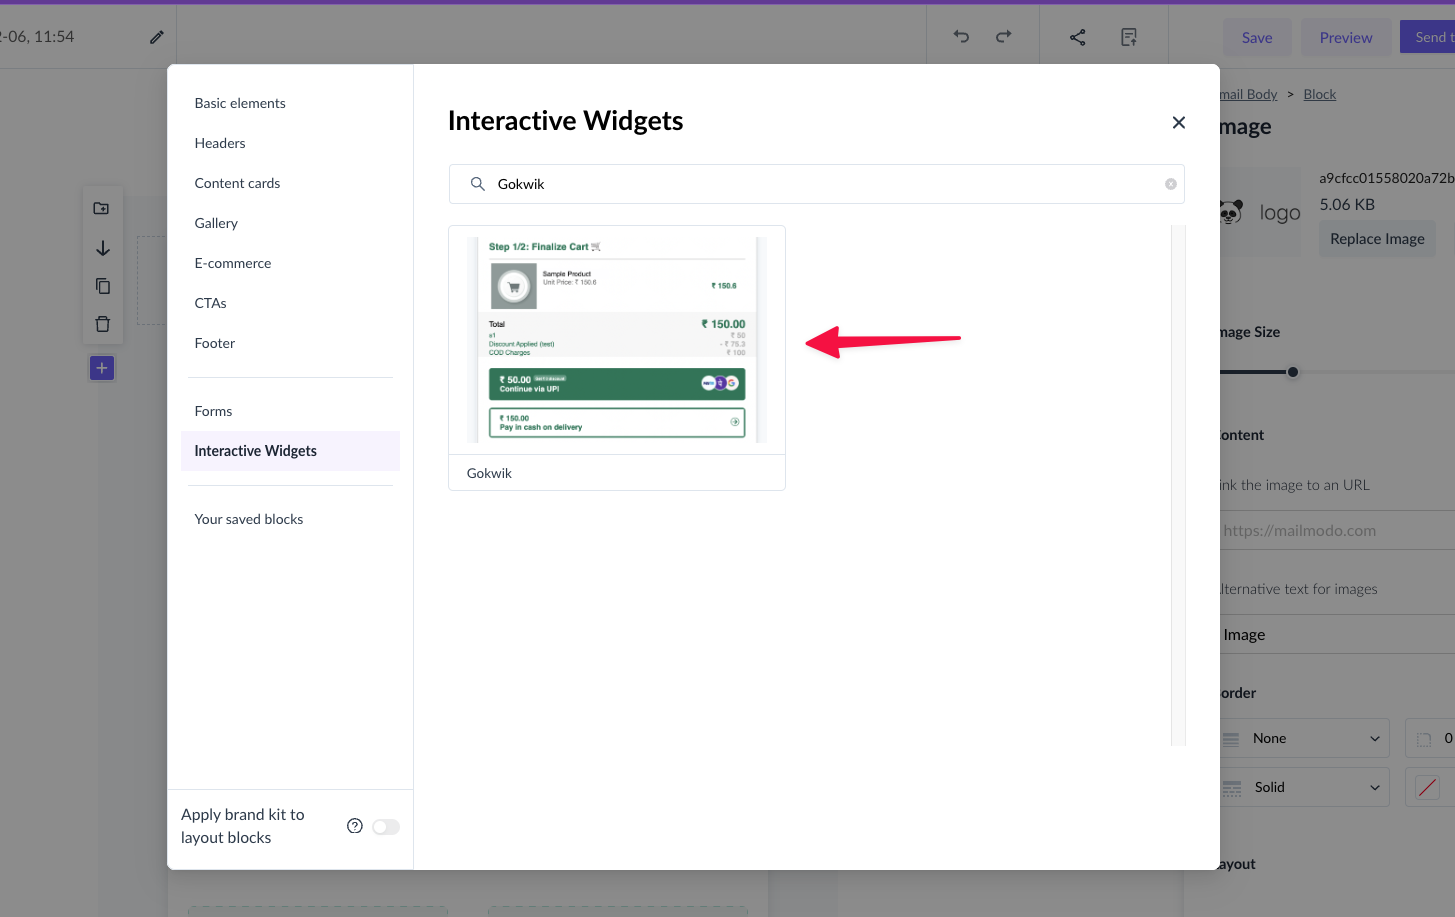
Your template is ready. You have edited the content and added the Gokwik widget in the template.
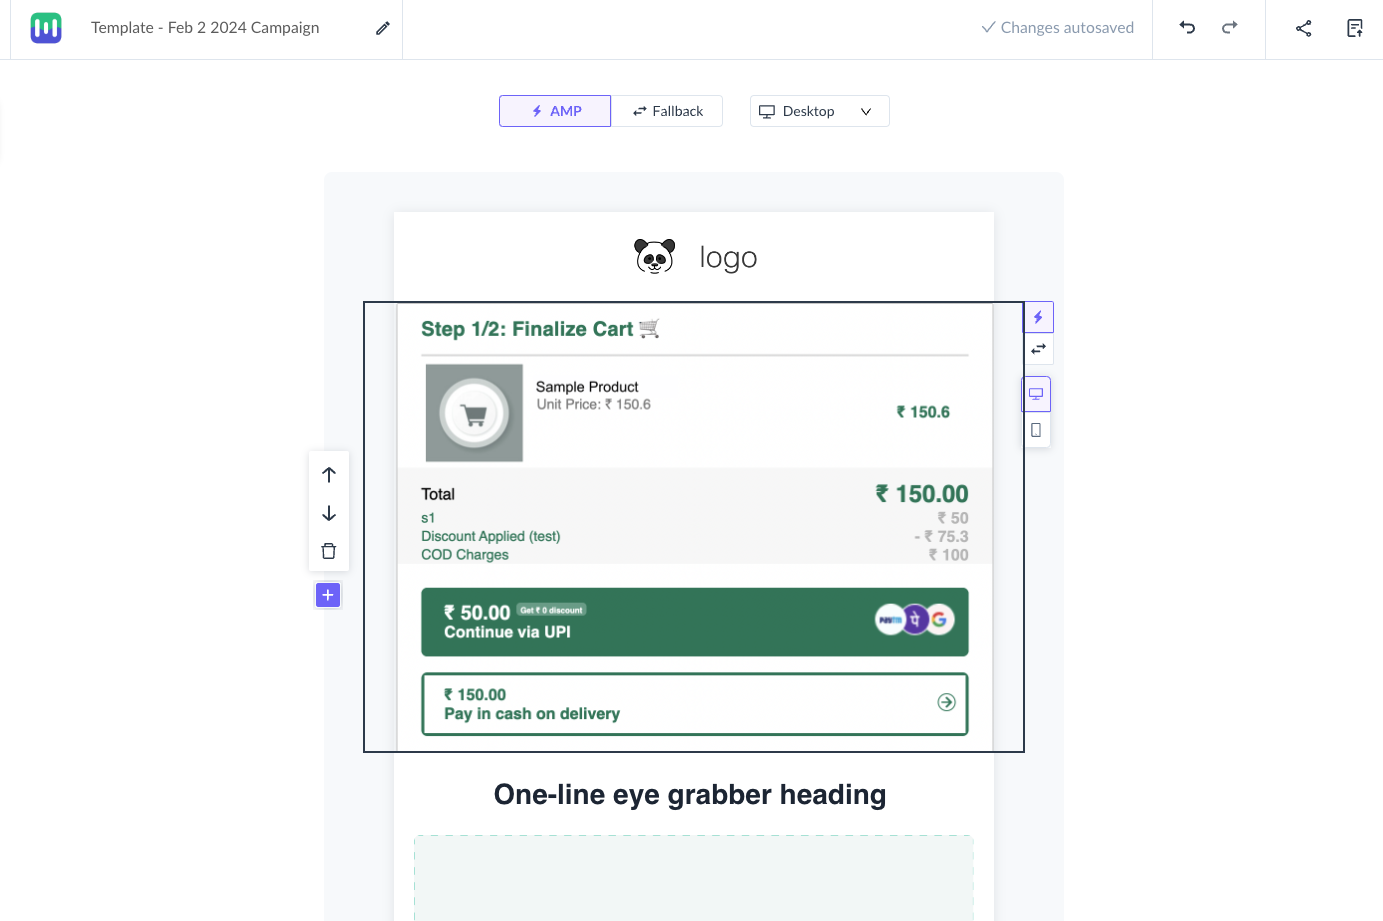
Now, you need to create a ‘Trigger campaign’ for this template to get the ‘Mailmodo Trigger Campaign API endpoint’.
2. Get the Mailmodo Trigger Campaign API endpoint
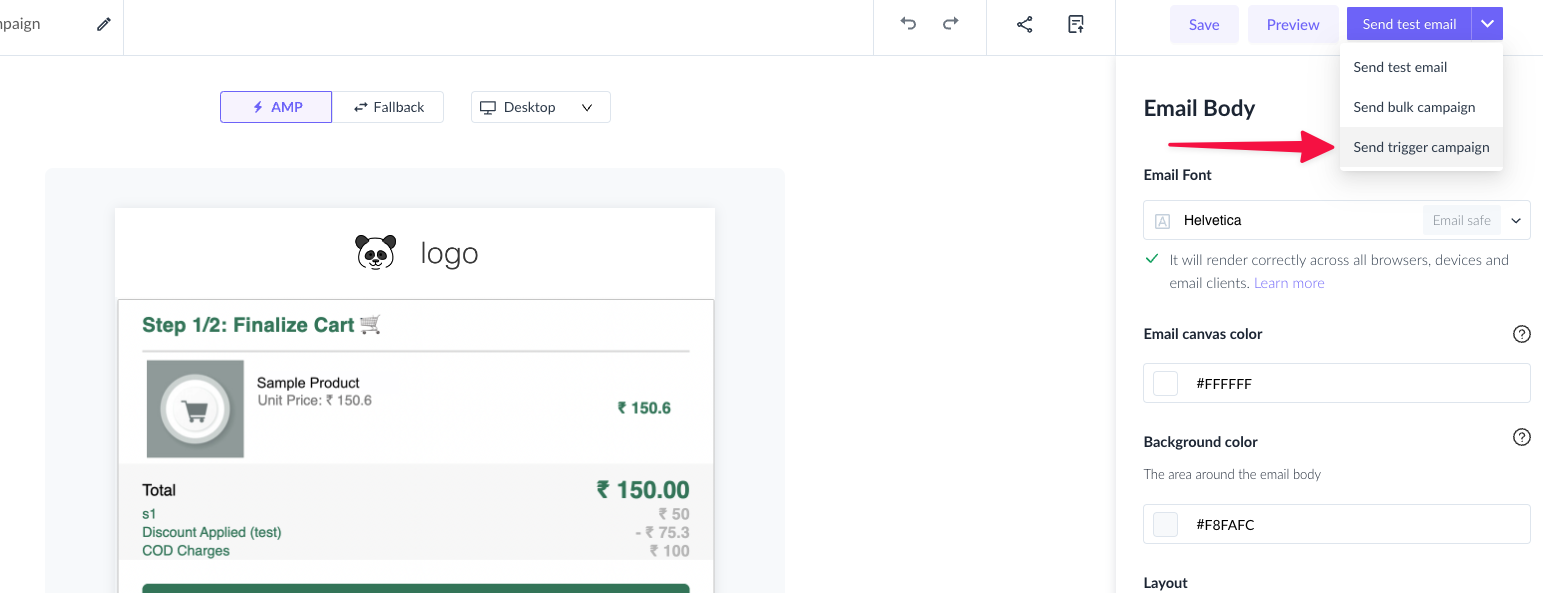
Step 1: Once the template is created. Click on the ‘Send Mail’ button in the editor to create a new trigger campaign.
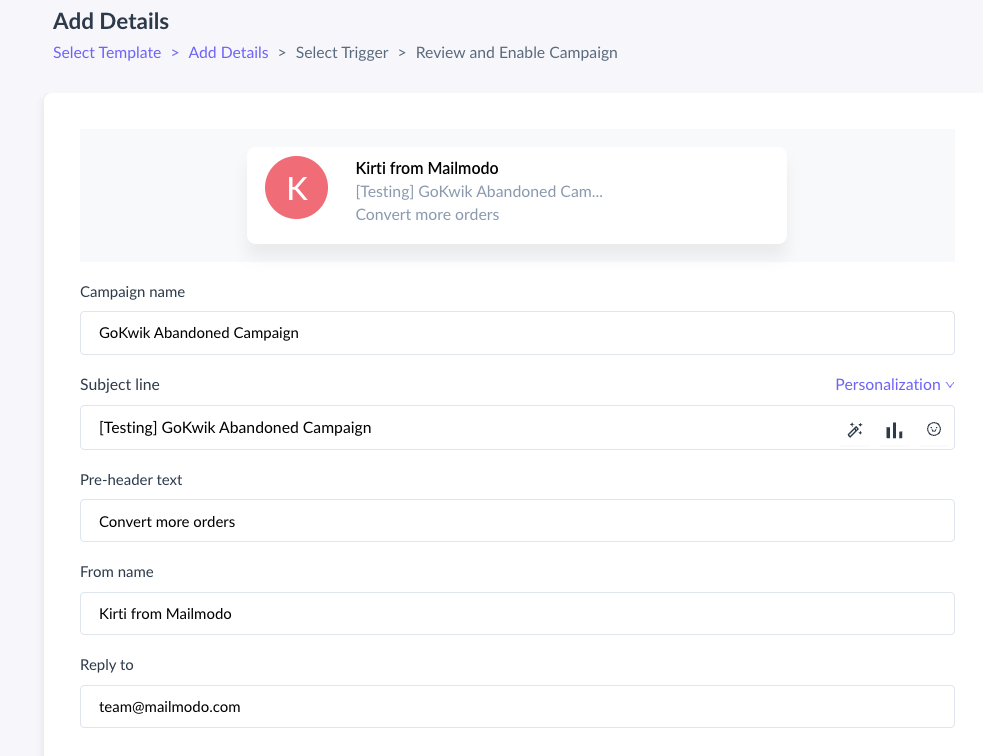
Step 2: Add ‘Campaign Name’, ‘Subject’, ‘Pre-header’ and ‘Reply to email address’ in the ‘Add details’ section.
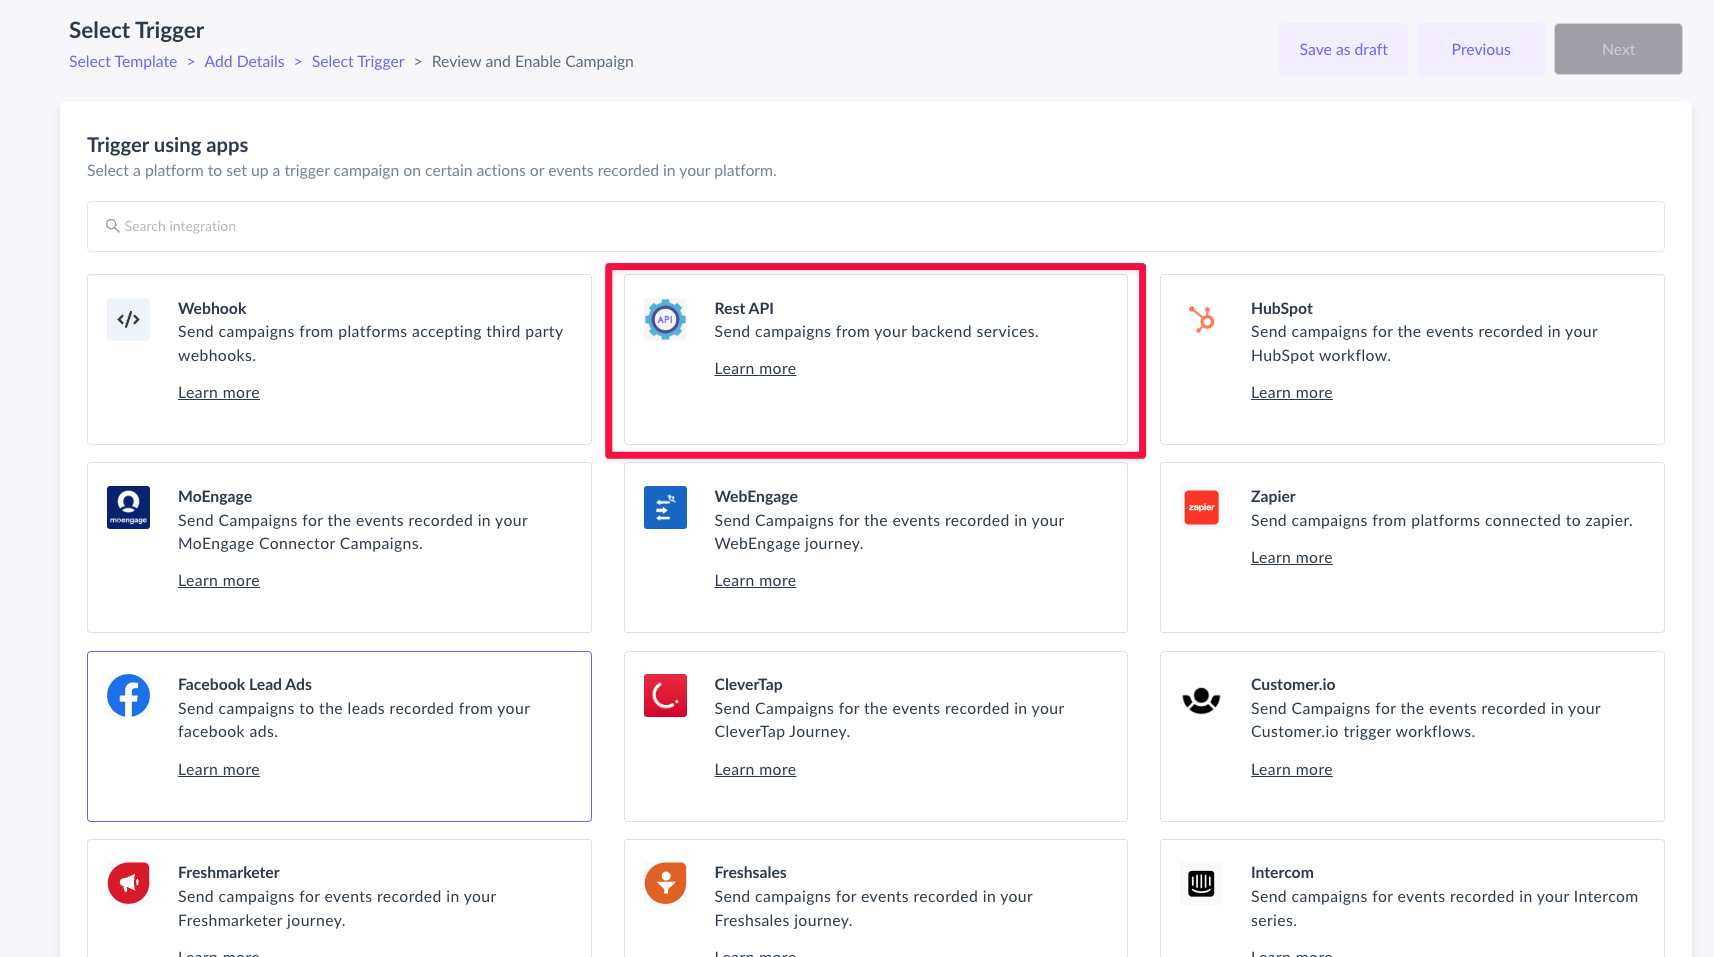
Step 3: Select ‘Rest API’ option in the ‘Select contact’ section. Click ‘Next’ to enable the campaign.
Step 4: Click on ‘Enable Campaign’ to get the ‘API endpoint URL’.
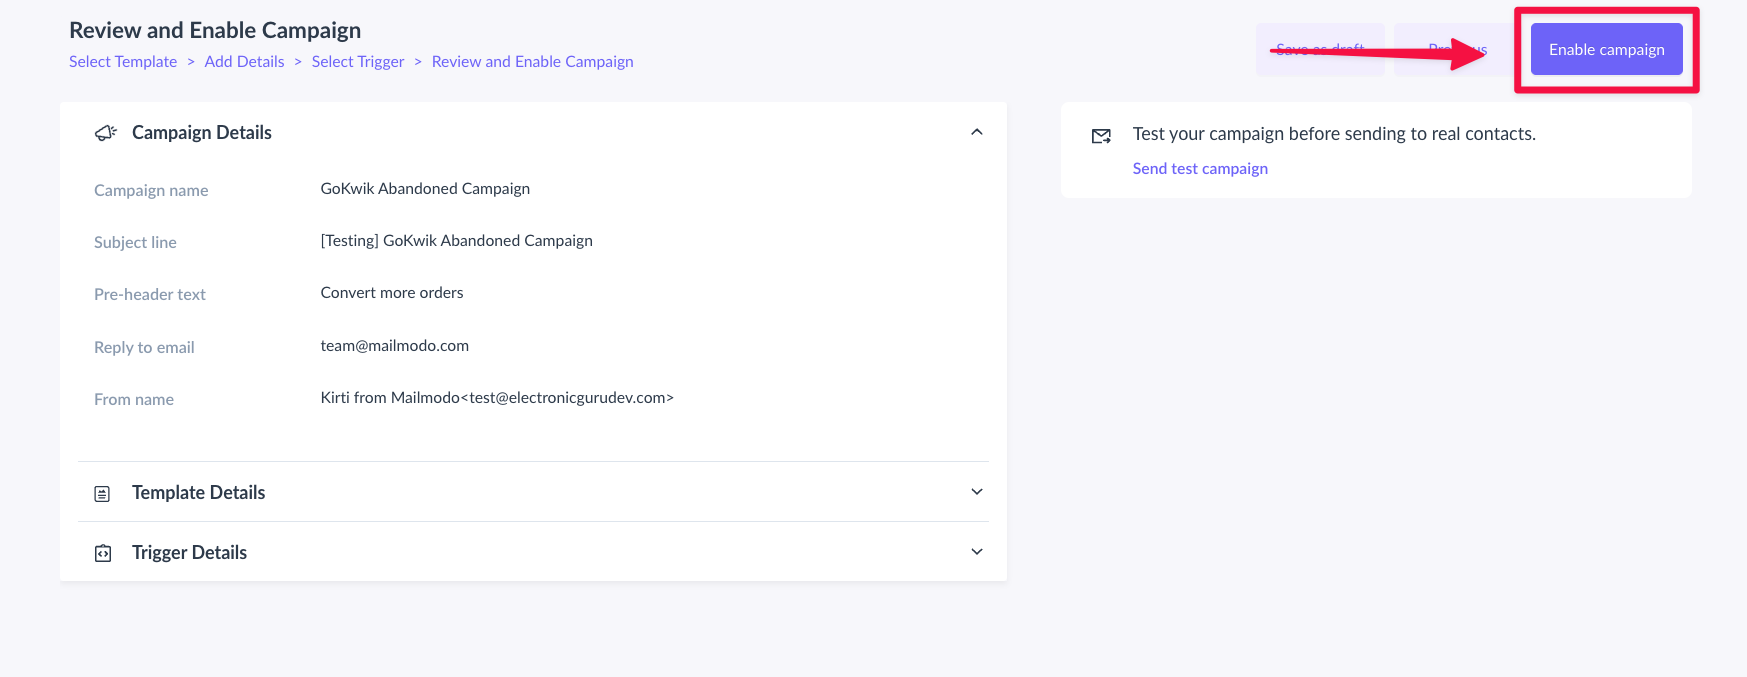
(Enabling a campaign is a step to finalise the campaign to get the API endpoint URL, it does not mean that the campaign is being sent to any of your contacts.)
Great! You are on the trigger info page.
In the first box you would see your API endpoint of this campaign.
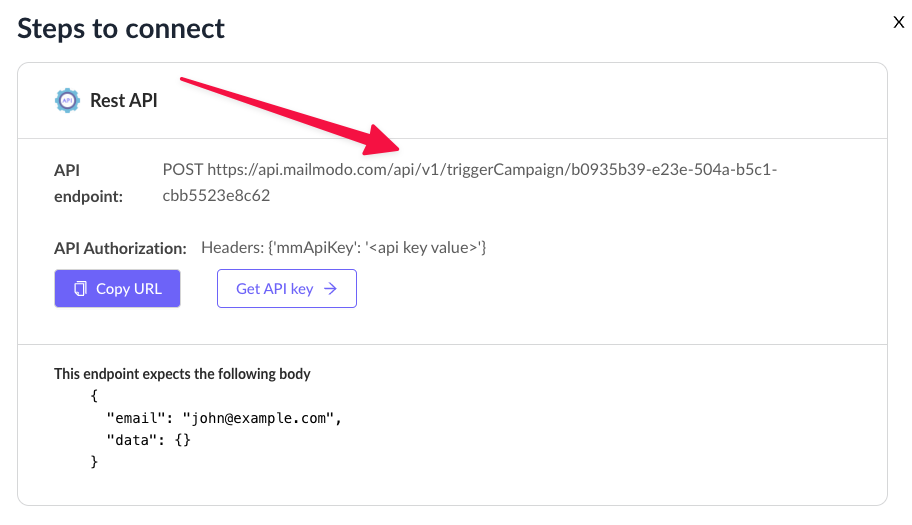
You need to share the same API endpoint with the GoKwik team.
3. Get the Mailmodo API Key for GoKwik setup
Step 1: Click on Get API Key button in the API endpoint box.
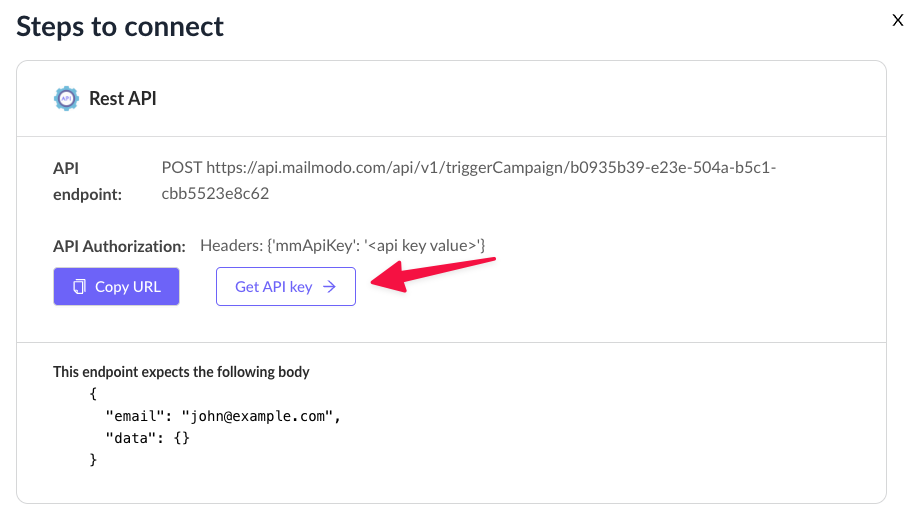
It would take you to the API key page in the settings section.
Step 2: Click on Add New API key to create a API Key for your GoKwik setup.

Step 3: Enter the name of the API key as GoKwik and click on OK to create the API Key.
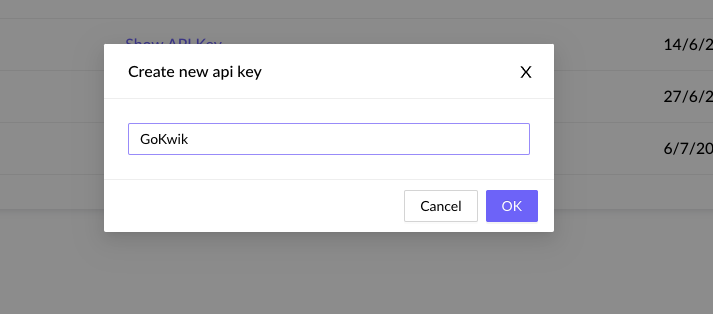
Your GoKwik API key is created.
Step 4: Click on ‘Show API key’ to reveal the API.
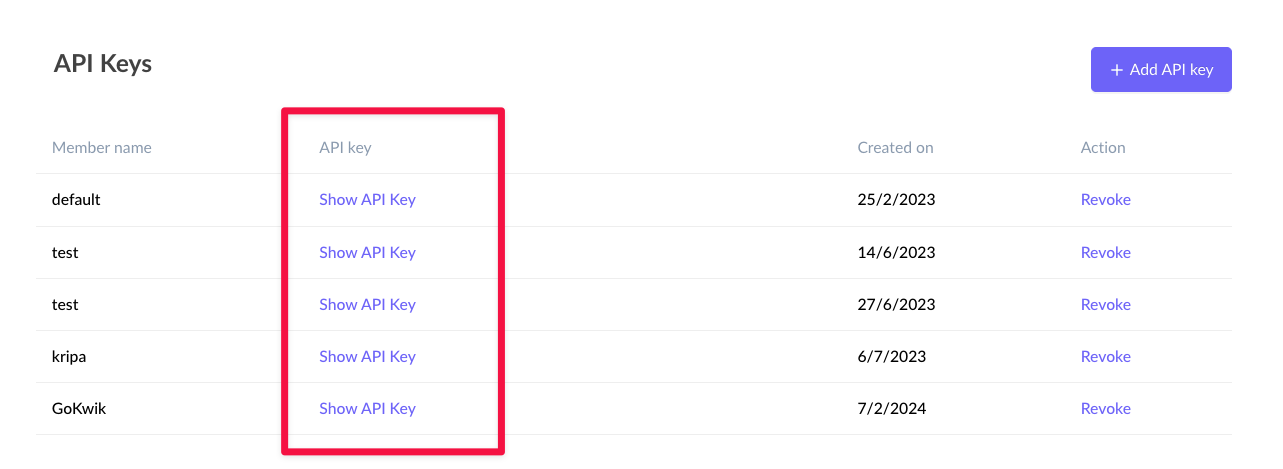
Step 5: Copy the ‘API Key’ and share with the GoKwik team.
3. Meaning of ‘Wait Time for the campaign’
It is the delay time in minutes, hours or days which you want to set for the campaign to be sent to the contact after they leave the items in the cart. Strategise on your end for a suitable ‘Wait Time’ and share it with the GoKwik Team. This is optional.
4. Share the following details with the GoKwik team
- Triggered Campaign API Endpoint. (Got in Step - 2nd)
- API Key (Got in Step 3rd)
- ‘Wait time’ after which the email will be sent once your customer leaves the items in the cart. (Optional)
Use this table to share details with the GoKwik team to avoid any confusion.
| # | Item | Value |
| 1. | Triggered Campaign API Endpoint | www.sampleurl.com |
| 2. | API Key | Sample Key Value |
| 3. | Wait Time for the campaign | Sample Value for (Hours/Minutes/Days) |