

Getting Started with Journeys
Last updated February 6, 2024
Journeys are automated sequences with messages and various actions that are strategically designed to guide individuals through a series of personalized interactions, aiming to achieve specific business objectives.
The goal is to deliver tailored content and communication based on individual behaviors, preferences, or responses, thereby enhancing customer engagement and driving desired outcomes for both the customer and the business.
Mailmodo journey builder helps you to do just that. Choose different trigger events, actions, conditions, and delays to design the journey.
You can build journeys such as:
- Welcome series
- Shopify order-related series
- Cart abandonment reminders
And more!
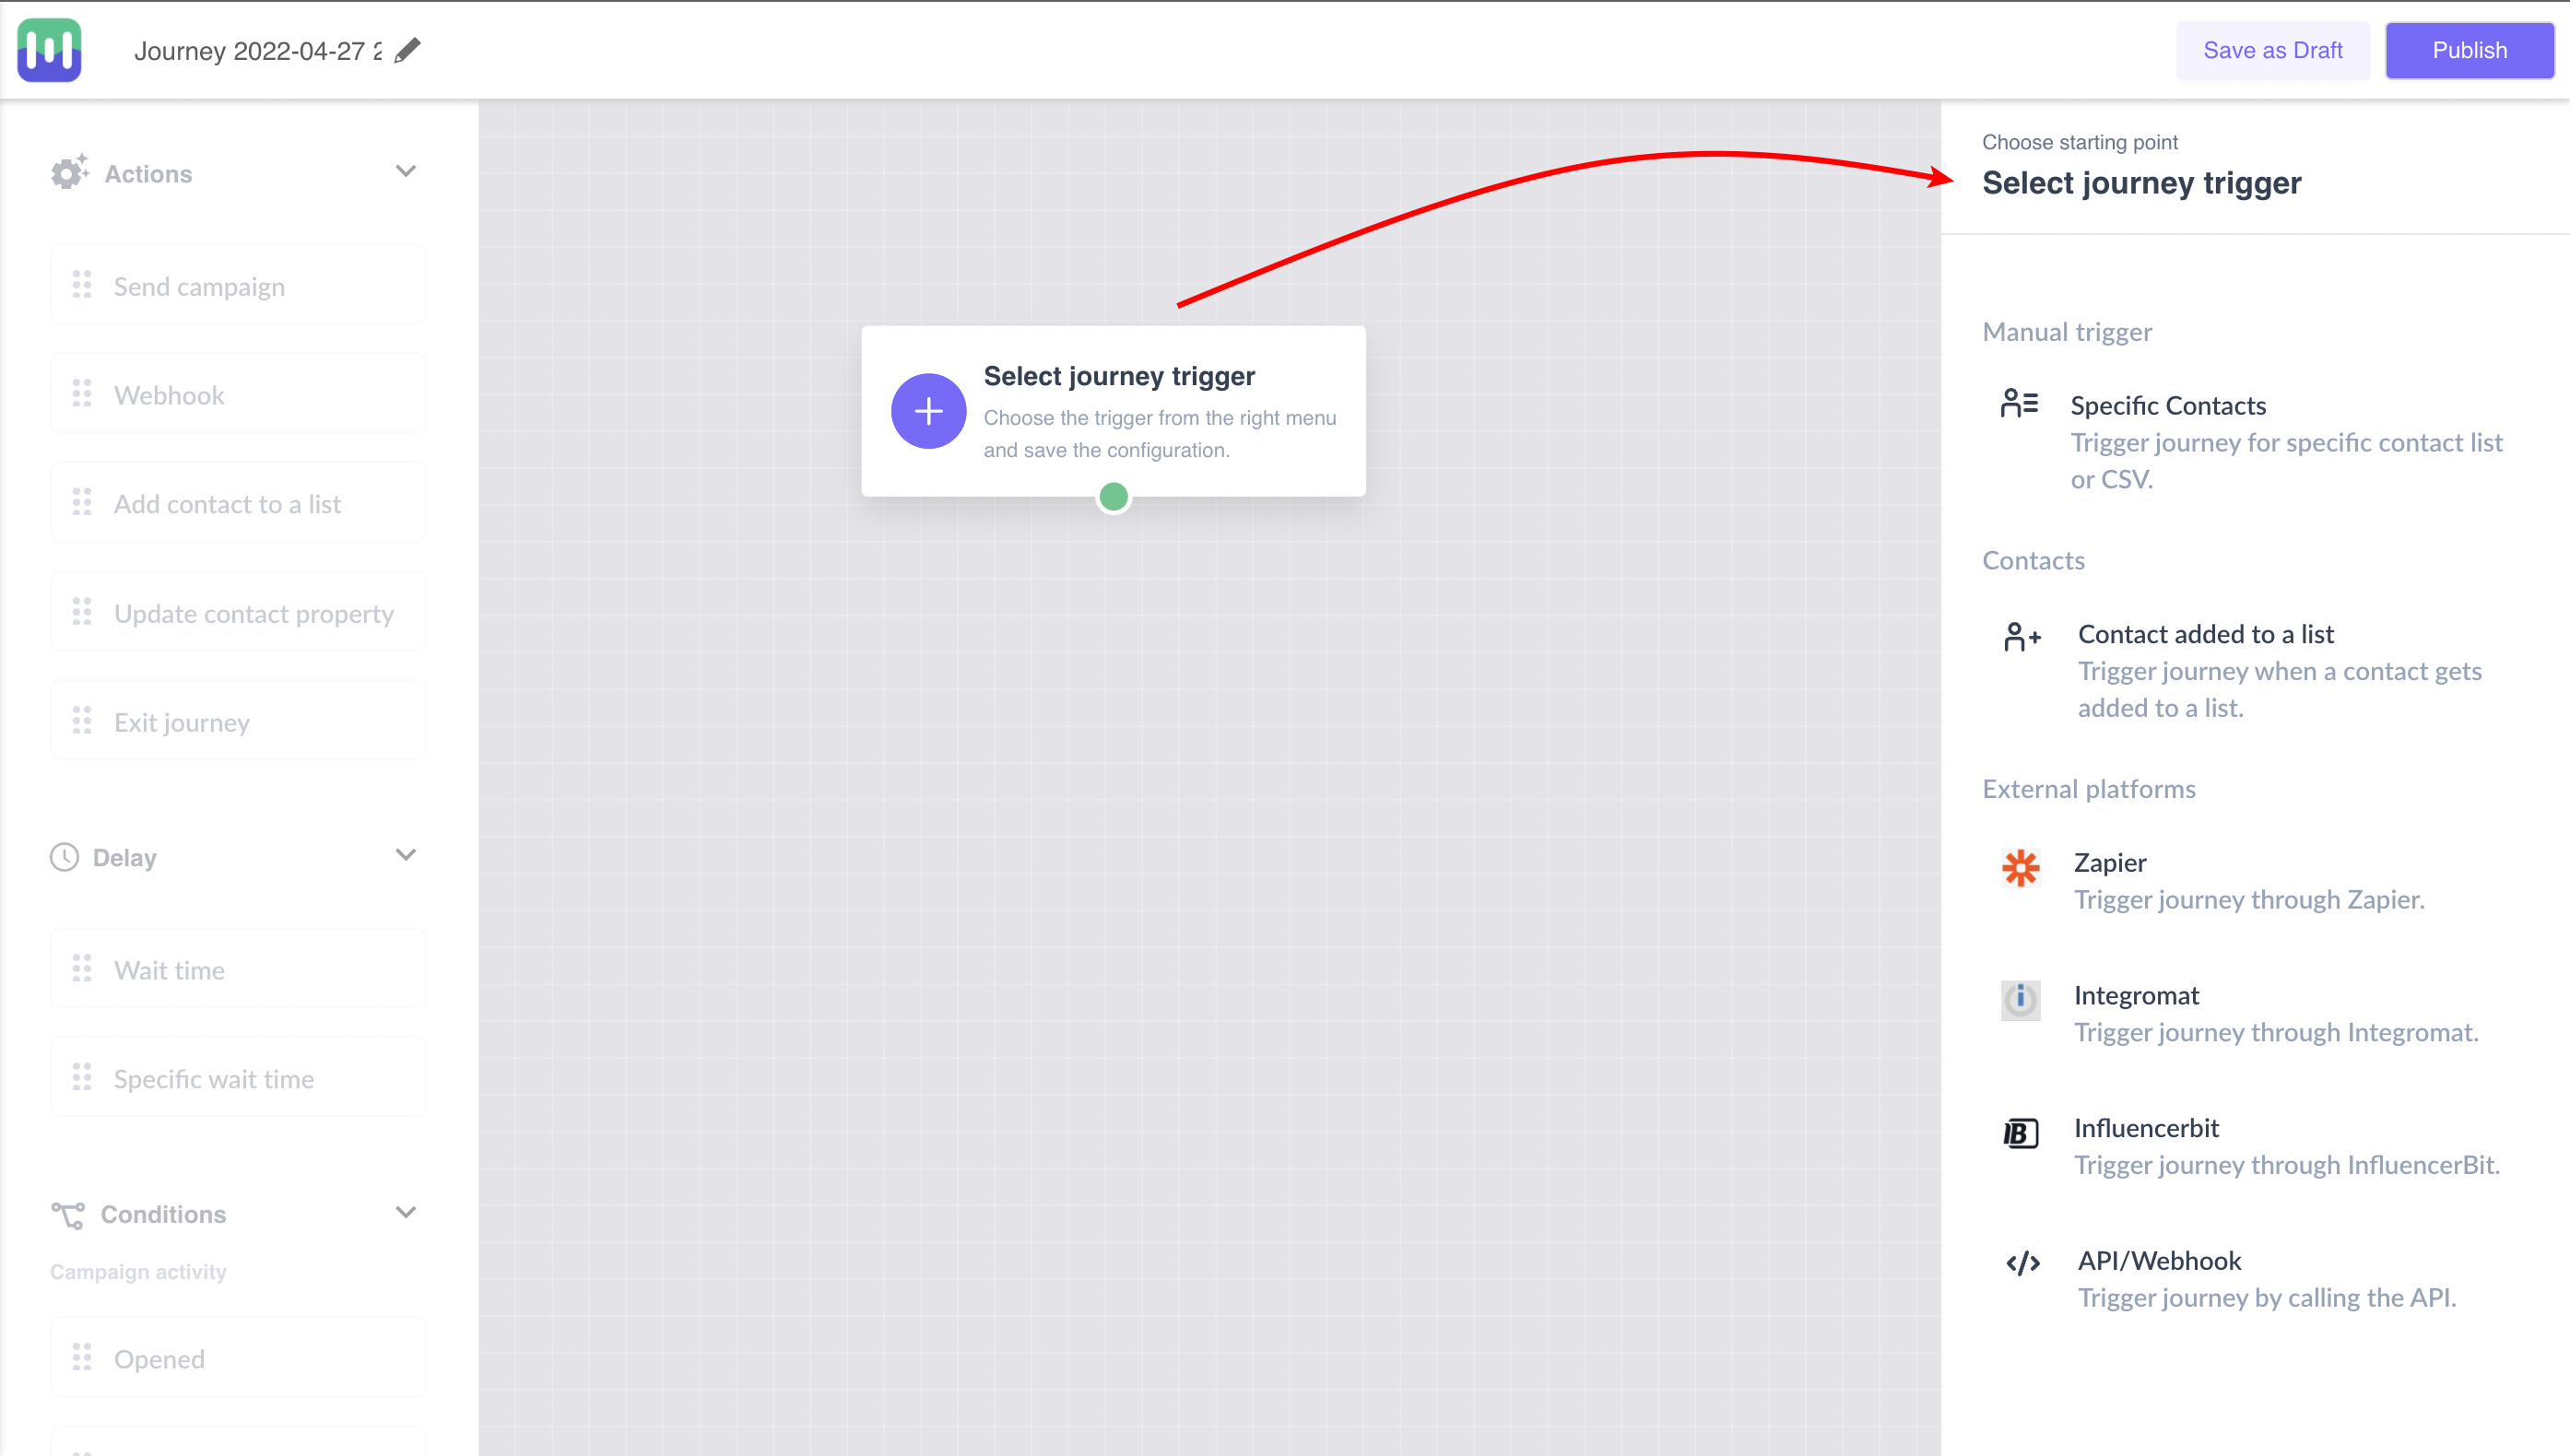
Type of Triggers
| Elements | Usage |
| Specific contacts | Manually trigger journeys by adding specific contacts in the journey. |
| Contacts added to a list | Trigger journey when a contact gets added to a list. For ex - When a contact subscribed to your newsletter, he/she would get added to a list. |
| Change in contact property | Trigger journey when there is a change in value of a contact’s property. For example - Use this trigger when your contacts have a property called Billing Plan and the value changed from FREE PLAN to PAID PLAN. |
| Form submission | Trigger journey when there is a submission in the form used in a template. For example - Use this trigger, when you want to run a webinar registration campaign and trigger a series of emails when a contact registers for a webinar. |
| Occurrence of an event | Trigger journey when there is an occurrence of an event recorded on your Website, App or other platforms. For example - Use this trigger, when the event sent into Mailmodo is a Sign up event and run a journey for a contact who has just signed up on your platform. |
| API / Webhook | Use API to trigger journeys from external systems. |
| Zapier | Use Zapier to trigger the journey from external applications. |
| Integromat | Use Integromat to trigger the journey from external applications. |
| InfluencerBit | Use InfluencerBit to trigger journeys in Mailmodo. |
Type of Actions
| Elements | Usage |
| Send campaign | Use it to send email to contacts. |
| Webhook | Use it to send data through Webhook. |
| Exit journey | Use it to end the journey of a contact. |
| Add contact to a list | Use it to add contact to a list. |
| Update contact property | Use it to update the value of a contact property. |
Type of Delays
| Elements | Usage |
| Wait for time period | Use it to add delay for a time period in minutes, hours or days. |
| Wait till specific time | Use it to add delay for a specific time, day or dates. |
Type of Conditions
| Elements | Usage |
| Campaign condition → Opened | Use it to check if the campaign is opened. |
| Campaign condition → Clicked | Use it to check if the URL is clicked. |
| Campaign condition → Submitted | Use it to check if the form is submitted. |
| Contact property | Use it to check if the contact property has some specific value. |
| List/segment membership | Use it to check if the contact belongs to a list/segment. |
| Custom event condition | Use it to qualify contact based on event property. |
Fundamental steps to design a journey
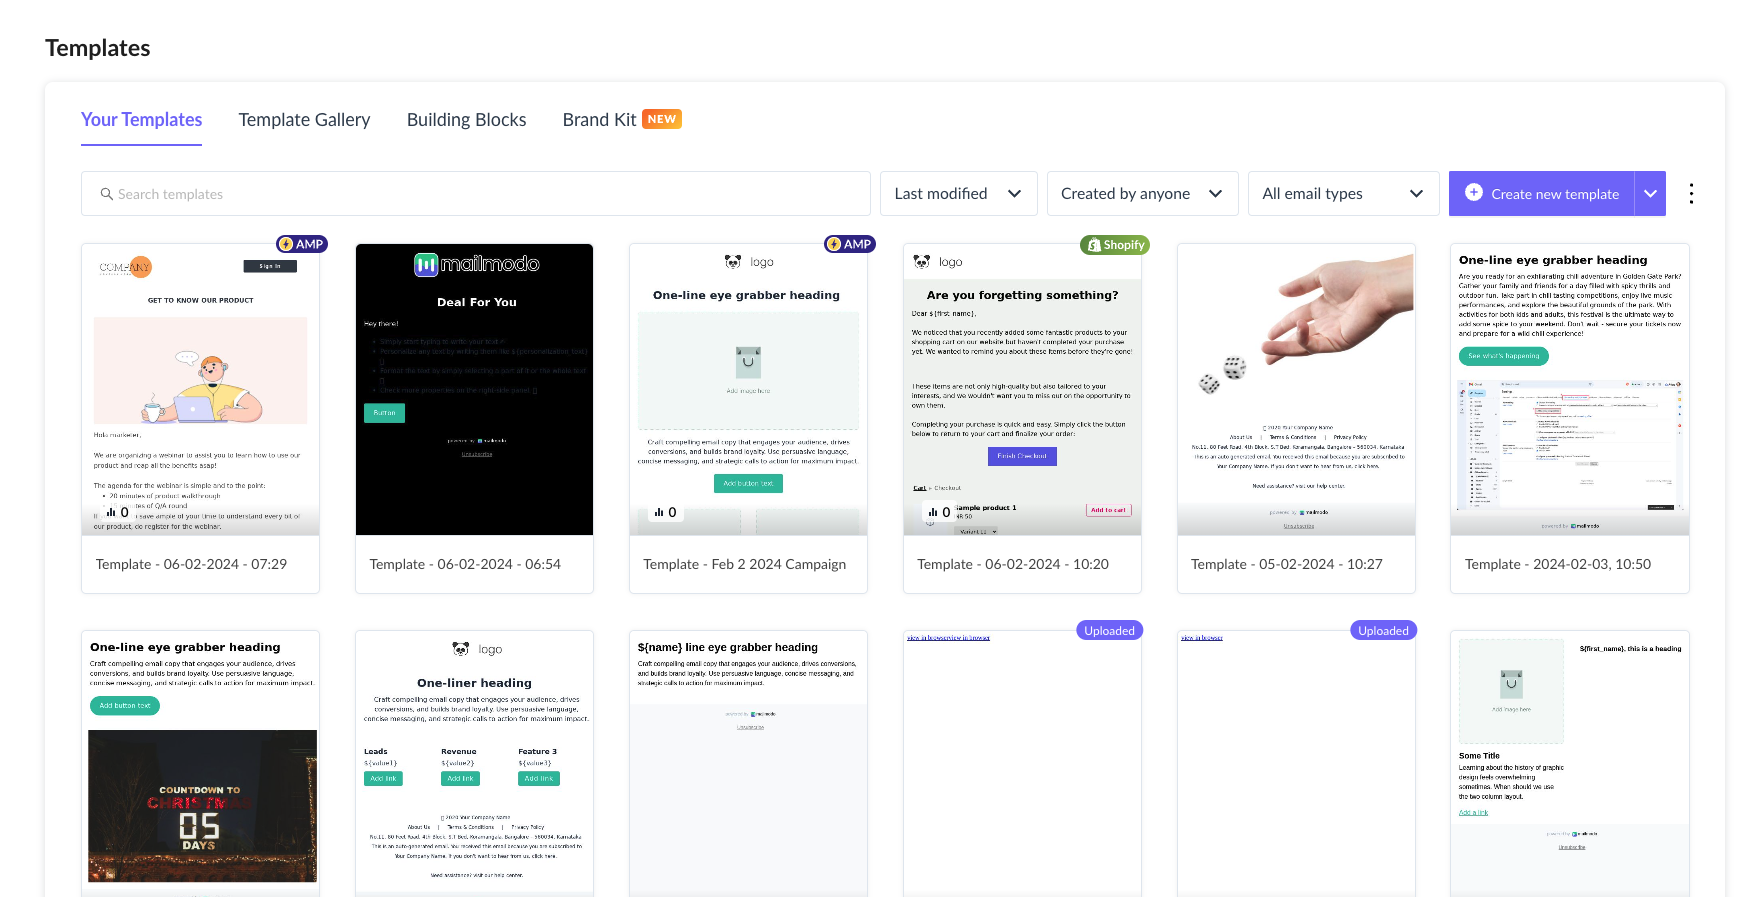
Step 1: Click on the Templates section in the left panel. Design an email template to be included in the journey campaigns.
Step 2: Go to the Journey section and create a new journey.
Step 3: Once you are in the journey builder, start building your journey by selecting a trigger.
Select a trigger 'Contact added to a list' to send campaigns when a contact signs up on your website and gets added to a list.
Step 4: We can use various options on the left panel to build our journey. For example, we can start with the Send Campaign. For that click and drag the Send Campaign option from the left panel.
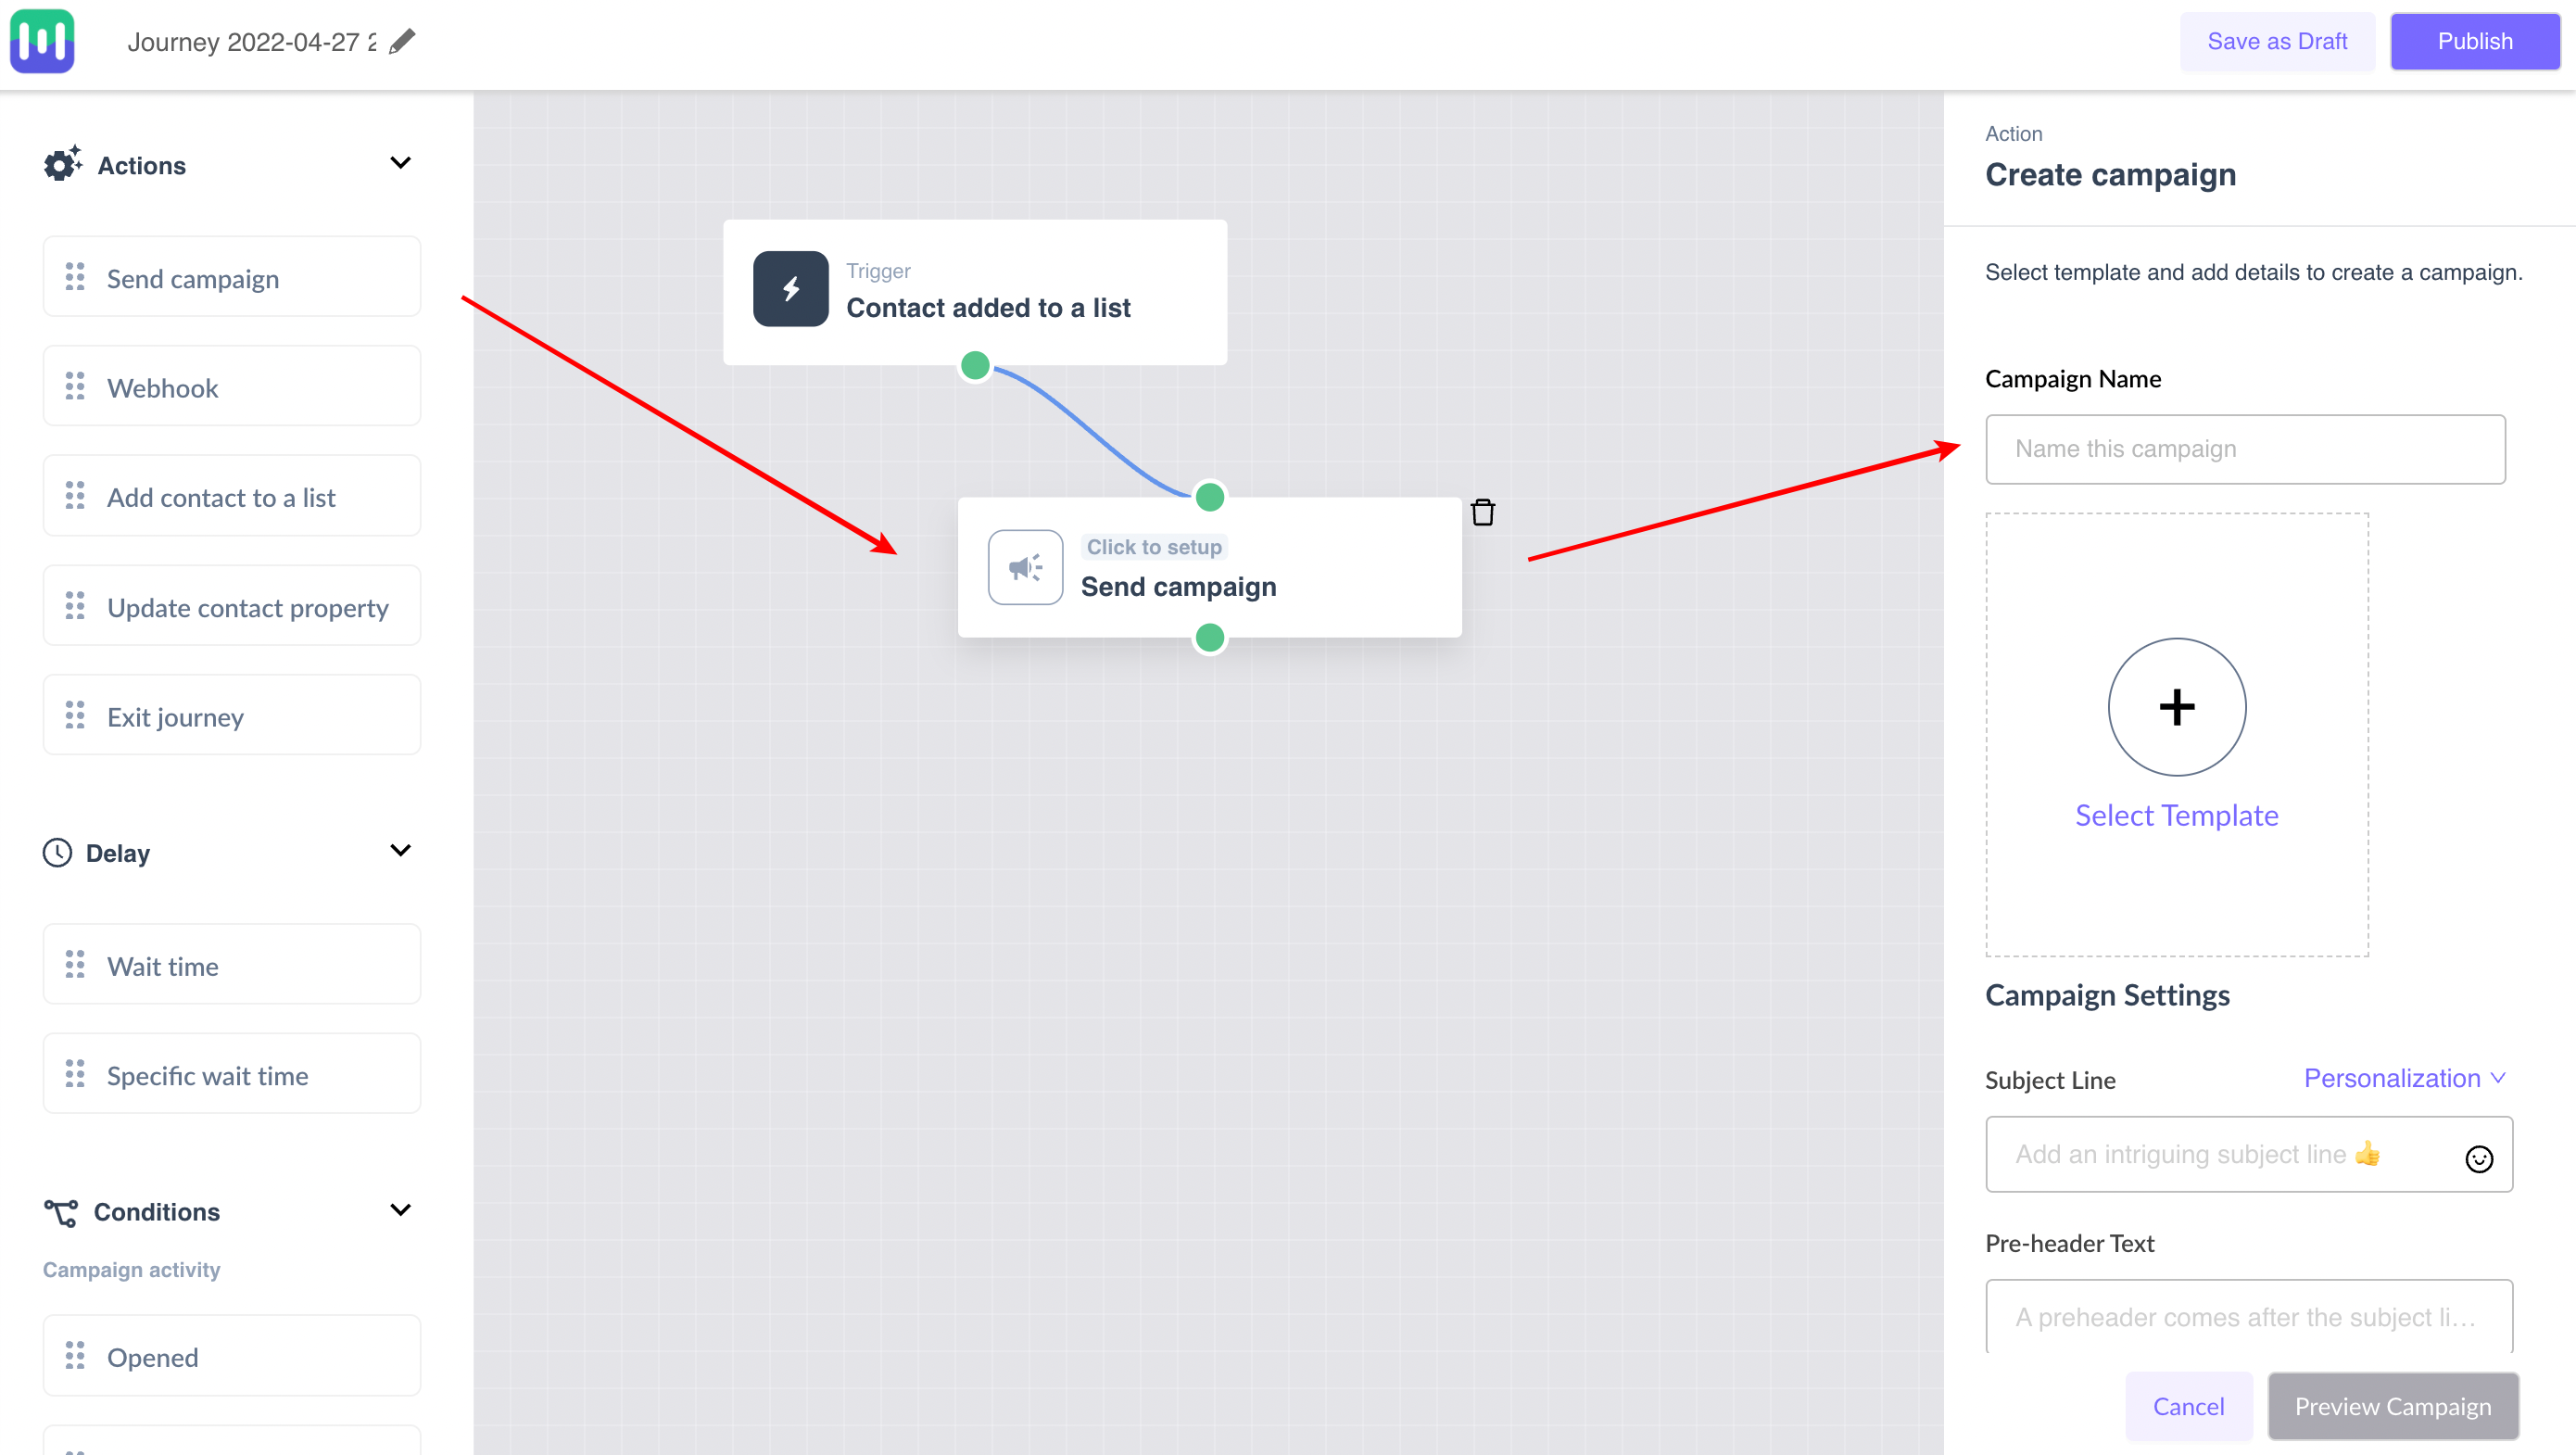
In the Right Panel select the email template that you’ve designed to continue with the next steps.
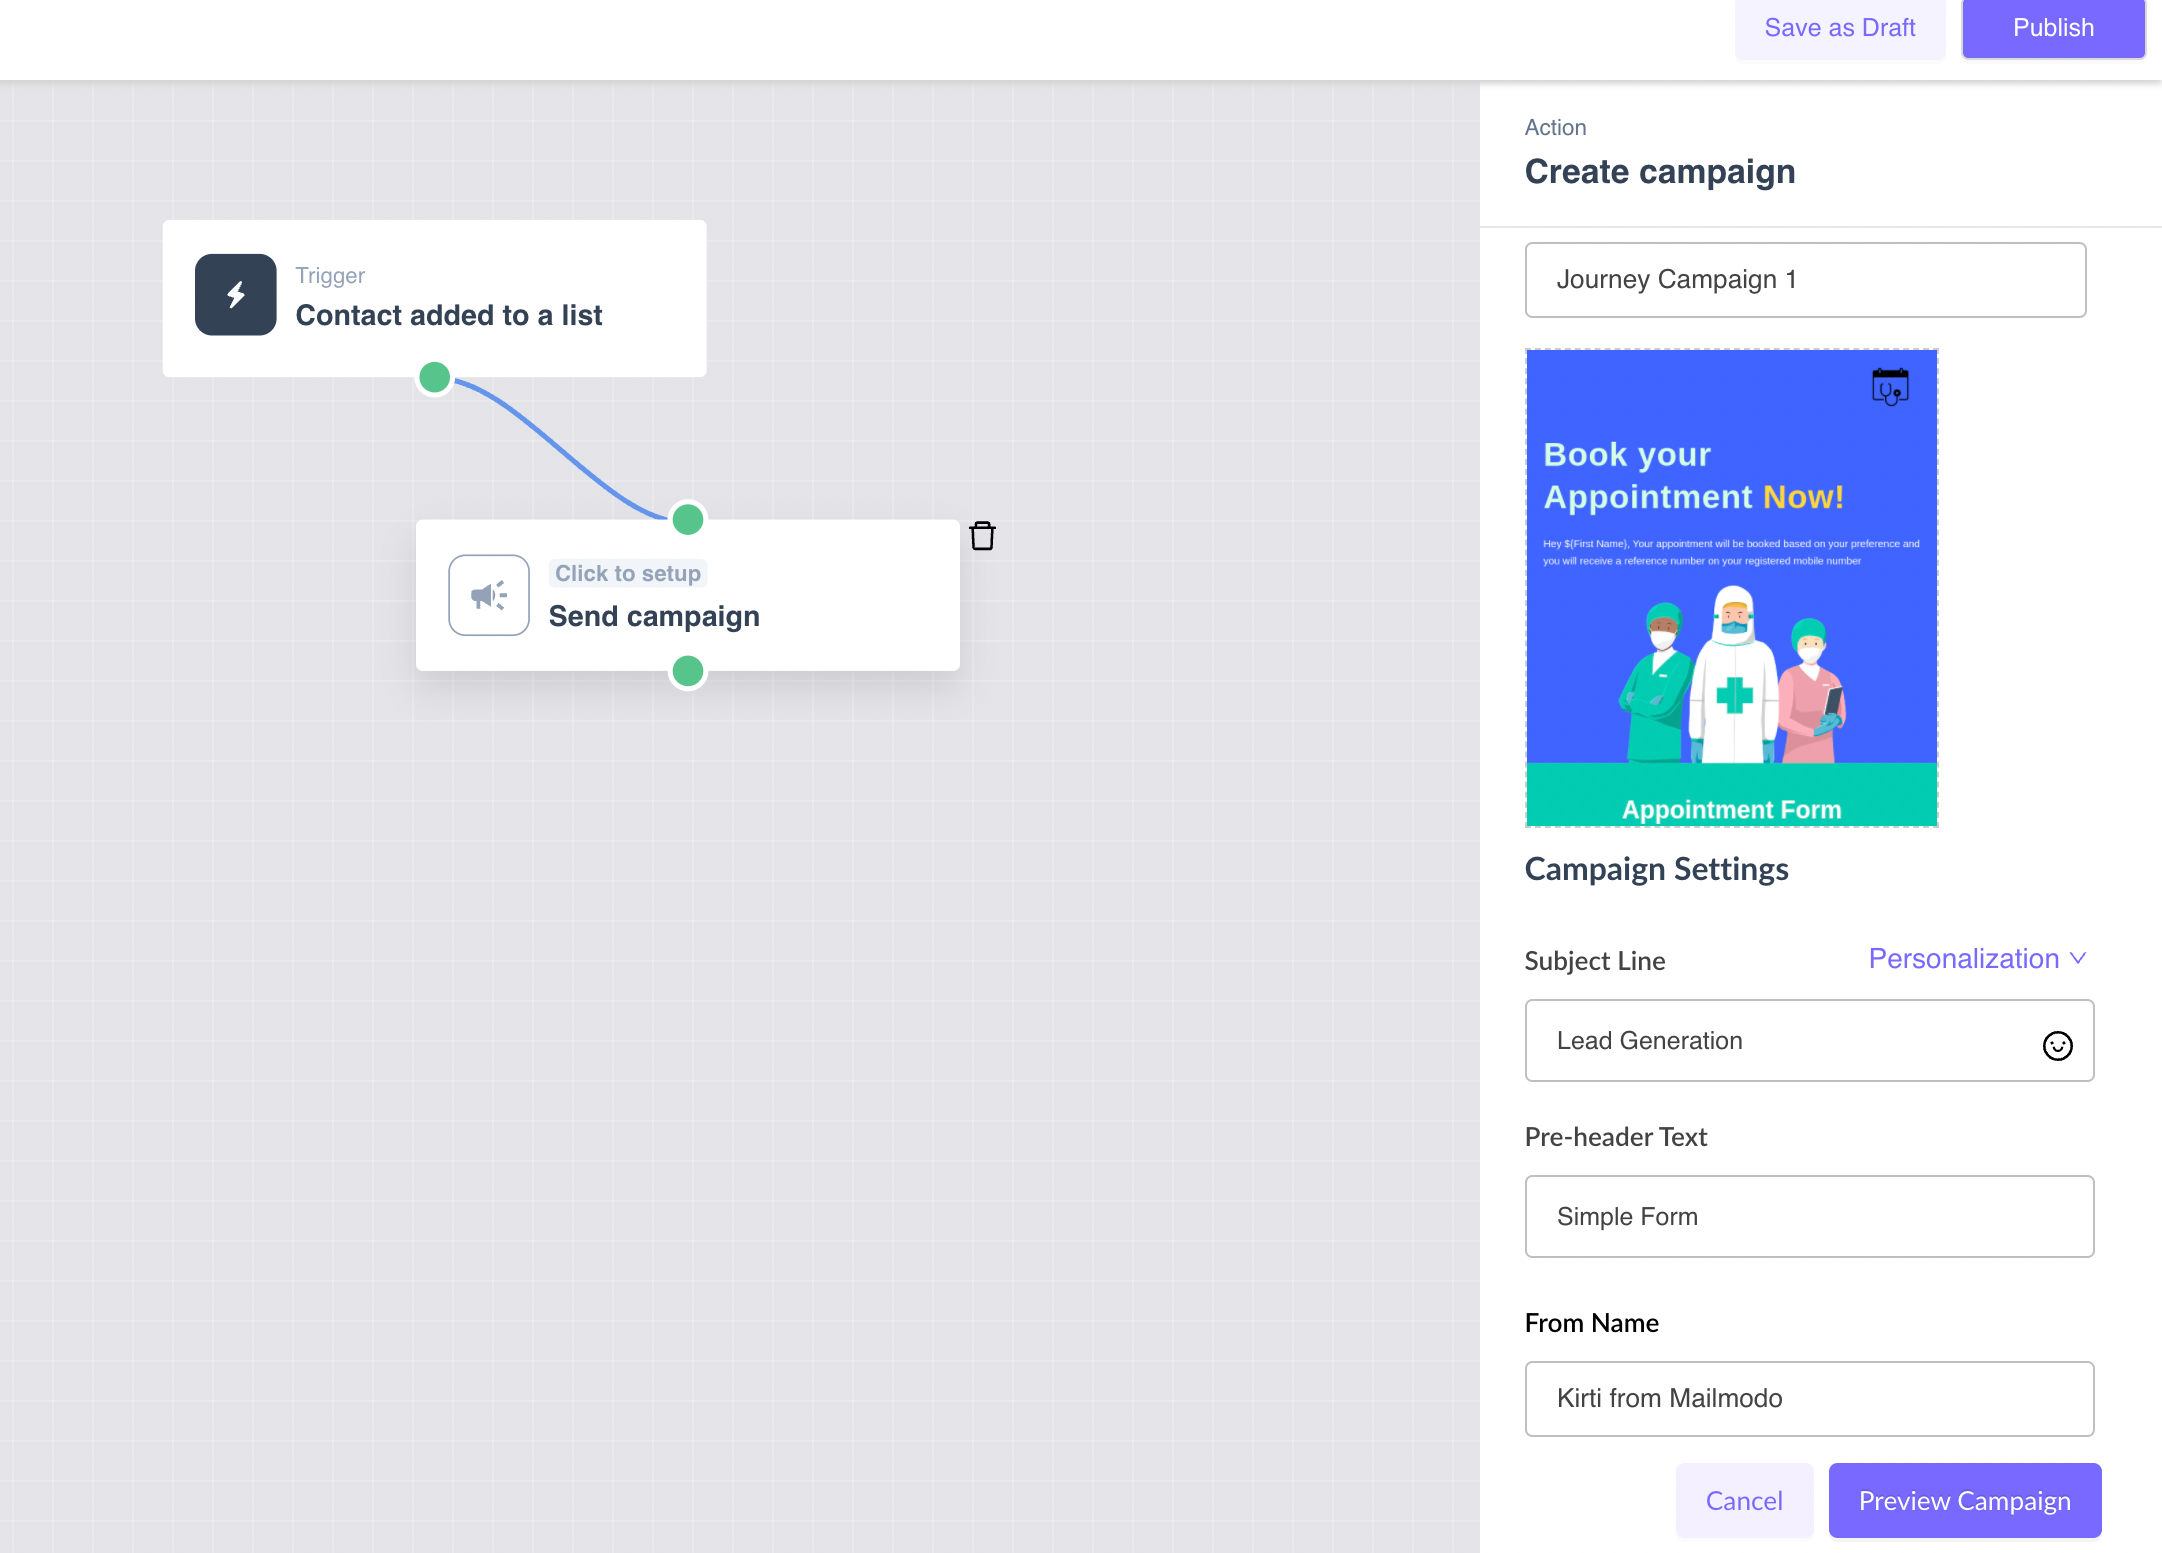
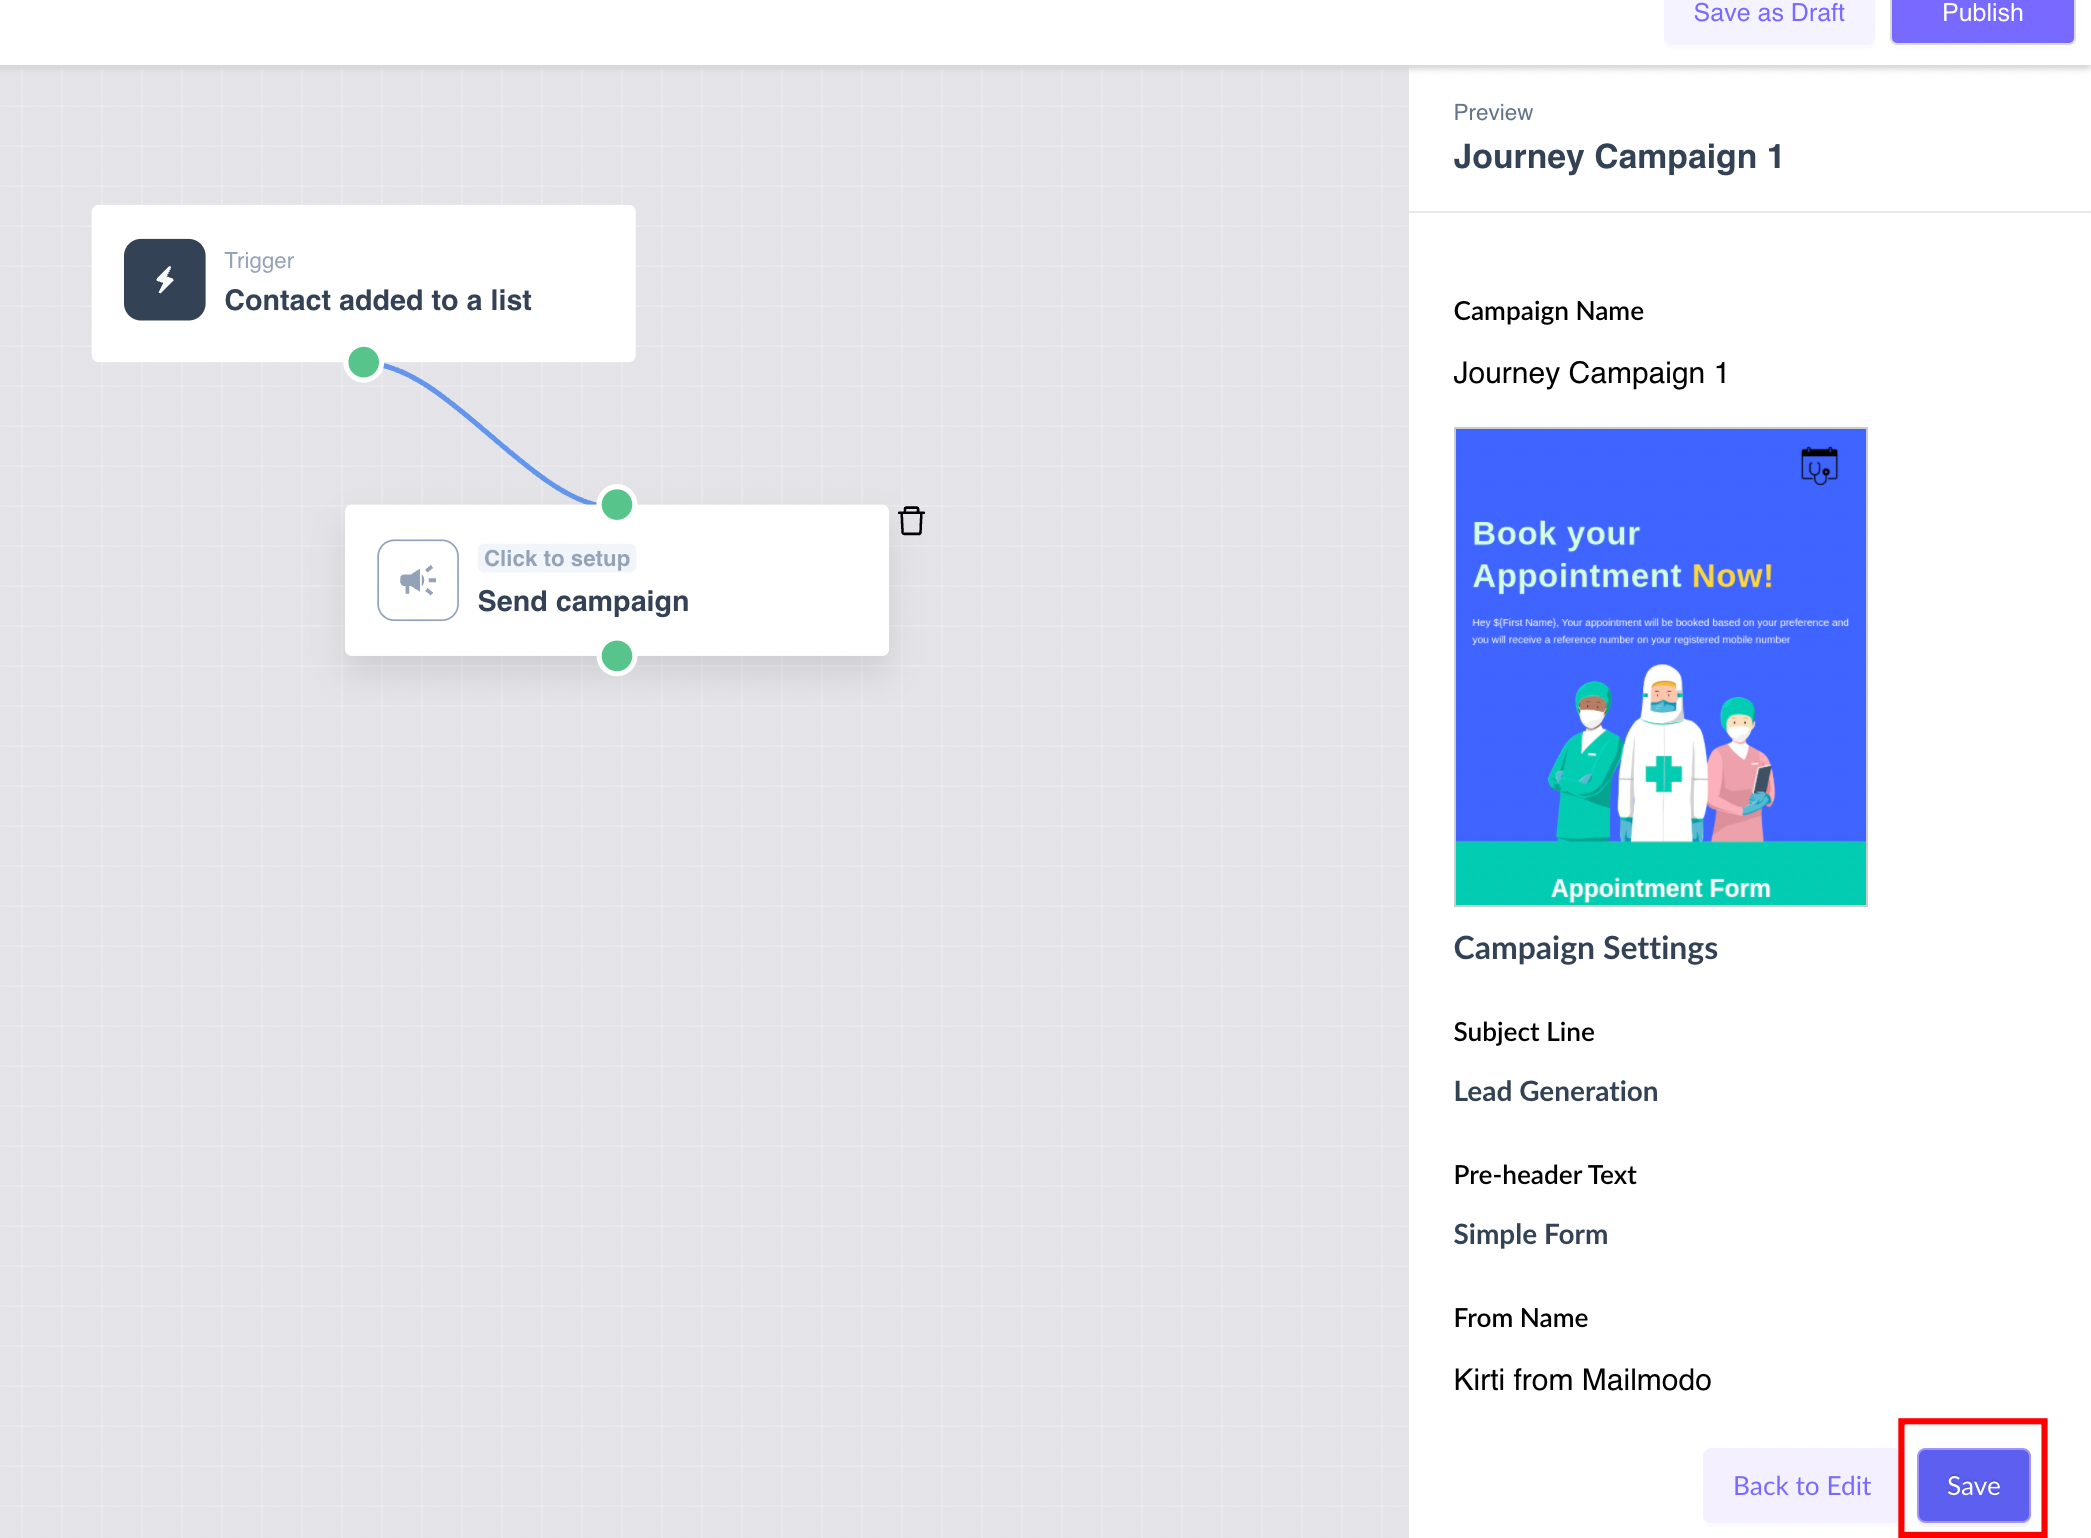
Step 5: Select a template, then fill up the relevant details to create a campaign and 'Complete Setup' to continue.
Step 6: You can choose to add Conditions/Activity in the journey as discussed below
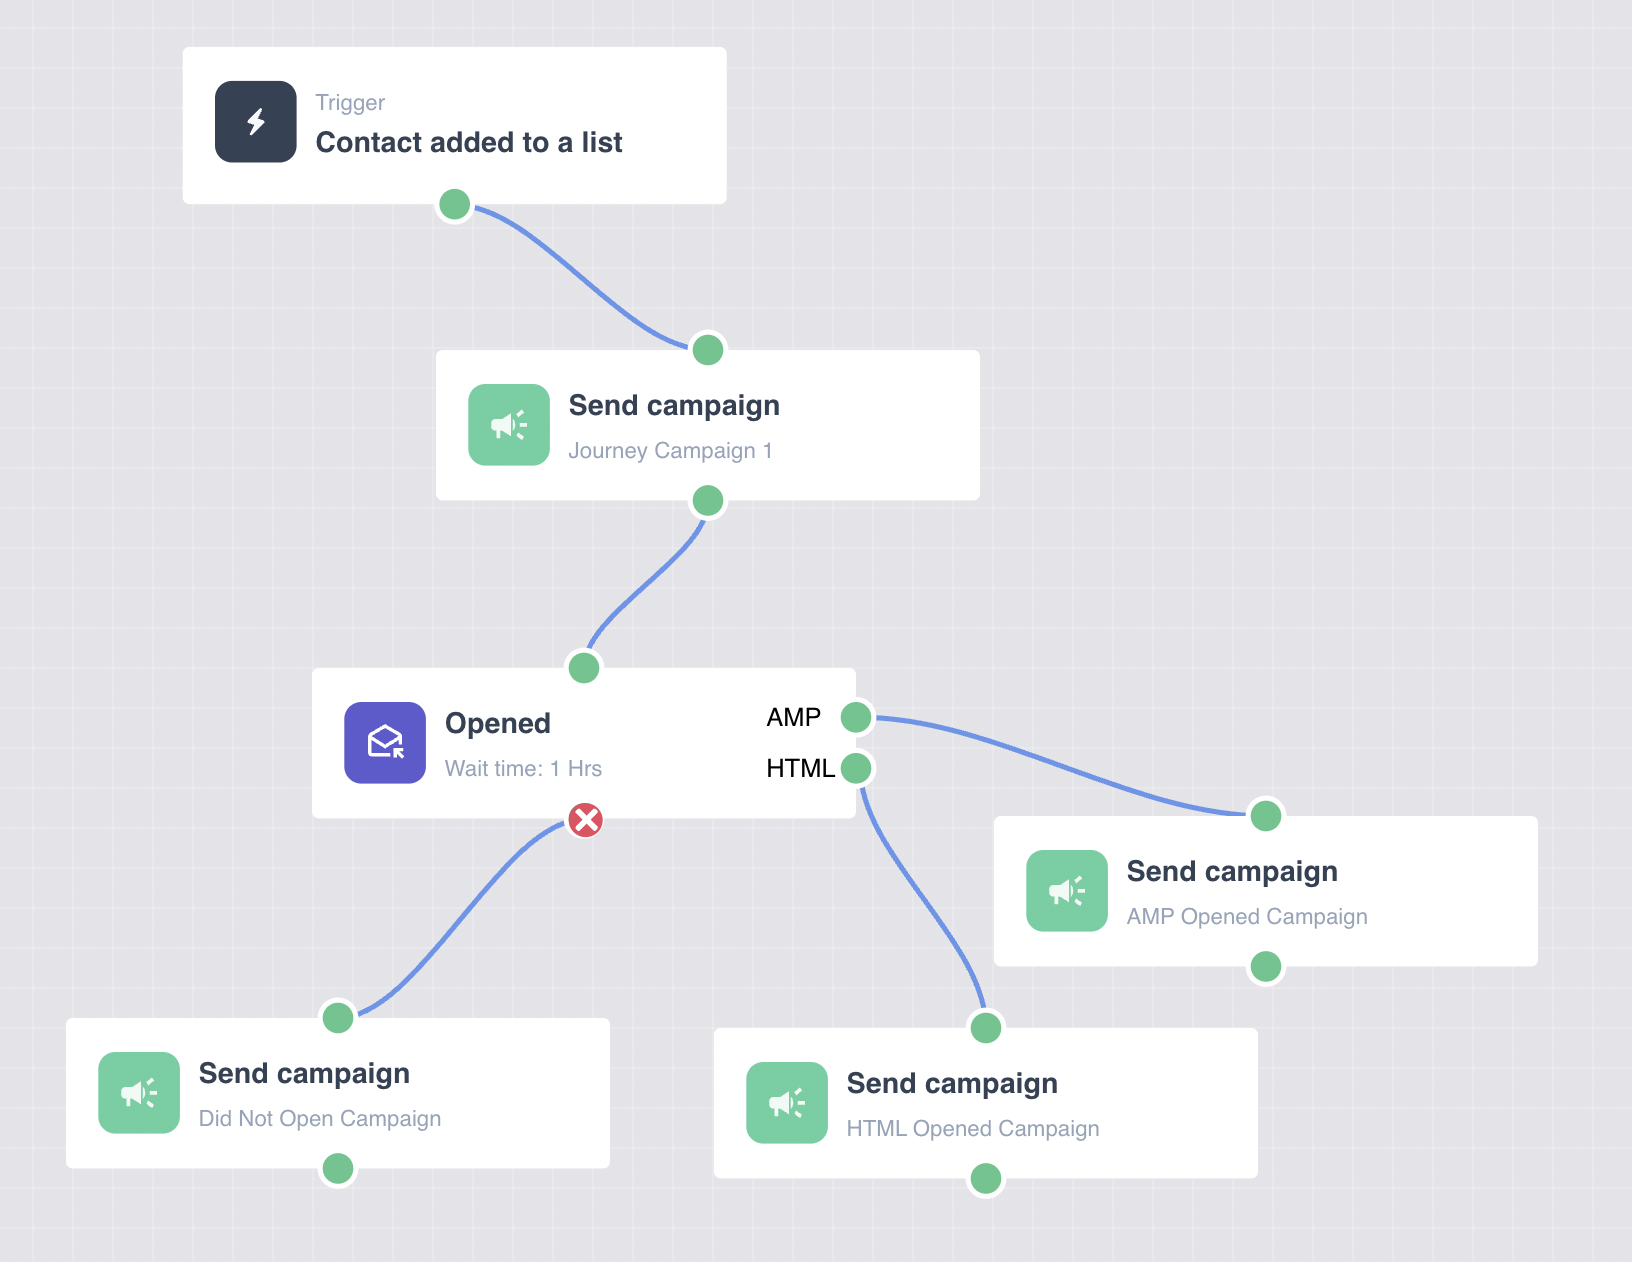
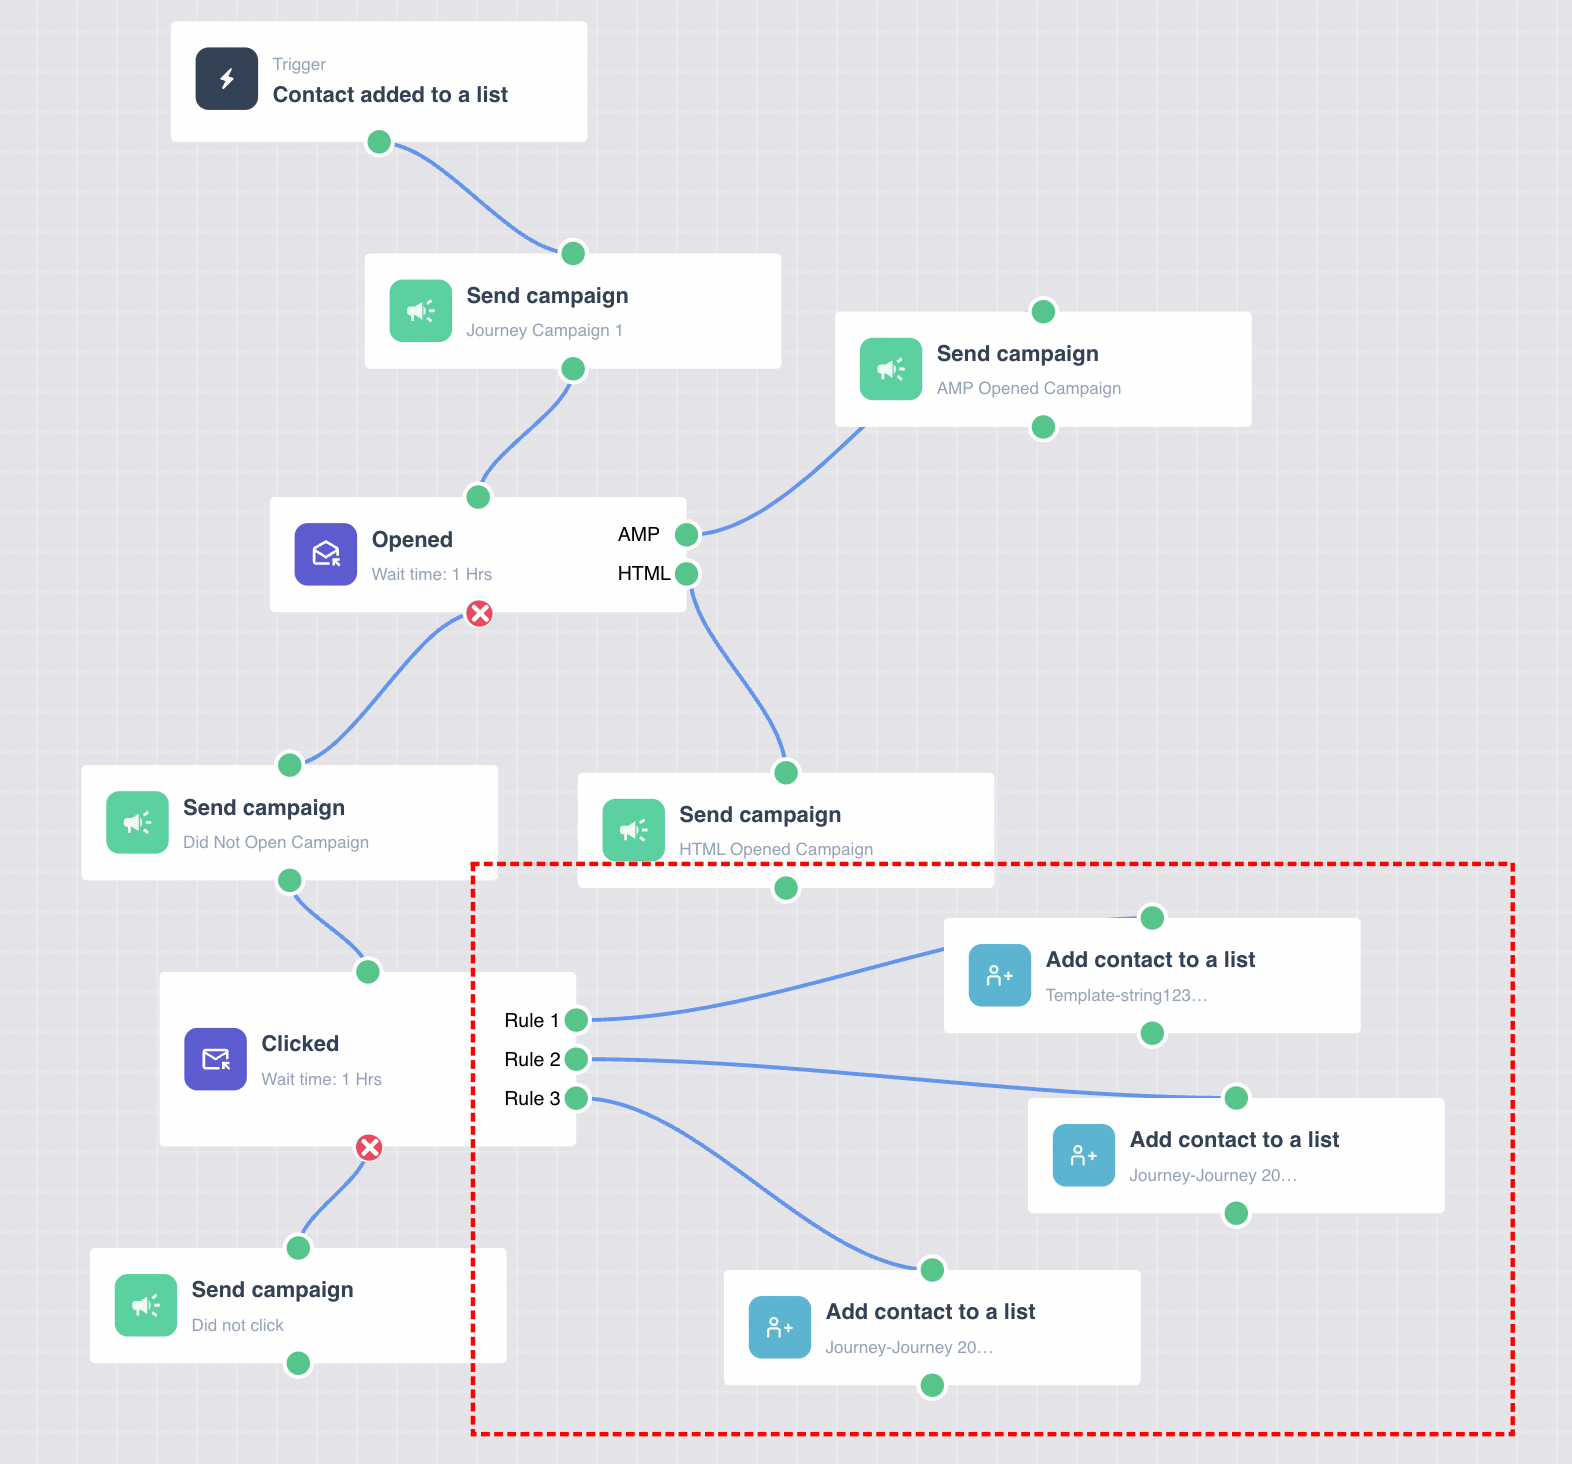
A. Opened- Drag and drop Opened from the left panel and Click on Configure Conditions to adjust Wait Time from the right panel. This means If someone opens the onboarding email, then after that much wait time, a new campaign (e.g. an email with a demo video link) can be started.
You can also use different campaigns depending on whether AMP or HTML email has been opened by selecting Different Ports for AMP and HTML in the Configure Conditions
B. Clicked - It is dragged and dropped in a similar way like Opened. In Clicked condition when a user clicks on a particular link in the received email, a next mail (campaign) can be sent to them after some delay.
Also different campaigns can be launched through different link(s) in the mail. This can be done by ‘Specific URL Click’ as shown below.
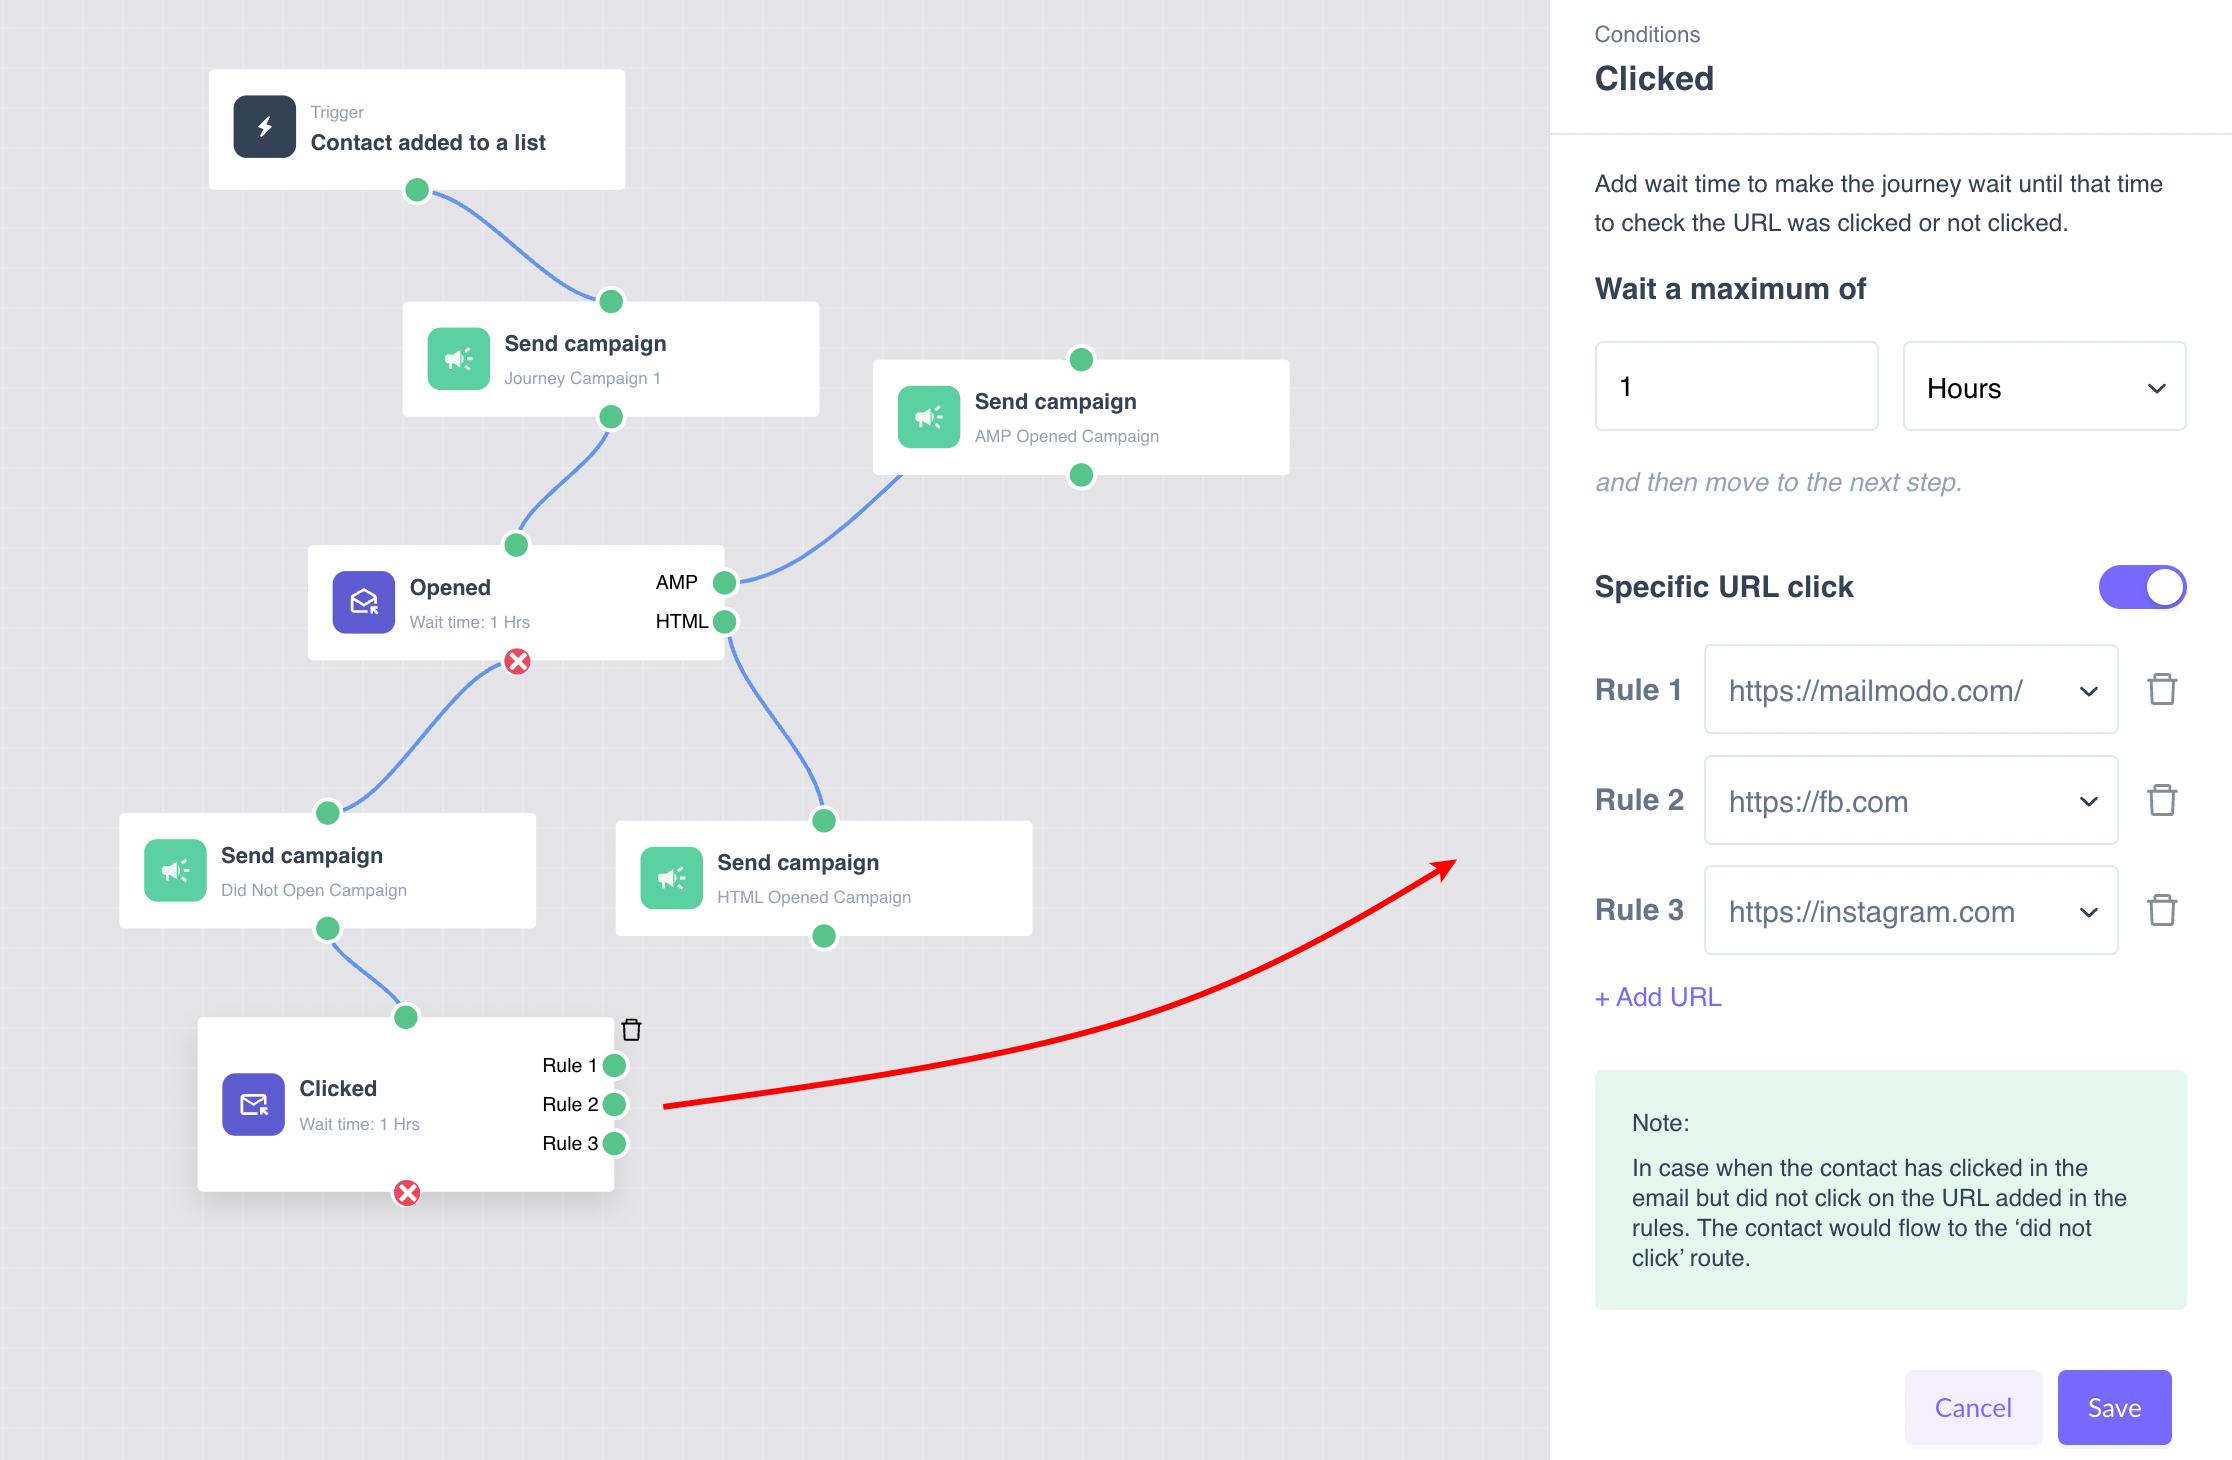
Rule 1, Rule 2, Rule 3 are the URLs which can trigger different campaigns or in this case add the contacts into different contact lists.
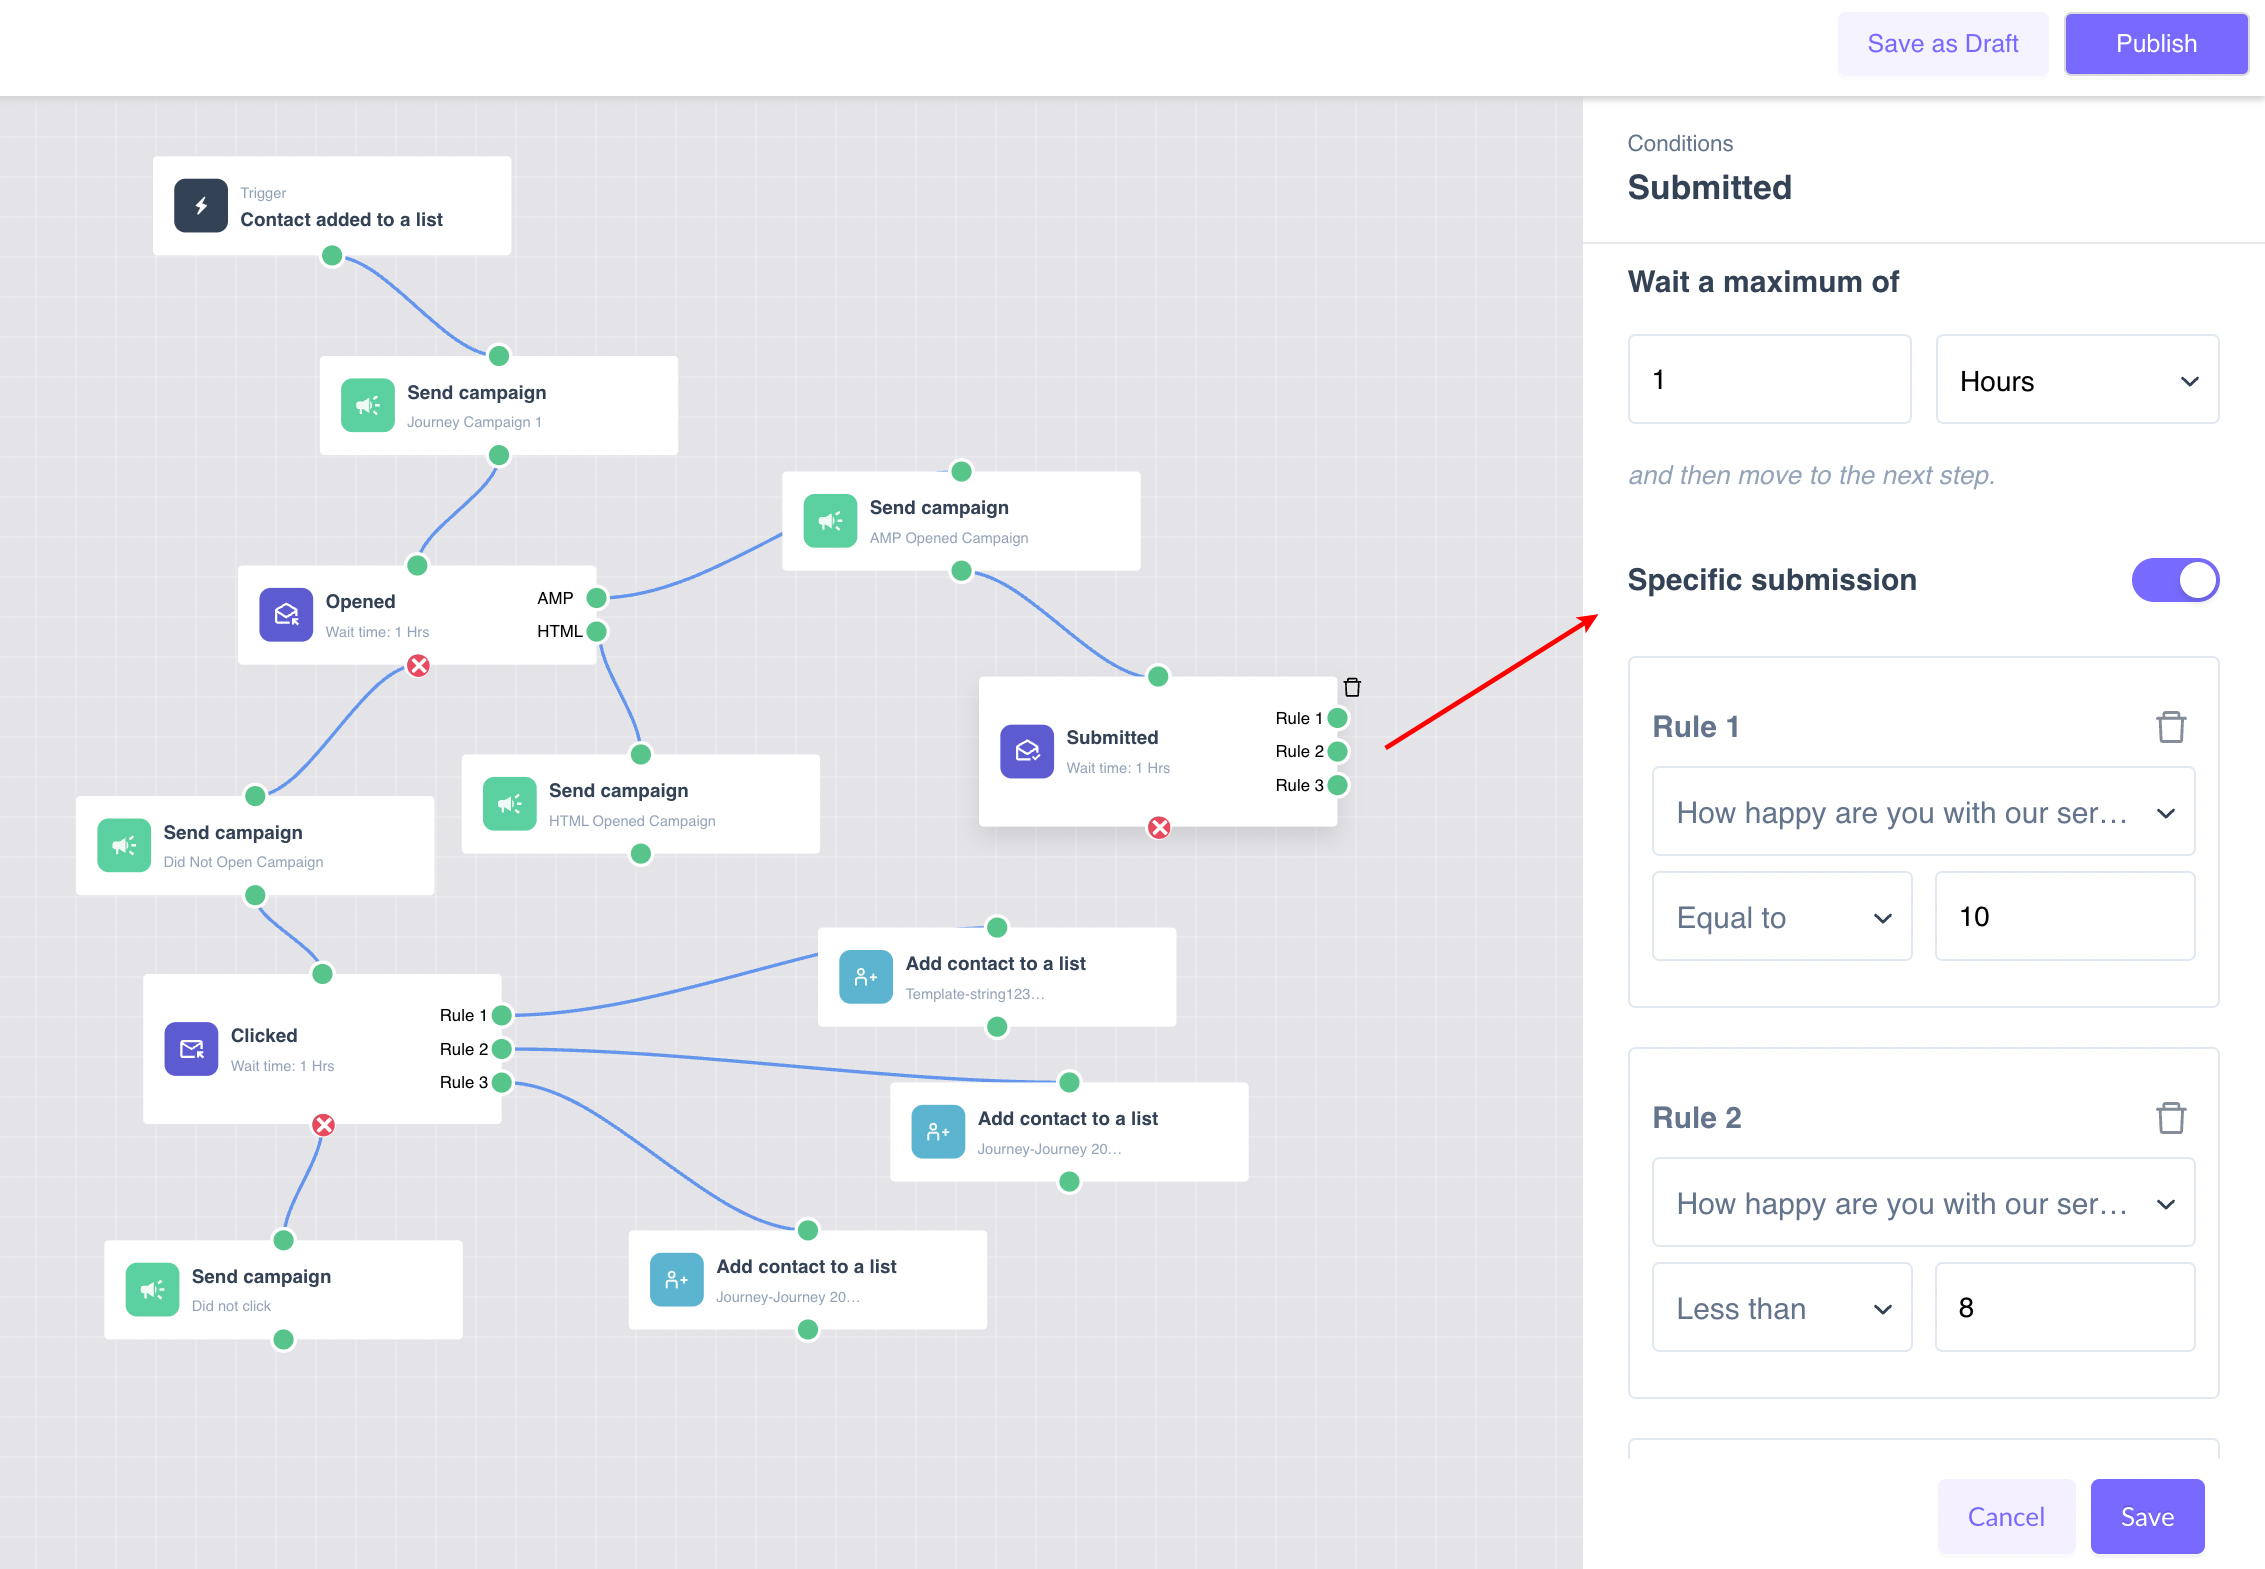
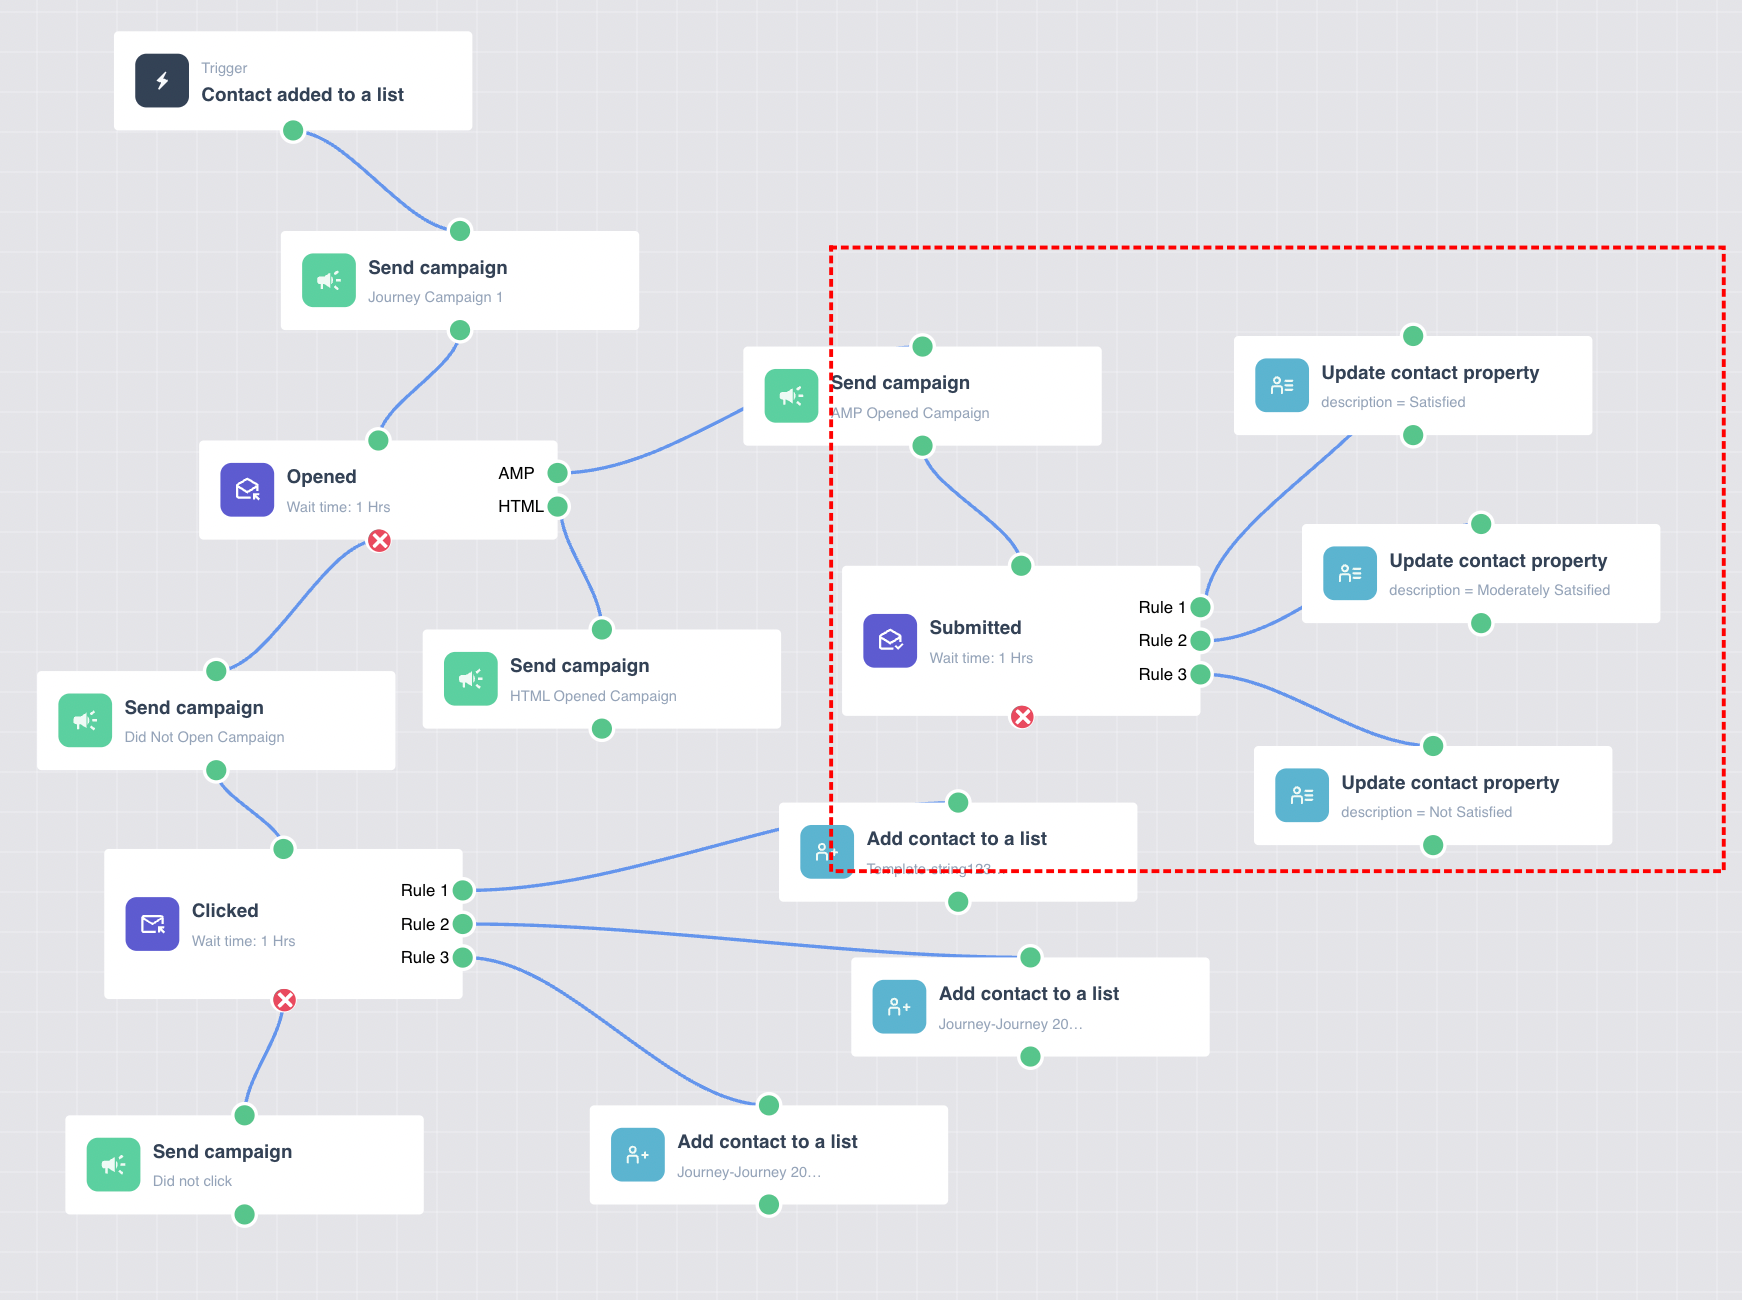
C. Submitted - This can be used in a similar fashion as described above. It also has ‘Wait Time’ and ‘Specific Submission’ to trigger different campaigns as required.
‘Specific Submission’ creates some conditions/logic on the data received from the submitted form. Different labels ( Rule 1, Rule 2, Rule 3) are assigned to the conditions and related campaigns can be launched as shown below.
For example - Based on 'Specific Submission' rules the contact's description would be updated with a value of 'Satisfied', 'Unsatisfied', 'Moderately Satisfied'.
Step 7: After setting up the whole journey, test it and click on Publish in the top right corner

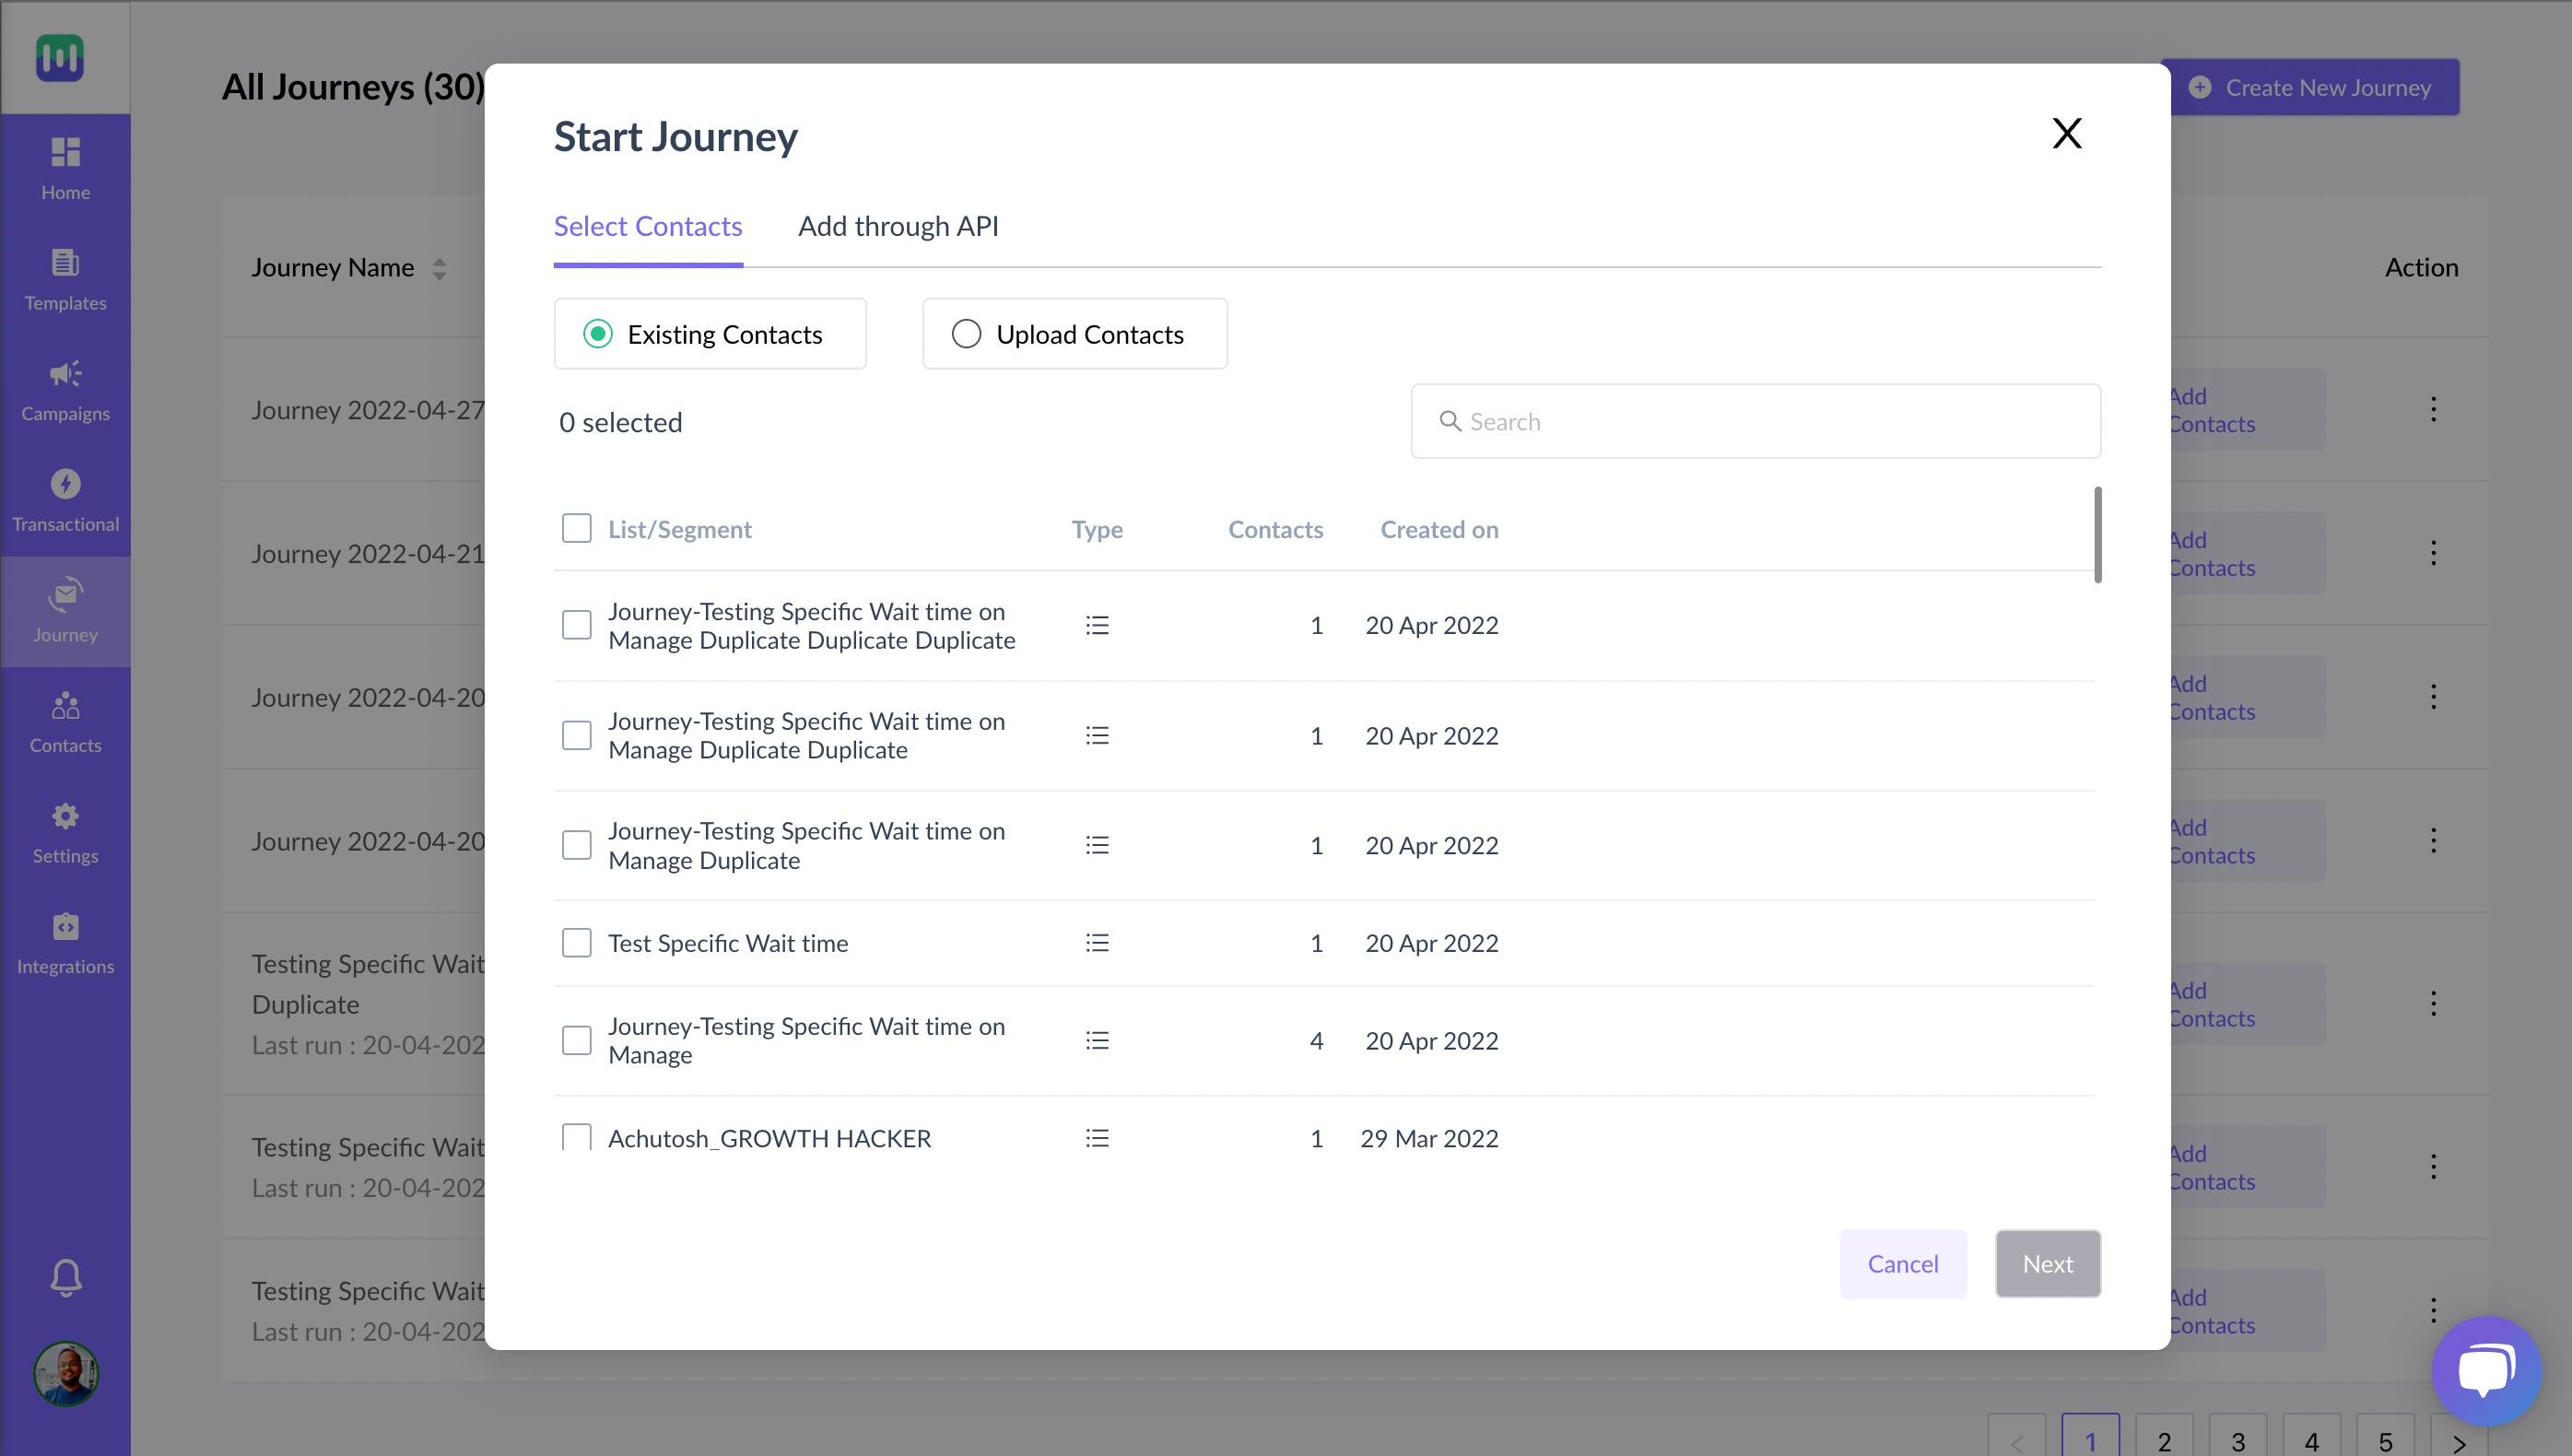
Trigger journeys through API/Webhook or manually by adding specific contacts
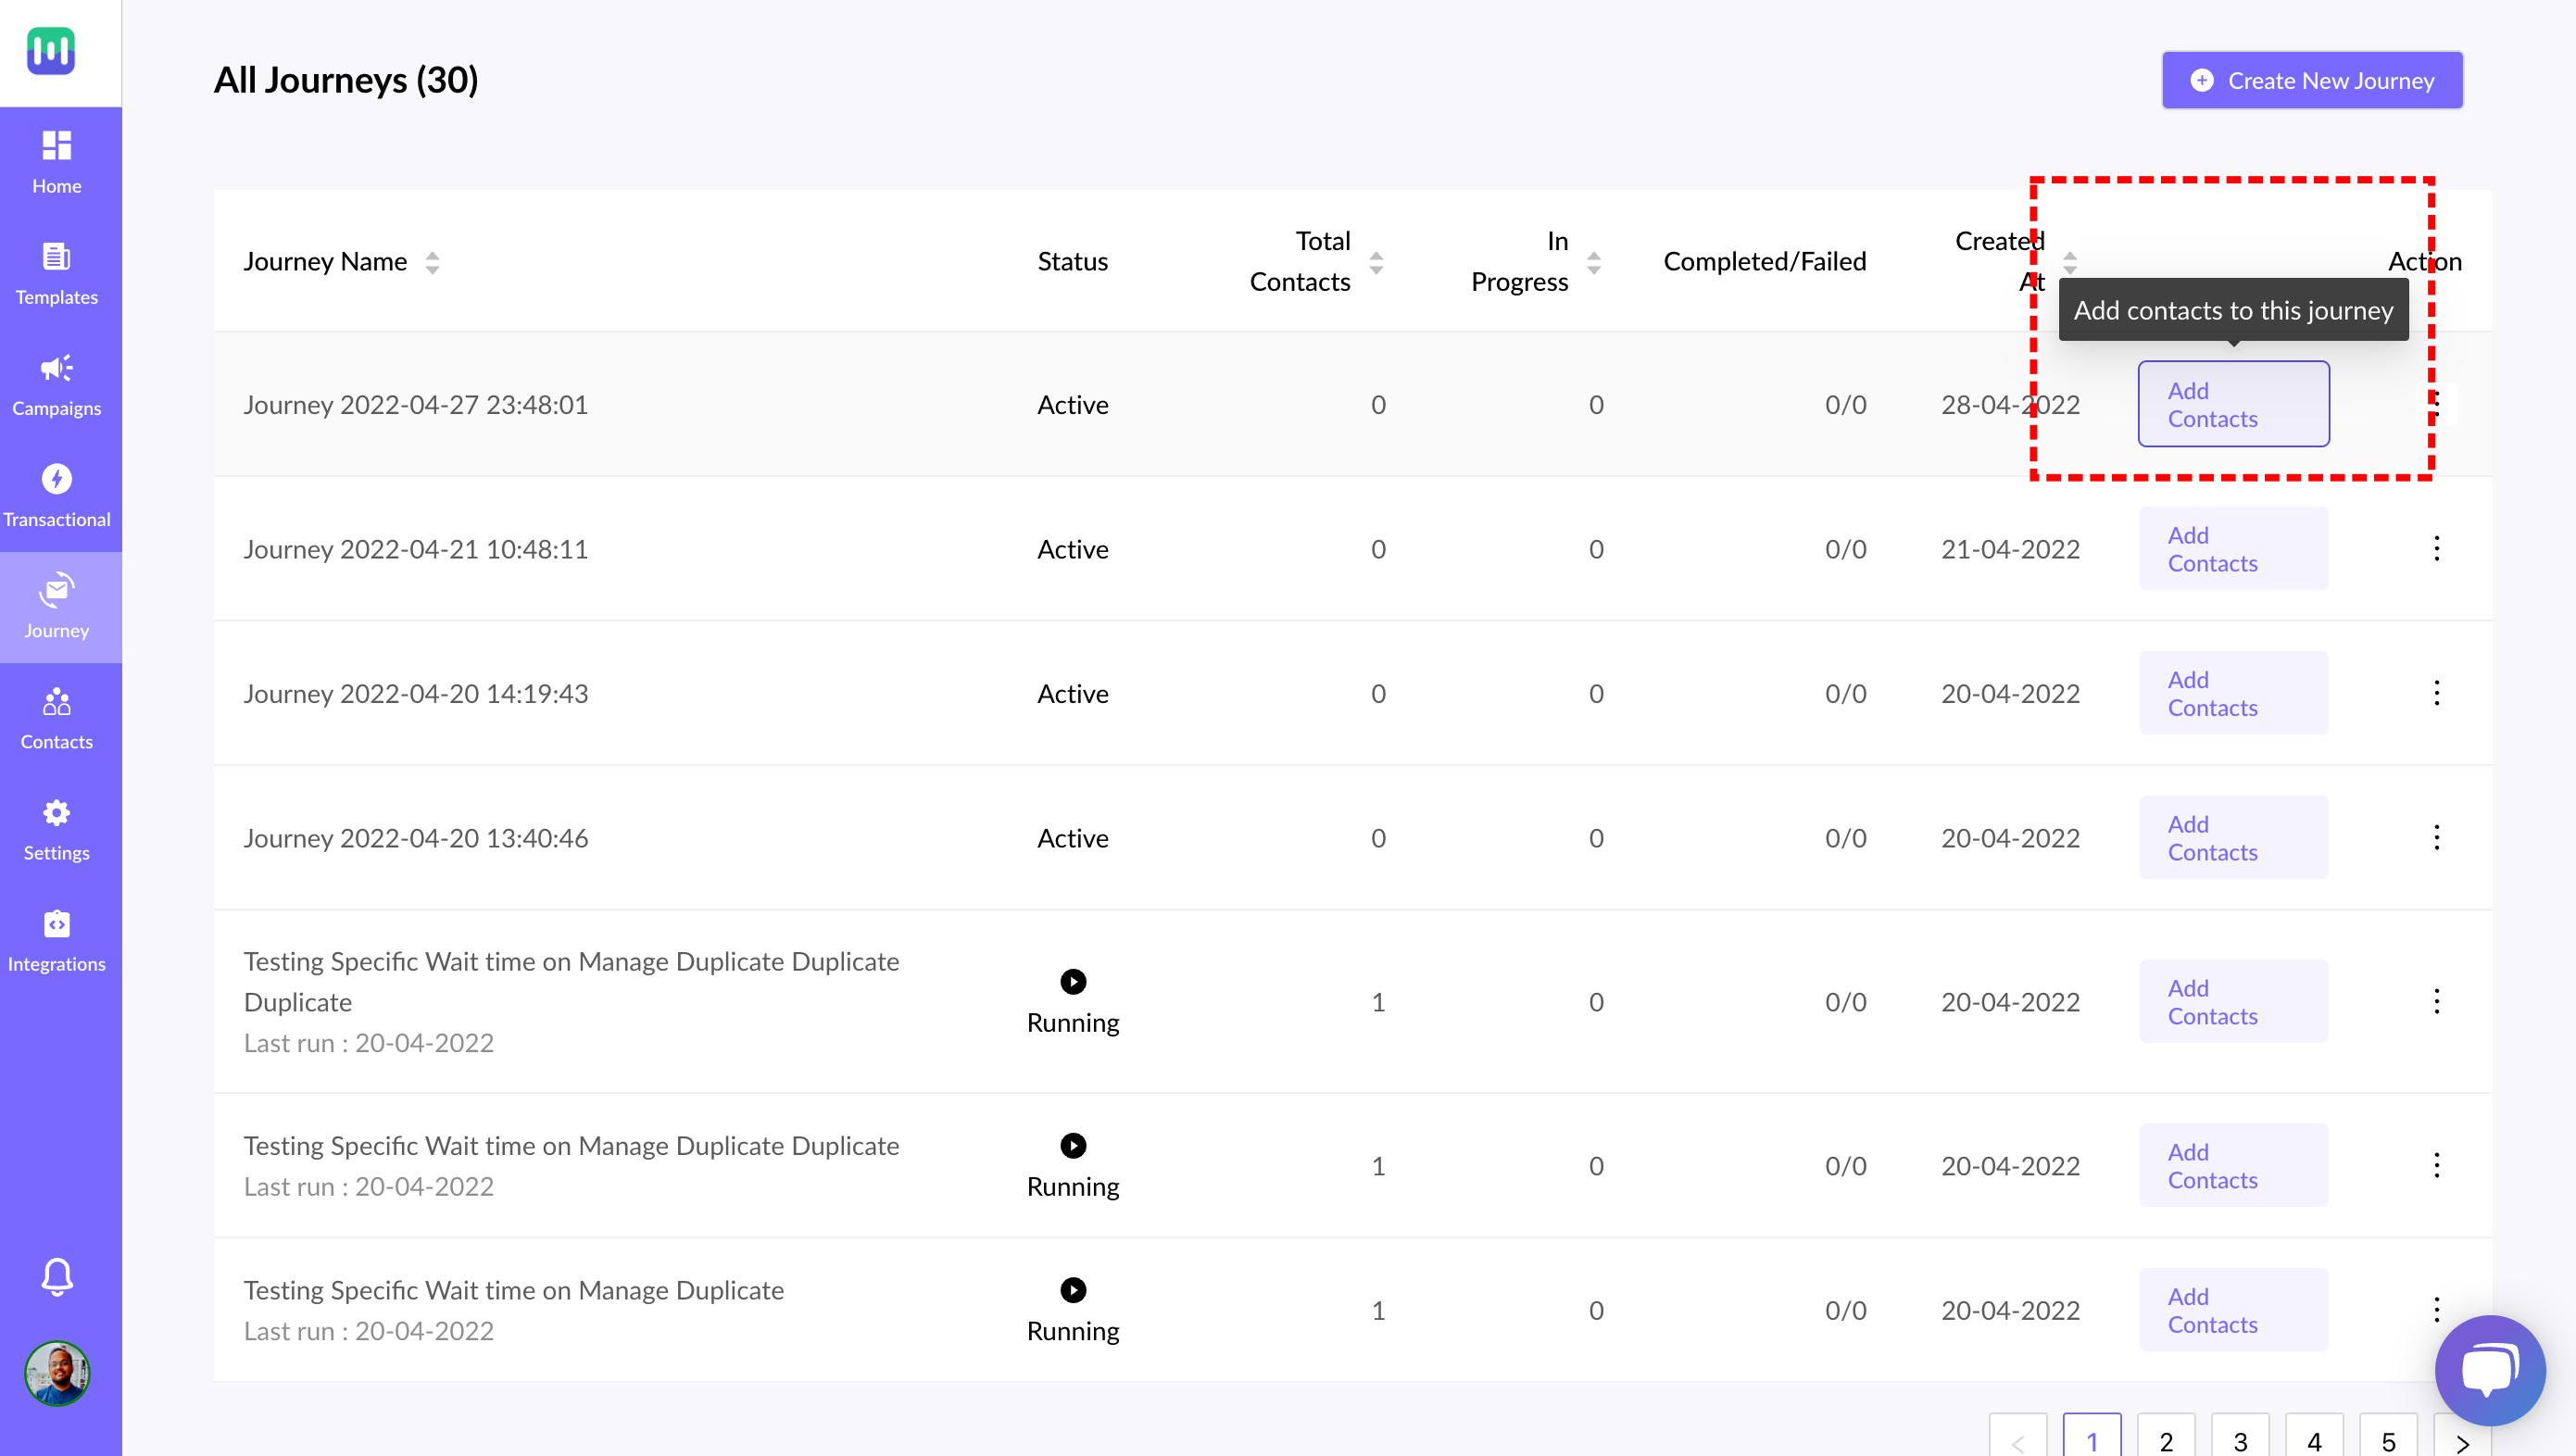
After Publishing the Journey. Click on 'Enroll Contacts' to send the journey to any existing contacts list, or you can upload a CSV. You can also trigger the journey by calling the API/Webhook or trigger it from other platforms like Zapier, Make, etc.
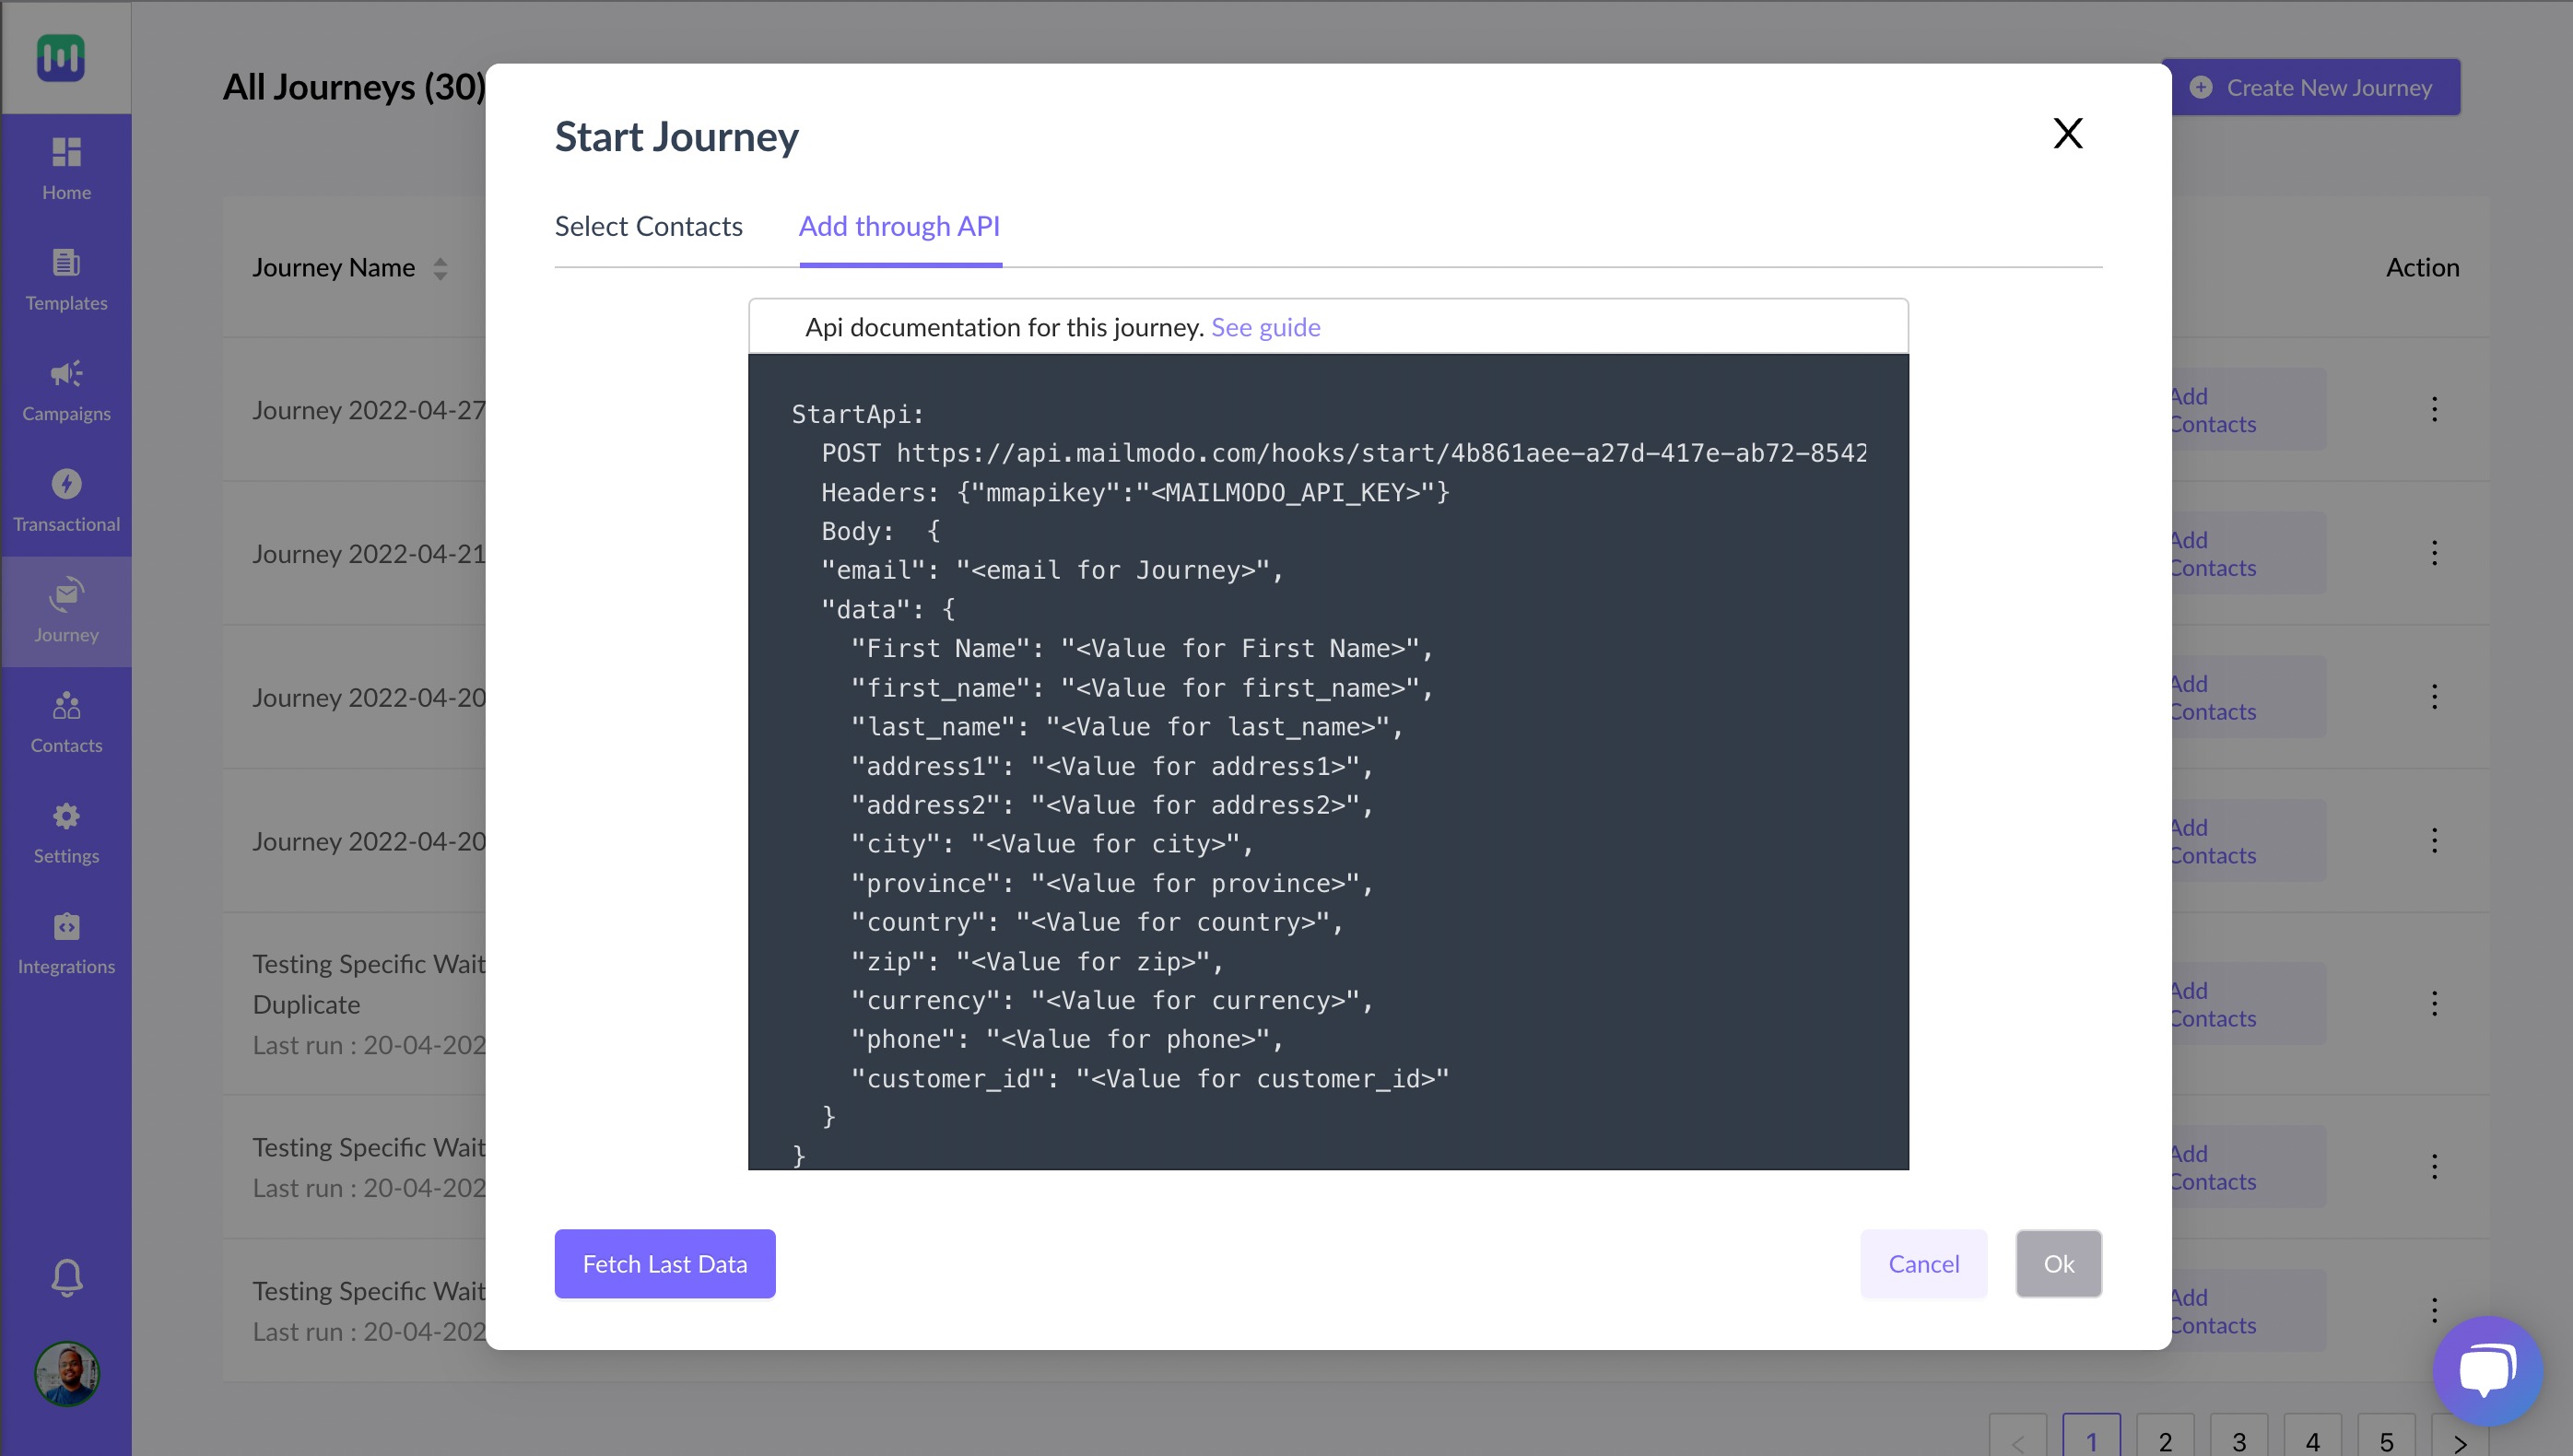
Detailed documentation for triggering a journey through API can be found here .
Access Journey Analytics and Dashboard
Click on your journey to view the journey dashboard. This shows the overall journey stats (total users in the journey, no. of mails sent, delivered etc.) as well as the stats of individual campaigns in the journey.
‘Activity log’ records the journey activity: date, trigger method used, total users in the journey, users in progress (at any stage within the journey), and no. of steps completed/failed. You can also choose to Cancel or pause the journey by clicking on the buttons on the top right corner.
Understand why you can't change the trigger once the journey is saved to draft
The trigger that you have selected plays a crucial role in configuring various aspects of your journey, such as the available action blocks in your journey, the mapping of personalization parameters, and other various journey settings.
Once you complete the trigger selection and configuration step, other blocks in the journey are generated based on your chosen trigger type, encompassing all relevant settings. Modifying the trigger type post this stage is restricted because it is likely to disrupt subsequent settings and workflow actions specific to the chosen trigger.
If you wish to change triggers, you can duplicate the existing draft or running journey and choose the necessary