Signing up on AWS and setting up your domain
Last updated March 10, 2024
This article explains everything you need to know to set up your account on AWS and configuring your sender domain.
Setting up AWS SES
Before you can use Amazon SES or other AWS services, you need to create an AWS account. For more information, see Signing up for AWS .
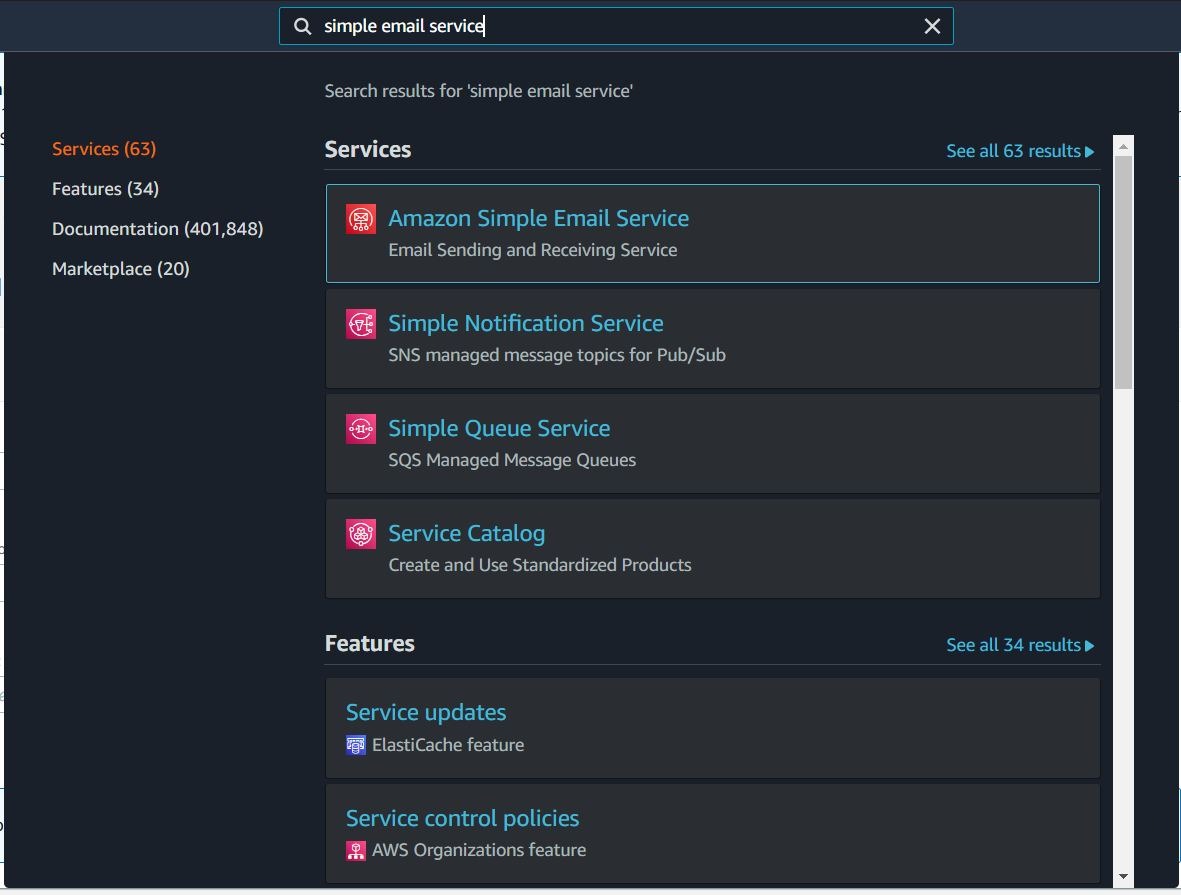
Step 1: After you create your AWS account, you can start setting up Amazon SES. Search for Simple Email Service in the AWS console.
Step 2: When you first start using Amazon SES, your account is in the Amazon SES sandbox. In the sandbox, you have full access to the Amazon SES API and SMTP interface. However, the following restrictions are in effect:
- You can only send email to the Amazon SES mailbox simulator , and to verified email identities .
- You can send a maximum of 200 message per 24-hour period
- You can send a maximum of one message per second.
For information about moving out of the sandbox, see Moving out of the Amazon SES sandbox .
Setting up Domain on AWS
To start sending emails with Amazon SES, you first have to verify your domain from which the mails will be sent, to confirm that you own it and to prevent others from using it.
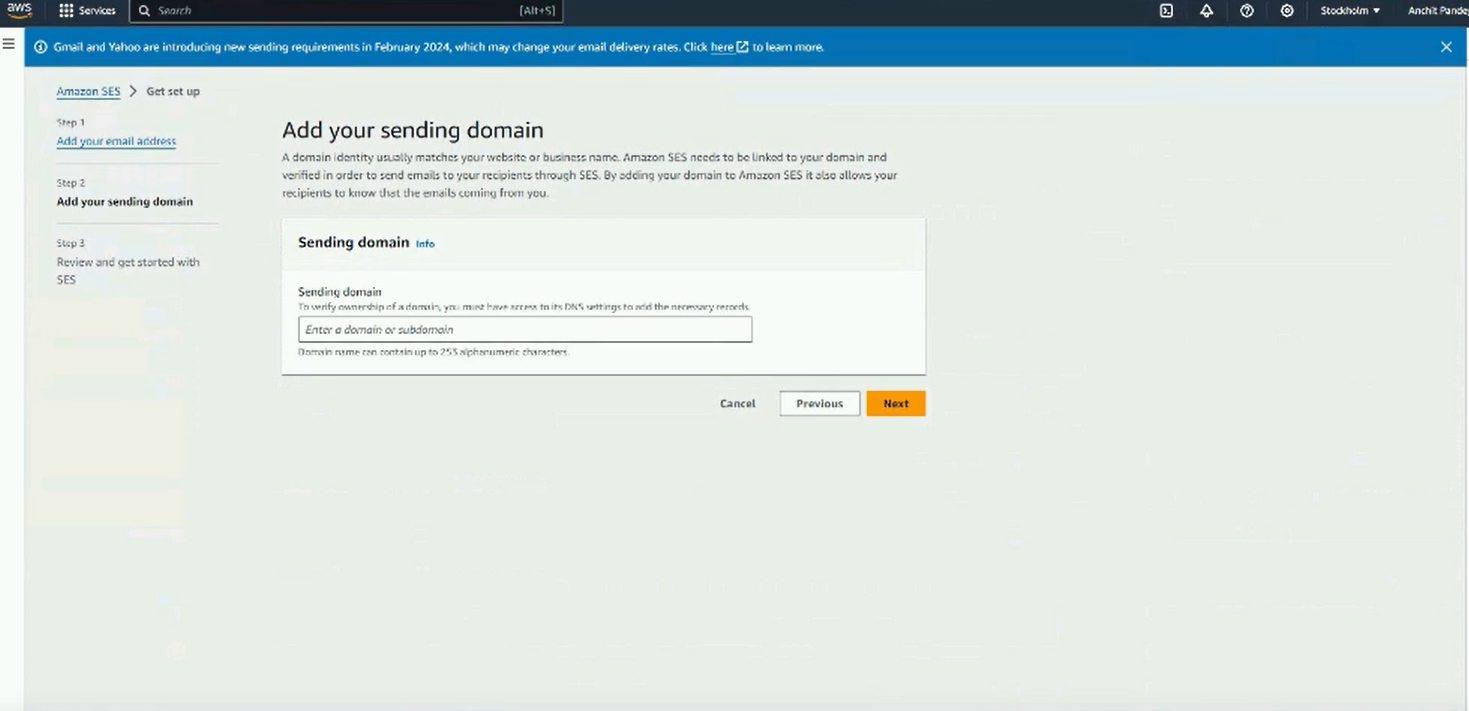
Let's demonstrate the process by setting up a domain
Step 1: Click on Verified identities in the left panel, and click on Create Identity.
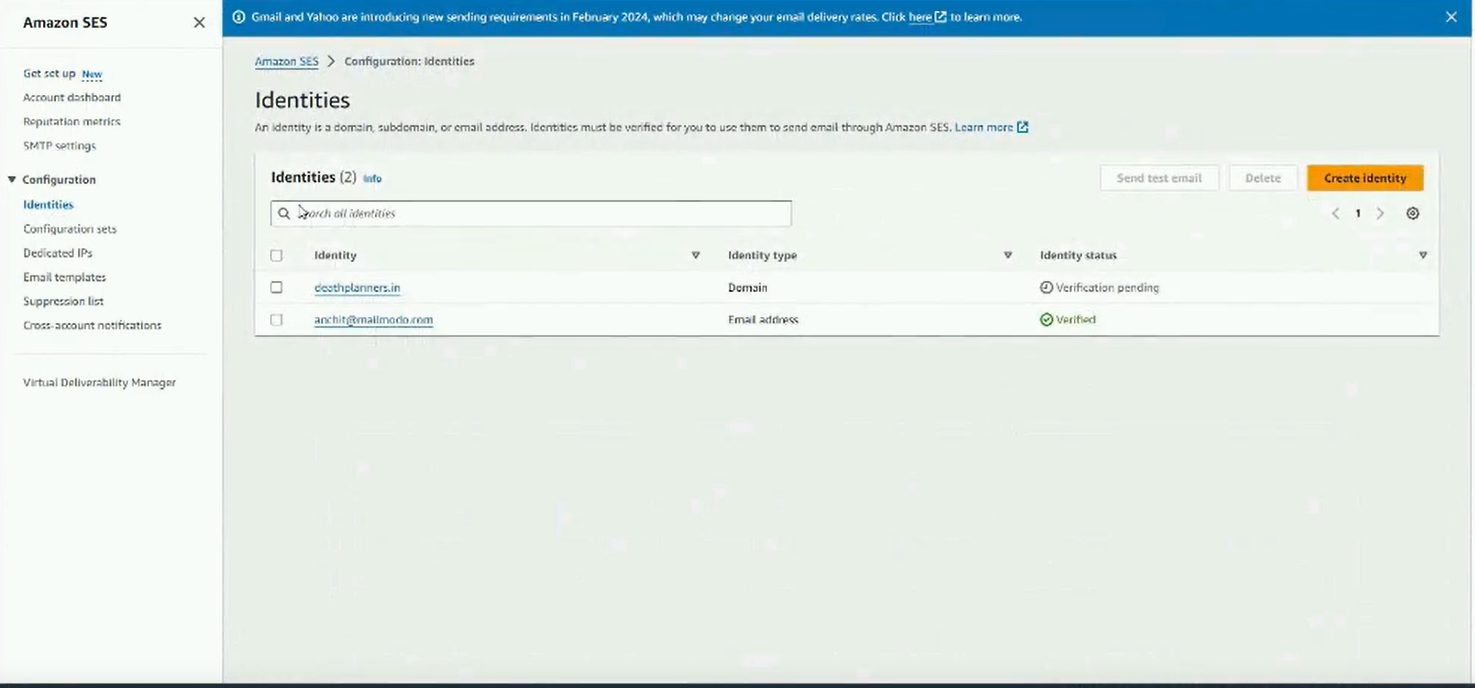
Step 2: Select the identity type as domain and add your domain name.
Once done click on create identity.
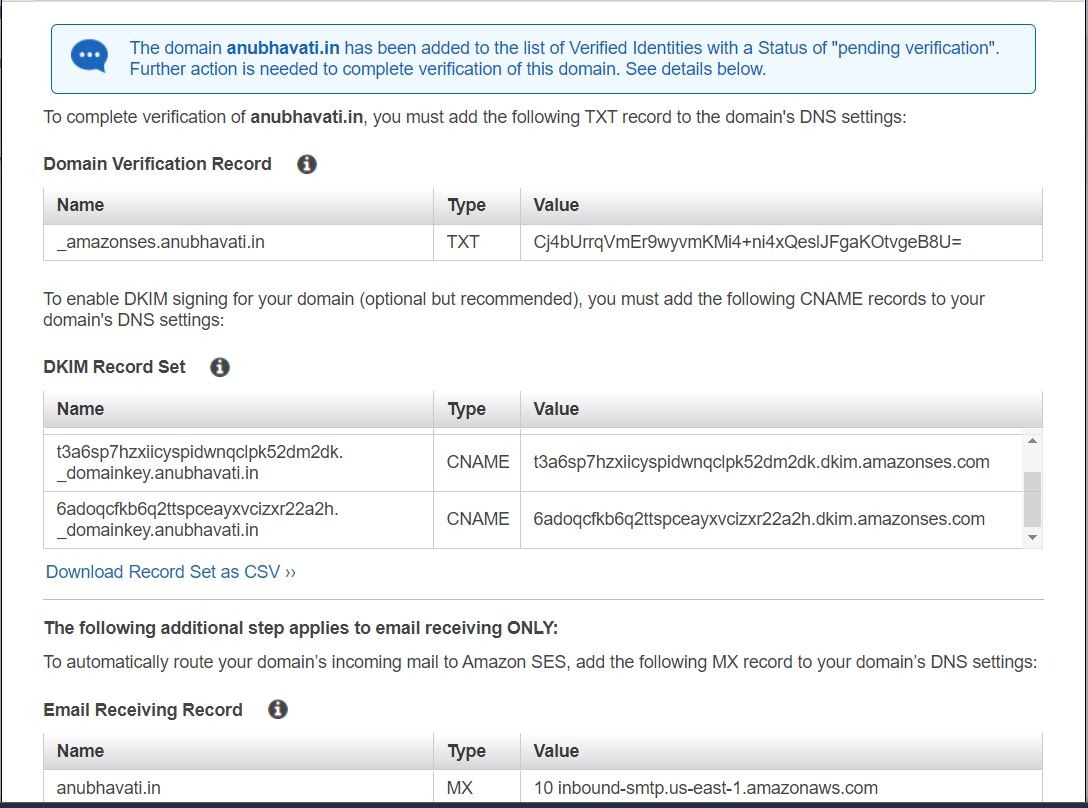
Step 3: Upon identity creation, the following DNS records will be generated. Add these to your DNS records.
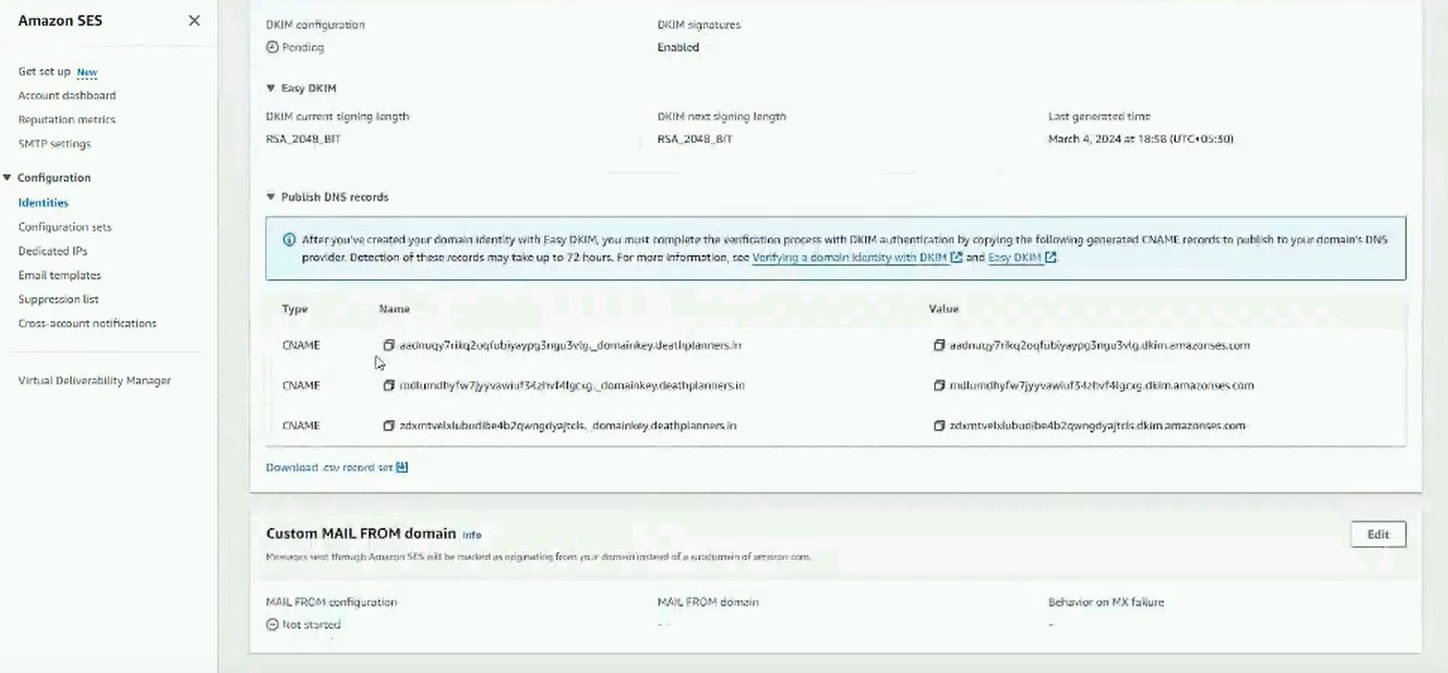
Please note that:
- While adding the hostname for DKIM records in your DNS, you will have to remove your domain's suffix from the record. For example, in the above case, the hostname to be added will be _amazonses (and not _amazonses.anubhavati.in) . Same goes for the CNAME type DKIM records. For example, in the above case, the hostname to be added will be t3a6sp7hzxiicyspidwnqclpk52dm2dk._domainkey
- The TTL value should be maintained at default (1 hr)
In case you need help in generating DKIM while setting up new domain in AWS, check out the guide Easy DKIM in AWS .
As next steps, we need to set-up DMARC and SPF records for your domain
Setting up DMARC
Add the following DMARC records for your domain:
| Hostname | Type | Value |
| _dmarc | TXT | v=DMARC1; p=none; rua=mailto:admin@yourdomain.com; pct=10; sp=quarantine |
Setting up SPF
If your domain does not have an existing SPF record, you can add the following TXT record to your DNS records
v=spf1 include:amazonses.com ~all
If you already have an SPF record or want to allow multiple senders in your policy, you can do so with include statement. A sample SPF record is shown below.
| Hostname | Type | Value |
| @ | TXT | v=spf1 include:example.com include:amazonses.com ~all |
Step 3: Now, copy the 'Domain Verification Record', 'DKIM Record Set', and the and the DMARC and SPF records to your domain's DNS records.
To learn more about SPF, DKIM, DMARC refer to this article .
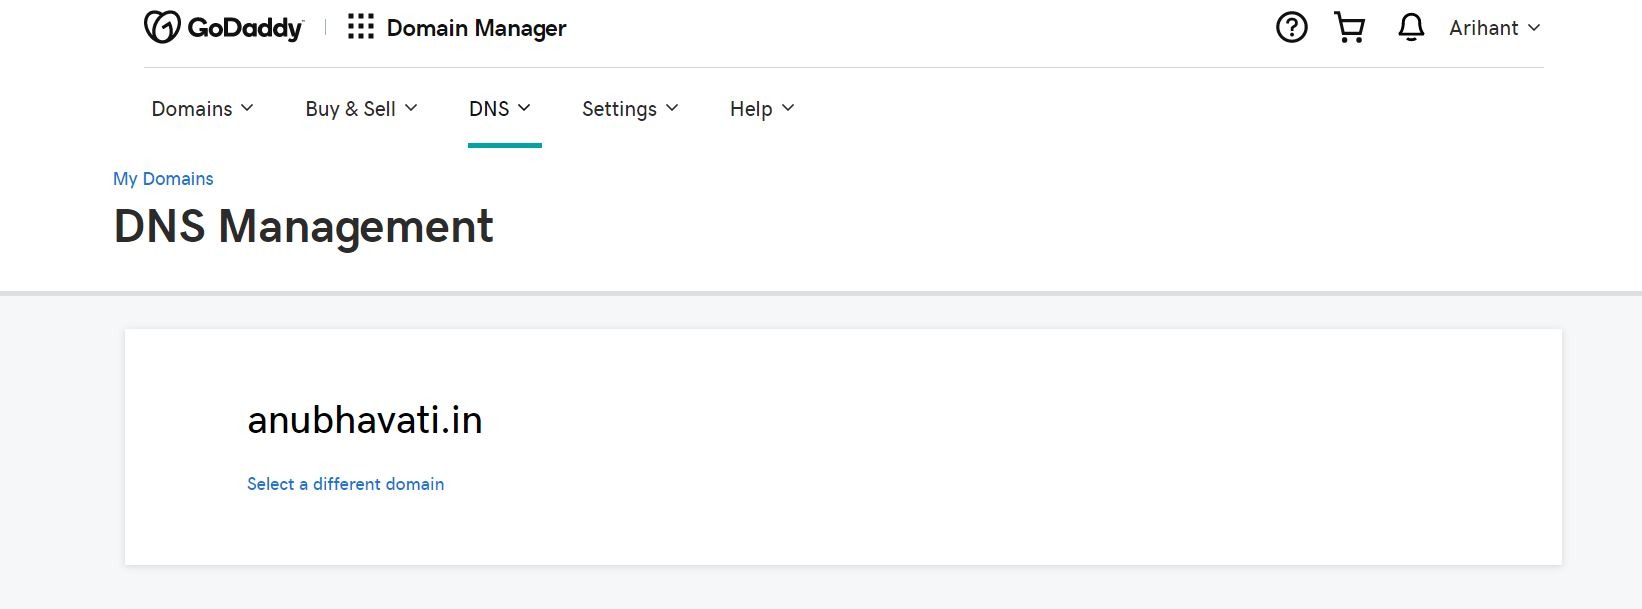
Let's demonstrate the aforementioned procedure by adding DNS records & configuring AWS SMTP for a domain that's hosted on godaddy.com
Step 1: Log-in to your GoDaddy account. Go to Domain Manager > DNS > Manage Zone
Step 2: Type in your domain, for which you want to add the DNS records
Step 3: Update the DNS records with the records generated in AWS
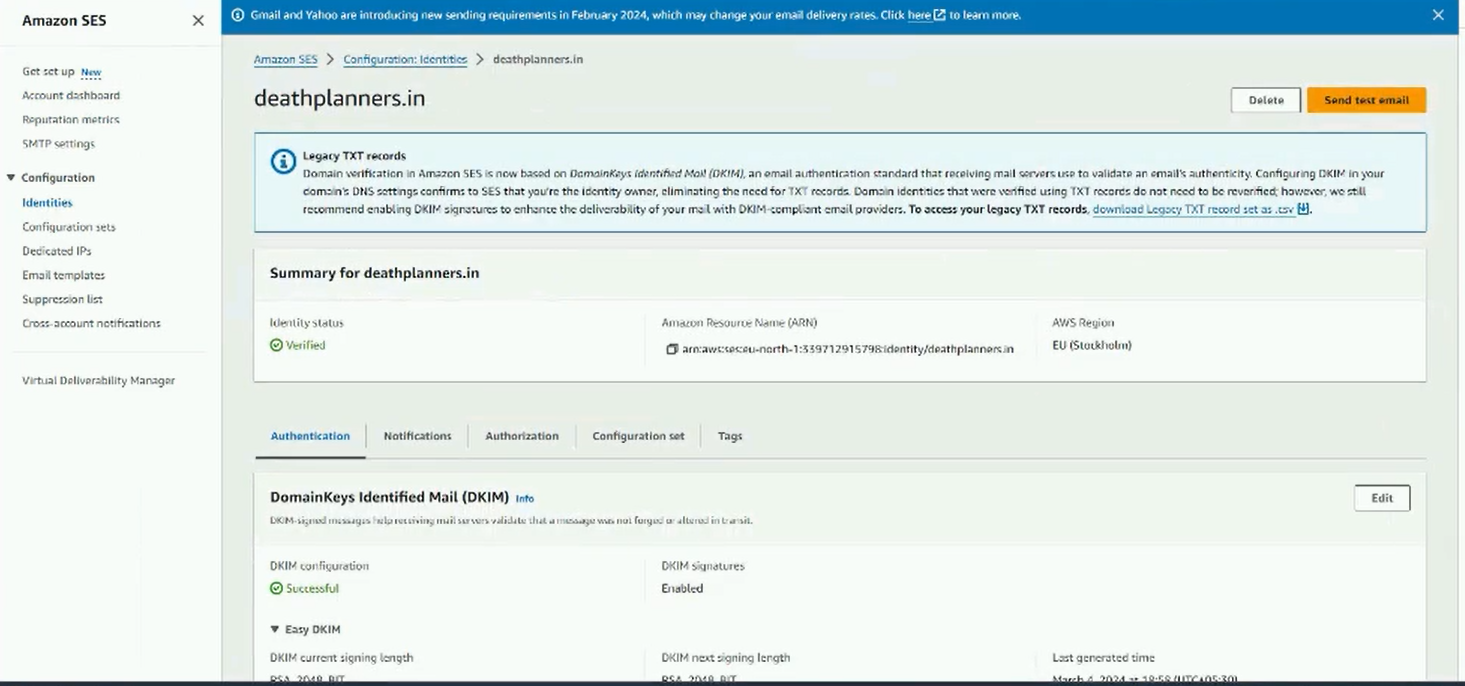
Once DKIM records have been successfully added, the AWS console should display the 'Identity status' as ‘Verified’ and ‘DKIM configuration’ as ‘Successful’.